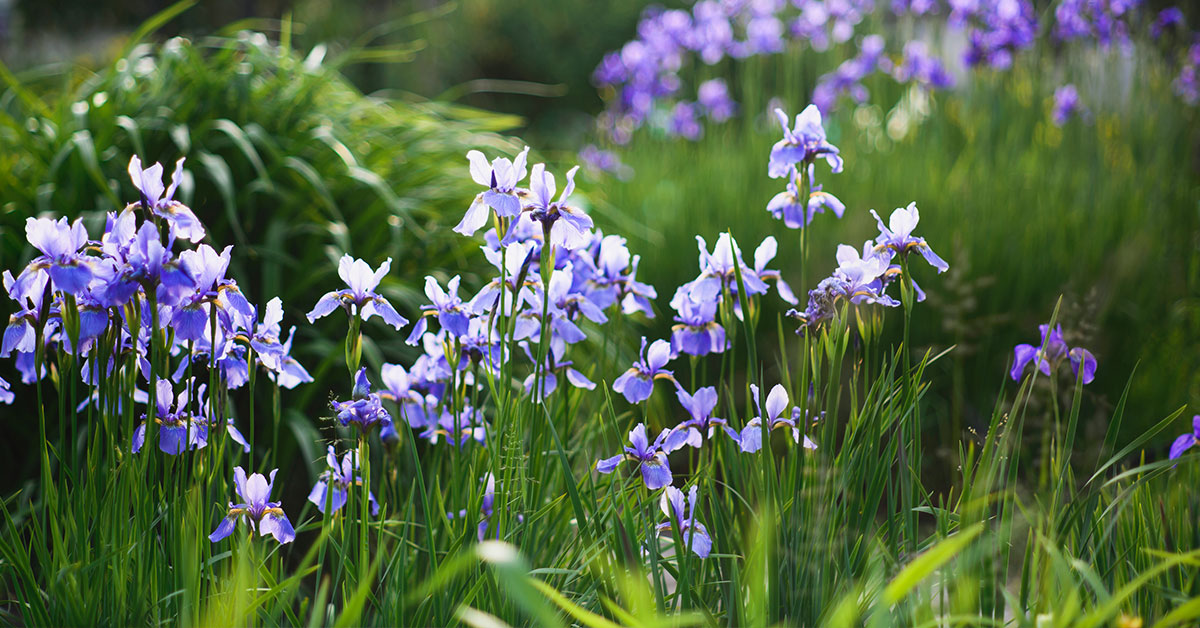

One of my favorite sights in early spring is spotting the vibrant blooms of irises and daffodils dotting the garden together! There’s just something so uplifting about those sword-like leaves of irises pairing with the cheerful, trumpet-shaped blossoms of daffodils. As gardeners, we know how frustrating it can be to see our carefully planted bulbs and rhizomes languish or fail to thrive—especially when pests swoop in or your bed is too shady for their liking. In this article, I’ll share ten of my go-to tips for growing these two spring favorites in harmony, hitting on everything from soil prep and spacing to managing pests and post-bloom care.
I get it—juggling the needs of bulbs (like daffodils) alongside rhizome-based plants (like bearded irises) can feel daunting. You might be thinking, “Will they compete for nutrients?” or “How do I prevent one from becoming invasive?” Whether you’re a first-time bulb-planting enthusiast or you’ve had too many trips to the garden center only to have your flowers underperform, I’m here to help. These tips come from years of trial, error, and sheer delight in coaxing those blooms out year after year. So grab a trowel, and let’s dive into the magic of growing irises and daffodils together!
Pest and Disease Prevention
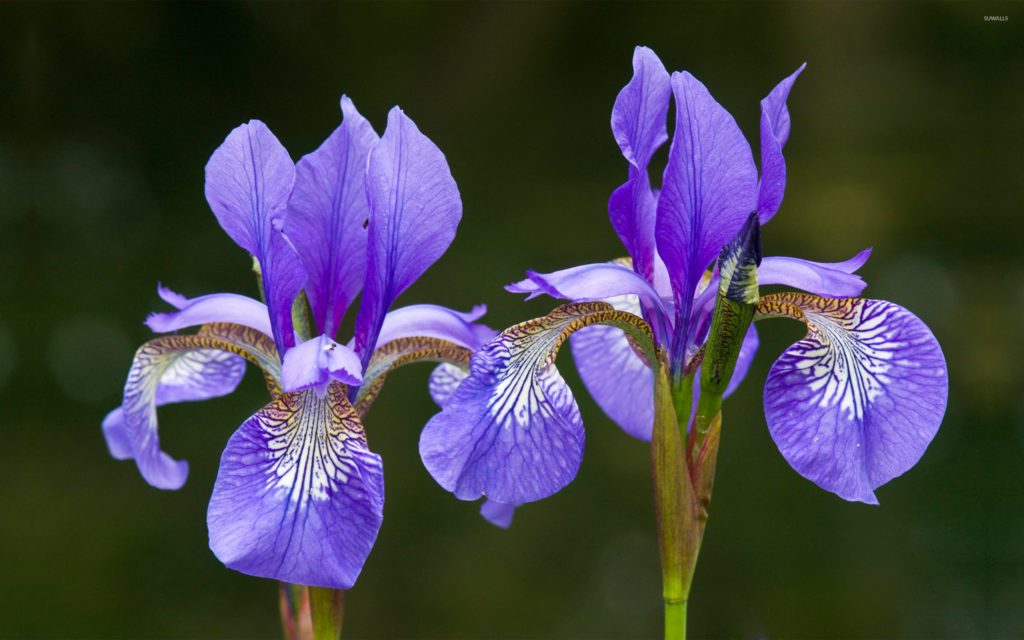
It’s such a bummer when pests take over your garden bed, munching on foliage or boring into bulbs—and nothing’s more disheartening than seeing iris leaves riddled with iris borers or daffodils wilting from bulb rot. Irises (Iris germanica and other species) are native to temperate regions of the Northern Hemisphere and can attract a variety of beneficial insects—like native bees that nest among the foliage—so it’s important to strike a balance. Inspecting new rhizomes and bulbs for signs of damage before planting is key. Any bulbs with mushy spots could be harboring Fusarium or Pythium, common culprits behind bulb rot. Removing affected material promptly prevents spread.
Likewise, keeping the garden bed clean of foliage debris in fall and early spring helps reduce overwintering pupae of iris borers and slugs, which can also devastate young leaves. Daffodils (Narcissus spp.), originally hailing from Europe, North Africa, and West Asia, tend to be deer- and rodent-resistant, but they can fall victim to bulb-eating voles. Planting daffodil bulbs in well-drained soil and interspersing them with companion plants that deter rodents (like alliums or aromatic herbs) can help. When it comes to disease, ensure at least 12–18 inches between iris rhizomes and daffodil bulbs to improve air circulation—this helps prevent fungal spores from taking hold in damp conditions. Trust me, taking these preventative steps early can save you a lot of frustration later on!
Coordinating Bloom Times
Pairing irises and daffodils requires a bit of calendar awareness—after all, you want both to shine in their prime! Many bearded irises (Iris × germanica hybrids) bloom from late spring into early summer, while most daffodils (Narcissus spp.) burst forth in early to mid-spring. If you plant early-maturing iris varieties (like Iris reticulata) alongside mid-season daffodils, you’ll extend your bed’s visual appeal. One of my favorite tricks is choosing daffodils with slightly later bloom dates—like ‘Thalia’ or ‘Minnow,’ which can bloom toward mid-spring—so they overlap more nicely with early iris varieties.
However, it’s crucial to avoid overcrowding the garden bed. While it might be tempting to cram as many bulbs and rhizomes as possible, giving each plant room to display its best foliage and flowers pays off. Irises develop heavy flower stalks that need stable support, especially if spring winds roll through, whereas daffodils stand upright marvelously on their own. By staggering bloom times—planting early, mid, and even late-season daffodils with irises that follow—you’ll create that jaw-dropping progression of color. I know how frustrating it can be to have one fade before the other emerges, so planning for this overlap is vital to a seamless show!
Dividing and Transplanting for Longevity
Nobody likes that awkward moment when you realize your iris bed looks overcrowded—with rhizomes bumping into each other, leading to diminished blooms and increased disease risk! Irises, native to the temperate zones of Europe, Asia, and North America, spread vigorously once established. To keep them at peak performance, plan to divide clumps every three to four years, ideally in late summer when the plants are dormant. Carefully dig up the clumps, trim away old, woody portions of the rhizomes, and replant the most vigorous pieces with plump fans of leaves intact. While you’re at it, check nearby daffodil bulbs, which you planted the previous fall. Daffodils multiply underground, too, and crowded bulbs often yield fewer blooms. Separating and replanting them in early summer (after their foliage has yellowed and fallen) ensures they return with vigor the next spring.
Transplanting can feel nerve-wracking—you worry about accidentally damaging roots or rhizomes, potentially leading to a season without flowers. Trust me, it’s worth the effort! When moving daffodils, handle the bulbs gently to avoid bruising, and plant them pointy end up at a depth of about three times their height. Irises, on the other hand, should be planted with the tops of the rhizomes just visible above the soil surface to prevent rot. While transplanting, consider adding a thin layer of gravel or coarse sand beneath some iris rhizomes to enhance drainage—especially if your garden tends to stay soggy. I know how frustrating it is to see your precious sword-like leaves stubbornly refusing to bloom; keeping them divided and healthy is probably the best preventive measure!
Selecting Complementary Varieties

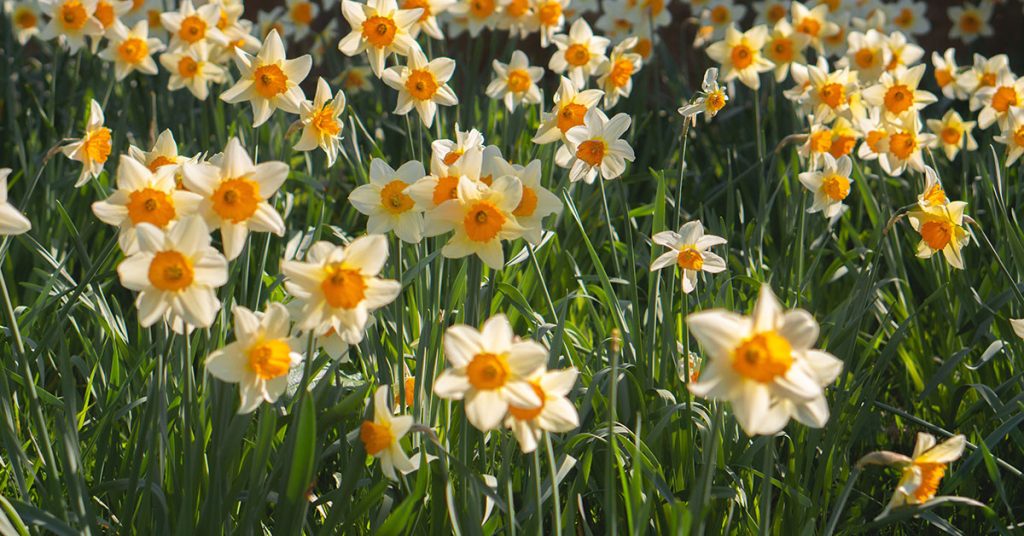
Choosing the right iris and daffodil varieties can make or break your shared bed’s overall look and performance! Some iris species—like the tall bearded iris—tower above early spring daffodils, so pairing them with shorter, vigorous daffodil cultivars (e.g., Narcissus ‘Tête-à-Tête’ or ‘February Gold’) ensures nothing gets overshadowed. Meanwhile, dwarf bearded irises (like Iris pumila hybrids) blend beautifully with mid-height daffodils. Irises hail from regions as diverse as the Mediterranean and Central Asia, so many are accustomed to well-drained soils and full sun. Daffodils come from similar climates—so look for varieties that share soil and moisture preferences to avoid having one outperform the other dramatically.
When considering color harmony, think beyond just yellow and purple—some irises bloom in whites, pinks, and even soft blues, while daffodils range from pure white to deep gold and peachy pink tints. For instance, pairing a creamy-white iris (Iris ‘Immortality’) with a blush-tinted daffodil (‘Pink Charm’) can create a serene, pastel palette. Conversely, a bold magenta iris (Iris ‘Beverly Sills’) alongside striking golden daffodils (‘Jet Fire’) sets up a vibrant contrast. Remember, where irises are native can matter—Iris hollandica hybrids thrive in regions with cold winters, much like daffodils from Northwest Europe. Mixing and matching varieties that share native climates typically reduces headaches later on, especially regarding disease susceptibility and hardiness. Experimenting with combinations and documenting what works in your garden zone is part of the fun—though I know all too well that trial and error often means the first season is a learning curve!
Soil Preparation for Bulbs and Rhizomes

Healthy blooms begin beneath the surface, and both irises and daffodils thrive in soil that’s well-draining, fertile, and slightly alkaline to neutral (pH around 6.5–7.0). Before planting, I like to clear the bed of any weeds or debris, loosening the soil to a depth of 12–15 inches. Incorporating organic matter—like well-rotted compost or aged manure—improves structure and nutrient content. Irises (particularly rhizomatous bearded types) prefer a soil that won’t retain excess moisture around the rhizome, which can lead to rot. Daffodils also detest waterlogged conditions; the bulbs can rot if left sitting in soggy soil. Adding a dash of agricultural lime can help raise the pH slightly if your soil tests a bit too acidic, especially essential in areas with heavy clay.
If you’re dealing with a compacted or clay-heavy bed, consider creating a raised mound or series of slight ridges—this encourages water to drain away from the delicate rhizomes and bulbs. When I built my own iris-daffodil border, I mixed in coarse sand and fine gravel to boost drainage, especially in areas where rainwater tends to pool. While neither irises nor daffodils are considered invasive in most garden settings, planting them too deeply can weaken them over time. Irises want their rhizomes partially exposed, allowing the sun to harden the top layer before winter sets in. Meanwhile, daffodils should be buried slightly deeper to anchor their sturdy leaf fans—about 6 inches deep. Taking time to get the soil right at planting sets the stage for healthy foliage, robust blooms, and minimal fuss in the seasons ahead!
Post-Bloom Care and Clean-Up

It can feel disheartening to walk past a once-vibrant bed only to find drooping daffodil leaves and fading iris stalks by mid-summer. Once daffodils finish flowering, resist the urge to snip off the foliage prematurely—even if it looks unsightly. The green leaves are diligently photosynthesizing, sending energy back into the bulbs for next year’s display. Only when the foliage has entirely yellowed and begun to wilt should you trim it away, gently tugging if necessary, to make the bed tidy. Likewise, after irises have bloomed, cut back spent flower stalks to prevent seed stalks from sapping the plant’s energy. However, keep the fan of iris leaves intact; they remain attractive to pollinators (like solitary bees that nest in ground crevices) until frost.
Cleaning up debris is also essential to avoid creating a cozy overwintering spot for pests, such as iris borers that lay eggs on dead leaves. Remove any wilted or diseased foliage and burn or discard it far from your garden bed. If you spot brown, papery bulbs emerging (in the case of daffodils), gently remove and discard them to allow for better circulation. Applying a light layer of mulch—such as composted bark or leaf mold—after cleanup can help conserve moisture and suppress weeds. But be careful not to smother the crowns of irises; they need that top layer of sun exposure to keep rhizomes healthy. Though it can feel tedious, spending a little time on post-bloom maintenance pays dividends in more vigorous spring growth and fewer pest problems!
Timing Planting Depths and Spacing
I know how thrilling it is to get bulbs and rhizomes in the ground as soon as the soil is workable, but rushing can spell trouble later. Daffodil bulbs should be planted in the fall—ideally 2–4 weeks before the first hard frost—at a depth of about three times the bulb’s height (usually around 6 inches). This ensures they develop strong roots before winter sets in. Irises, by contrast, often prefer to be set in mid to late summer—around 6–8 weeks before the first expected frost—so they can establish rhizomes in the warm soil. Positioning iris rhizomes so the top is just flush with the soil surface helps prevent rot and allows new growth to break through easily.
Spacing is just as crucial: crowding bulbs too closely can spawn competition for nutrients and water, leading to sparse blooms. I recommend planting daffodils 4–6 inches apart, depending on bulb size, and leaving 8–12 inches between iris rhizomes. This arrangement ensures each plant has enough airflow to deter fungal threats like basal rot in daffodils or bacterial soft rot in irises. If you have a raised bed, aim for a checkerboard pattern—dumbbell spacing—so that each species has its own “zone” yet appears intermingled when bloom time arrives. Trust me, I’ve definitely made the mistake of planting bulbs shoulder-to-shoulder, only to see stunted blooms and stunted growth. It’s worth taking those extra minutes to measure and layout before planting!
Managing Watering Needs

Balancing watering for irises and daffodils can feel like walking a tightrope: too much moisture invites rot, while too little can result in poor blooms. Both plants appreciate consistent moisture during active growth—daffodils need water while they’re forming roots in autumn, and irises benefit from light watering in early autumn too. However, once the leaves start to yellow—and especially after blooming—it’s time to scale back. In mid-summer, when irises are dormant and daffodils are resting, overwatering can lead to rhizome rot or encourage bulb-eating pests like voles. I once had my entire row of daffodils succumb to bulb rot simply because my garden bed lacked proper drainage and I overzealously watered during a rainy stretch.
The key is to water deeply but infrequently, ensuring the top inch or two of soil dries out between sessions. In spring, as daffodils push up foliage and iris buds begin forming, aim to provide about an inch of water per week—either via rainfall or irrigation. If your area receives heavy spring rains, it’s often more beneficial to wait for breaks and then water sparingly. Consider using a soaker hose or drip irrigation to deliver moisture directly to the root zone, reducing wet leaves that can harbor fungal spores. Mulching (lightly, as mentioned earlier) also helps hold moisture during dry spells without drowning the bulbs or rhizomes. I understand how infuriating it is to see yellow patches or warped leaves—you don’t want any unwelcome surprises when spring arrives!
Fertilization Strategies for Both Flowers

Feeding your irises and daffodils correctly can be a game changer for larger, longer-lasting blooms! Irises usually do best with a low-nitrogen fertilizer—something like a 5-10-10 blend—applied as new growth emerges in spring. High nitrogen can promote excessive foliage growth at the expense of flowers. Many irises are native to regions with lean, sandy soils, so they thrive when nutrients are balanced but not overly rich. I like to sprinkle a slow-release granular fertilizer around the rhizome base in early spring, lightly mixing it into the topsoil without burying the rhizome. After they finish blooming, a second, light feeding helps build up the energy reserves in the rhizomes for the next season.
Daffodils, with origins in Europe and parts of Asia, appreciate a balanced fertilizer—something like a 10-10-10 or 5-10-5—applied in autumn (just after planting) and again when shoots first appear in spring. This regimen supports root development and robust flowering. Avoid fertilizing daffodils after bloom or when the leaves are yellowing, as they’re channeling energy into the bulbs; extra nutrients at that point can lead to bulb rot or too much foliage and floppy stalks. A bit of bone meal worked into the planting hole can also supply phosphorus for strong root systems, but always be cautious—excess phosphorus can disrupt soil pH. I know how tempting it is to douse everything in fertilizer and hope for the best, but tailored feeding schedules will prevent weak growth or fewer blooms down the line!
Choosing the Right Sunlight Conditions

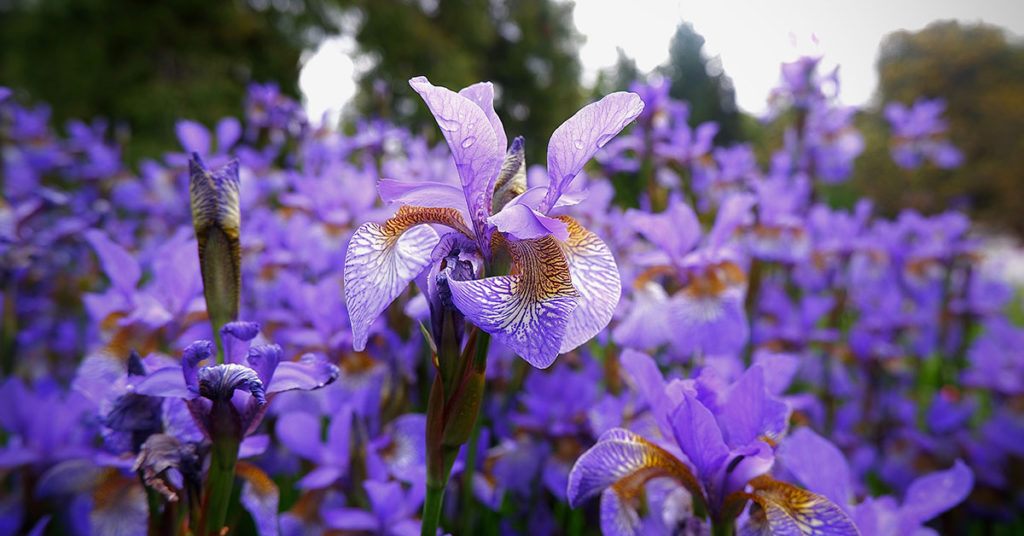
Sunlight can make or break your bed of irises and daffodils, and nothing’s more frustrating than planting in what seems like a good spot only to end up with lanky, spindly stalks! Both plants thrive in full sun—around six to eight hours of direct sunlight daily. In my own garden, I once tucked a row of daffodils under a shady maple, only to see them lean hopelessly toward dappled light and produce just a handful of blooms. Irises also demand plenty of sun; in too much shade, they might produce lush foliage but no flowers. When selecting your planting area, observe it throughout the day. You want sun exposure from morning through afternoon, not just fleeting patches here and there!
If your only available area is partially shaded—perhaps between taller shrubs—opt for daffodil varieties known to tolerate light shade (like Narcissus ‘Thalia’ or ‘Thalia’), and pair them with iris species that are more shade-adapted, such as Siberian irises (Iris sibirica). Siberian irises are native to cool, moist regions of Europe and Asia and can bloom reasonably well with as little as four to five hours of light. Still, remember that partial shade might encourage fungal issues if airflow is restricted. Prune nearby shrubs and trees to improve sun penetration and airflow, and avoid crowded plantings. If you can’t find a fully sunny location, maximizing the quality of whatever sun you have—especially morning sun—goes a long way toward healthy, vibrant blooms!