
Welcome to the world of okra cultivation in Zone 9! If you’re a gardening enthusiast residing in this region, you’re in luck because growing okra can be a rewarding and successful endeavor. Zone 9, characterized by its warm and mild climate, provides an ideal environment for this heat-loving vegetable to thrive. However, timing is crucial when it comes to planting okra, as it requires specific conditions to ensure optimal growth and productivity. In this article, we will delve into the details of when to plant okra in Zone 9, taking into account the unique climate and seasonal variations of this region.
Whether you’re a seasoned gardener or a beginner, this guide will equip you with the knowledge you need to achieve a bountiful okra harvest in Zone 9.
Best okra varieties to grow in zone 9
In zone 9, where the climate is warm and mild, there are several okra varieties that thrive. Here are a few recommended varieties for zone 9:
- Clemson Spineless: This is a popular variety known for its high yield and disease resistance. It produces tender, spineless pods that are great for cooking.
- Emerald: This variety is known for its dark green pods and excellent flavor. It is also resistant to diseases and pests, making it a reliable choice for zone 9 gardens.
- Annie Oakley II: This variety is prized for its early maturity and high productivity. It produces tender pods that are perfect for frying or adding to stews.
- Jambalaya: This variety is well-suited for warmer climates and produces large, flavorful pods. It is also resistant to fusarium wilt, a common disease in okra plants.
- Louisiana Green Velvet: This variety is a favorite among gardeners in the southern regions. It produces dark green pods that are tender and delicious.
Remember to provide adequate sun exposure, well-draining soil, and regular watering for optimal growth and yield.
When to plant okra in zone 9
In zone 9, the best time to plant okra is in the spring, after the last frost date has passed. Okra is a warm-season crop that thrives in hot weather, so it’s important to wait until the soil has warmed up and the risk of frost has diminished.
For other hardiness zones in the United States, here are the recommended planting times for okra:
- Zone 8: Okra can be planted in late spring, around the same time as in zone 9. However, in some areas of zone 8 where the winters are milder, it may be possible to plant okra in the fall for a late-season harvest.
- Zone 7: In zone 7, it’s best to plant okra in late spring or early summer, once the soil has warmed up and the danger of frost has passed. Okra needs a long growing season to produce a good harvest, so planting early is important.
- Zone 6: Okra can be a bit challenging to grow in zone 6 due to the shorter growing season. It’s recommended to start okra seeds indoors 4-6 weeks before the last frost date and transplant the seedlings outdoors once the soil has warmed up. Alternatively, you can use season extension techniques like row covers or greenhouses to protect the plants from cold temperatures.
- Zone 5: Okra is not well-suited for zone 5 as the growing season is generally too short and the temperatures too cool. However, if you have a longer growing season or use season extension methods, you can try starting okra seeds indoors and transplanting them outdoors after the last frost date.
It’s important to note that these are general guidelines, and local climate conditions can vary within each hardiness zone. It’s always a good idea to consult with local gardening resources, such as your county extension office or experienced gardeners in your area, for more specific planting recommendations based on your location.
How to grow okra in zone 9
Growing okra requires some specific steps and considerations. Here are the key points to keep in mind:
- Climate and Temperature: Okra thrives in warm climates with temperatures between 75-90°F (24-32°C). It is best to plant okra when the soil temperature reaches around 65°F (18°C). If you live in a cooler region, consider starting okra indoors and transplanting it outside once the weather warms up.
- Soil Preparation: Okra prefers well-draining soil with a pH level between 6.0-6.8. Before planting, amend the soil with organic matter like compost or well-rotted manure to improve fertility and drainage.
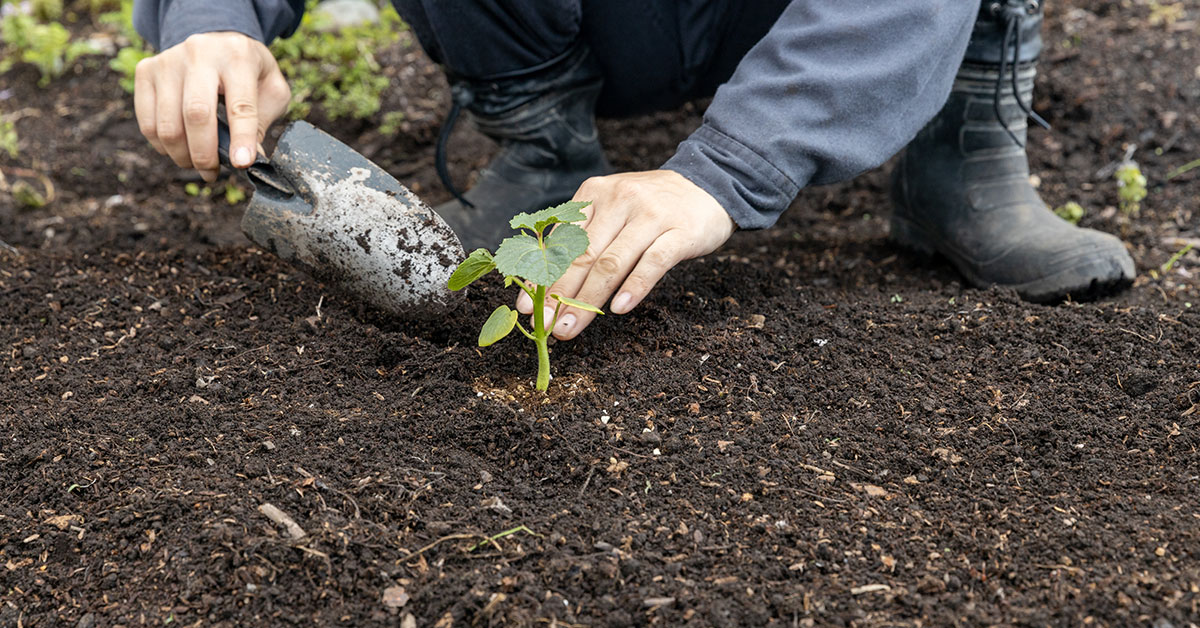
- Planting: Sow okra seeds directly into the garden bed, spacing them around 12-18 inches (30-45 cm) apart. Plant the seeds about 1 inch (2.5 cm) deep and cover them with soil. Alternatively, you can start seeds indoors 4-6 weeks before the last frost and transplant them outside once the weather permits.
- Watering: Okra requires regular watering, especially during dry spells. Aim to keep the soil evenly moist, but not waterlogged. Water deeply, allowing the top few inches of soil to dry out between waterings.
- Fertilization: Okra is a heavy feeder and benefits from regular fertilization. Apply a balanced, slow-release fertilizer or compost at planting time. Additionally, side-dress the plants with nitrogen-rich fertilizer every 4-6 weeks to promote healthy growth.
- Mulching: Apply a layer of organic mulch, such as straw or wood chips, around the base of the plants. Mulching helps retain soil moisture, suppresses weed growth, and keeps the soil temperature stable.
- Pruning and Support: Okra plants can grow quite tall, reaching heights of 4-6 feet (1.2-1.8 meters). Consider providing support, such as stakes or a trellis, to prevent the plants from falling over. Prune off any lower branches to improve air circulation and reduce the risk of disease.
- Pest and Disease Control: Common pests that may affect okra include aphids, flea beetles, and caterpillars. Monitor your plants regularly and take appropriate measures, such as handpicking pests or using organic insecticides, if necessary. Okra is generally resistant to diseases, but keep an eye out for fungal infections like powdery mildew.
- Harvesting: Okra pods are ready to harvest when they reach around 2-4 inches (5-10 cm) in length. Harvest every 2-3 days to ensure the pods are tender and not overly mature. Use a sharp knife or pruners to cut the pods from the plant, being careful not to damage the stems.
By following these steps and considerations, you can successfully grow okra in your garden. Happy gardening!
When to harvest okra
In zone 9, where the climate is warm and typically has a long growing season, you can start picking okra when the pods are about 2-3 inches long. This usually occurs around 50-60 days after planting, but it can vary depending on the variety you are growing. It’s important to harvest okra regularly, every 2-3 days, to ensure that the pods are tender and not overly mature. Overripe okra can become tough and fibrous, making it less enjoyable to eat.
Common okra problems and fixes
Common problems when growing okra include pests, diseases, and environmental issues. Here are some common problems and their fixes:
- Aphids: These small insects can infest okra plants, sucking sap from the leaves and causing them to curl and distort. To control aphids, you can spray the plants with a strong stream of water to dislodge them, or use insecticidal soap or neem oil.
- Spider mites: These tiny pests can cause yellowing leaves and fine webbing on the plants. You can control spider mites by regularly spraying the plants with water to increase humidity, or using insecticidal soap or neem oil.
- Fusarium wilt: This fungal disease causes yellowing, wilting, and stunting of the plants. To prevent fusarium wilt, choose disease-resistant varieties, rotate crops, and avoid overwatering. If plants are infected, remove and destroy them to prevent the spread of the disease.
- Powdery mildew: This fungal disease appears as a white powdery coating on leaves, causing them to yellow and wither. To control powdery mildew, ensure good air circulation around the plants, avoid overhead watering, and apply fungicides if necessary.
- Lack of pollination: Okra flowers require pollination to produce pods. If there is a lack of pollinators in your area, you can hand-pollinate the flowers by using a small brush or cotton swab to transfer pollen from the male flowers to the female flowers.
- Nutrient deficiencies: Okra plants may suffer from nutrient deficiencies, such as yellowing leaves due to nitrogen deficiency or stunted growth due to phosphorus deficiency. Conduct a soil test to determine the nutrient deficiencies and apply appropriate fertilizers or amendments to correct them.
- Heat stress: Okra is a heat-loving plant, but extreme heat can cause flower drop and reduced fruit set. Provide shade during the hottest part of the day, mulch around the plants to conserve moisture, and water deeply to help the plants cope with heat stress.
Remember, prevention is always better than cure. Providing optimal growing conditions, such as well-drained soil, full sun exposure, and regular watering, can help prevent many problems. Additionally, selecting disease-resistant varieties can greatly reduce the risk of encountering certain issues.