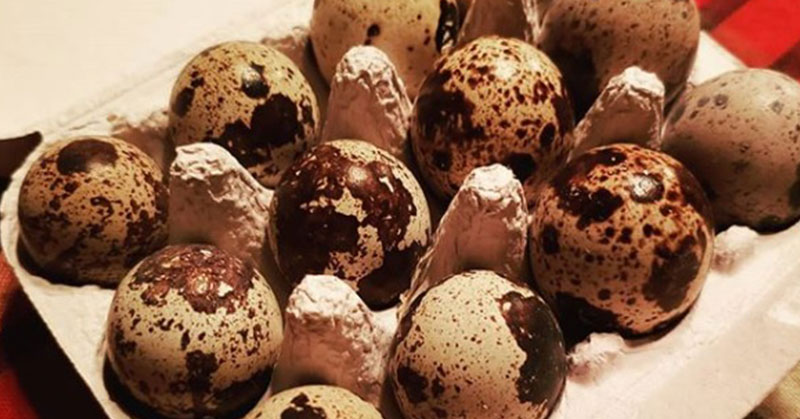

There are a few types of quail that people commonly keep, but coturnix quail are far and away the easiest to raise. We will be focusing on how to incubate coturnix quail eggs for this particular breed. Coturnix quail eggs are one of the easiest to incubate and hatch successfully. 9 weeks after you set eggs in your incubator, your quail will be laying eggs of their own.
If you’re just getting started and need an incubator, I strongly recommend the Manna Pro Harris Farms Nurture Right Incubator. This is an incubator I personally use for hatching eggs. It has an automatic egg turner suitable for around 25-30 quail eggs and a full 360-degree view, which is awesome when the eggs start to hatch. If you are looking to hatch more eggs than that, the Hatching Time Cabinet Incubator is pretty much unbeatable. You can incubate as many as 216 quail eggs in this incubator.
How to incubate coturnix quail eggs
That’s pretty remarkable when you consider most poultry need about a month to incubate then 4-6 months before they even think about laying their first egg. Quail incubate for a total of 18 days and then begin laying eggs sometimes as early as 5 weeks old, though usually between 6 and 8 weeks old.
Before you buy quail eggs to hatch, be sure you’ve done your research on how to properly raise and care for quail. Once you’ve done that, you’re ready to get incubating. Here’s how to incubate coturnix quail eggs.
Read More: How To Boil Quail Eggs Perfectly
Setting up your incubator
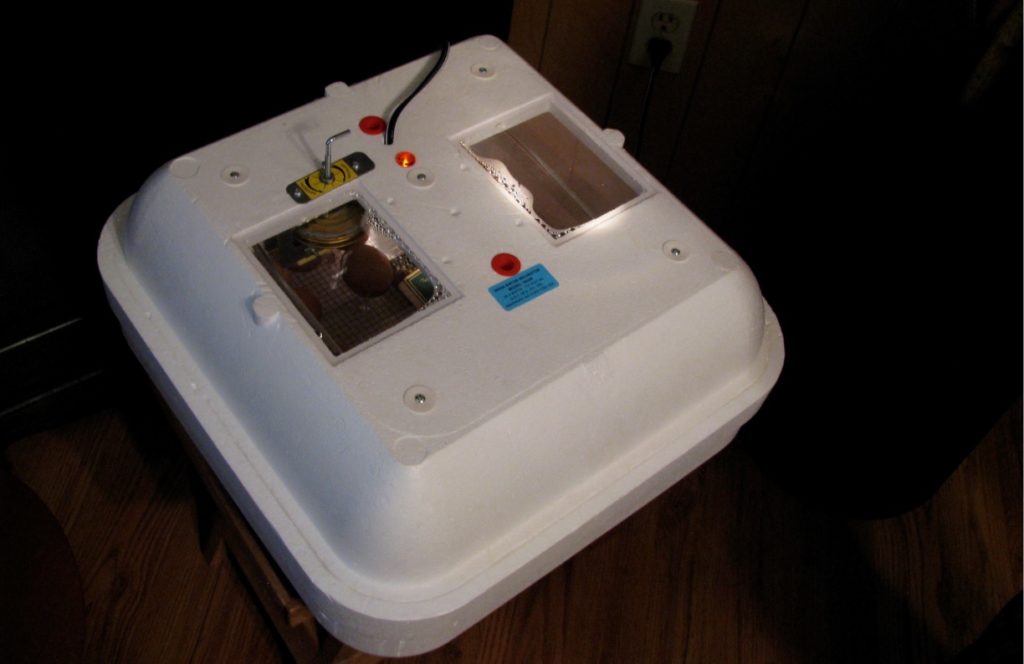
Incubating quail eggs starts with, you guessed it, a functional incubator. Making sure that your incubator is set up and functional before you set your eggs is important. When incubators are just warming up, their temperatures can swing pretty wildly while they stabilize. You don’t want to set eggs before your incubator has a stable temperature and humidity level. You may accidentally cook your eggs! Your eggs will become unviable if the temperature is sustained over 103°F (39.4°C).
Quail eggs should be incubated at a temperature of 100°F and require a humidity level of 45% humidity for the first 15 days of incubation. During the last three days of incubation, your humidity levels will need to increase. More on that later.
Carefully follow the instructions that your incubator’s manufacturer provides and once you’re certain that everything is all set and good to go, you can set your eggs.
Read More: Which Is Better, Duck or Chicken Eggs?
Setting quail eggs in your incubator
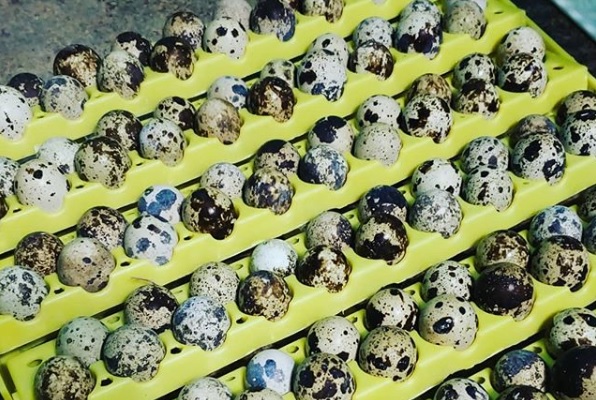
Once you’ve set your quail eggs in the incubator, they will need very little attention and you should take care not to touch them more than you have to. Your quail eggs will need to be turned a minimum of 4 times every day. You can do this by hand or purchase an automatic egg turner.
If you turn your eggs by hand, always wash your hands before and after turning the eggs. This helps prevent the spread of pathogens that may harm you or the developing chick inside of the egg. It also prevents oils from your hands from being deposited on the eggs, where they can block the egg’s pores.
Read More: Where To Buy Quail Eggs
Candling quail eggs
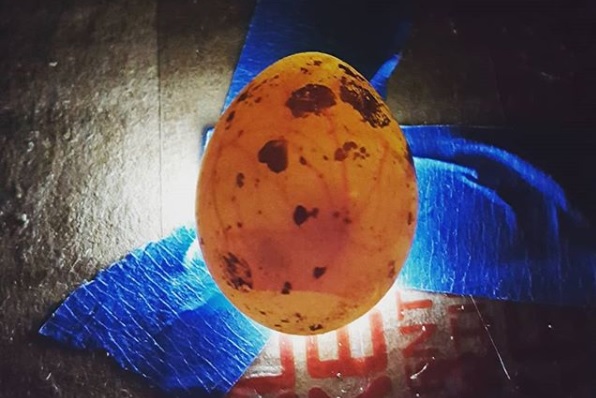
At the 10 day mark, you will want to candle your quail eggs to check for development. Eggs that have not developed may be harboring dangerous bacteria. Bacteria-filled eggs, if left alone long enough, can explode, spreading infected egg material all over your incubator. This can be extraordinarily difficult to clean out of your incubator and it can spread the bacteria to all of the eggs, potentially killing everyone inside. It also tends to smell pretty bad.
It should be pretty apparent which eggs have developed and which have not. Eggs with development will be darker, and you may be able to see movement and veins inside of the egg. Eggs which did not develop will light up and appear clear.
You will also likely have eggs that started developing but quit at some point during incubation. Quail eggs are spotted and difficult to see into, but the principles are largely still the same.
If your chick is alive, at 10 days you should see the embryo, a dark, formless mass, rocking back and forth in the egg. You should also see a network of veins spreading outward from the embryo. The veins may also be in motion.
If your chick has died, there will be no movement. When an embryo dies, the veins may quickly break down, leaving only a motionless dark mass inside of the egg. Dead embryos stop growing, which means they will often be smaller than other, live embryos that have incubated the same length of time.
Keep reading: Common causes of poor hatch rates
Lockdown and hatching day
The last 3 to 4 days of incubation are referred to as ‘lockdown.’ During the lockdown phase of incubation, you will stop turning the eggs and increase the incubator’s humidity to 65%. Increasing humidity is important. The added moisture will help soften the egg shell membranes, allowing the chick inside to hatch more easily.
If the humidity is too low, your chicks may not be able to hatch. If it’s too high, they may have excess fluid inside their eggs and drown in it when they begin breathing.
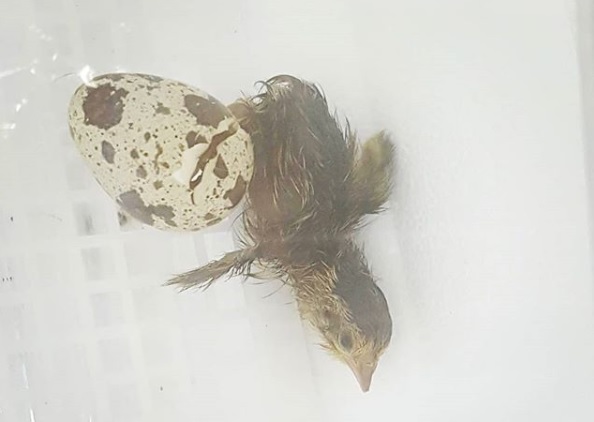
On the 14th day of incubation, you will set your humidity to 65% and not open the incubator again until they hatch. Between the 14th and 15th day, your chicks will internally pip and begin breathing from the air cell in the egg. Around the 16th or 17th day, you should begin seeing external pips, where they’ve poked through the shell and are now breathing outside air.
During this period, the chick will begin absorbing the remaining yolk inside of the egg into their bodies. Chicks will survive on this yolk for a day or so after hatching, at which point they begin to eat and drink.
Note: If you get impatient and try to help a chick hatch, you may accidentally kill it. If the yolk isn’t fully absorbed and you pull the chick from the shell, this radically increases the odds that the chick will not survive.
The general rule of thumb is once you see a pip in the shell, which may appear like a crack or a bump, your chick should hatch within 24 hours. As it prepares to hatch from the egg, it will slowly rotate, breaking the egg shell in a process called unzipping. This is the final stage of hatching. Once they have begun to unzip themselves, hatching is imminent.
The period of time from pip to zip can vary pretty widely. In my experience, once you see an external pip, the chick will fully hatch within 24 hours. The eggs may not all hatch at once. Or they might. It really depends on a number of factors that are nearly impossible to account for. I’ve had hatches where every single egg hatches at the exact same time and some where chicks hatch on day 18 and continue hatching until day 21.
The important thing is to be patient and not mess with the eggs. Hatching eggs can be taxing if you’re emotionally invested. Some eggs won’t pip and hatch. Some will internally pip but not externally pip. Some will externally pip but never unzip. Some will unzip but won’t be able to push out of their shell. Some will fully hatch and then die.
If you think a chick is struggling to hatch, don’t intervene. It sounds callous, but if a chick can’t hatch on its own, it means it wasn’t strong enough to do so. Some chicks are also slow hatchers. Intervening too early can kill them. Let nature take its course.
If you help a chick that can’t hatch on its own, any offspring they have may also be predisposed to having difficulty hatching. This is something to consider if you plan to continue breeding that line of quail.
Common coturnix quail egg incubation problems
If you’ve gone through the process of incubating coturnix quail eggs and didn’t get many – or any – quail chicks, I understand that can be a difficult thing to experience. You’ve been incubating your eggs for 3 weeks and have little to show for it. Now we troubleshoot. What are the more common causes of poor hatch rates?
- Setting old eggs
- Eggs with low fertility
- Improper turning
- Improper handling
- Uneven incubator temperature
- Uneven incubator humidity
- Nutritional deficiencies with the breeding stock (remember when I suggested meeting the birds?)
- Contaminated incubator
More incubation guides: