
Welcome to the world of watermelon cultivation in Zone 3! Growing watermelons in colder climates can be a rewarding and exciting experience, but it requires careful planning and consideration. Zone 3, characterized by its short growing season and frosty winters, presents unique challenges for watermelon enthusiasts.
However, with the right techniques and knowledge, it is possible to successfully grow this juicy and refreshing fruit in your backyard. In this article, we will delve into the optimal timing for planting watermelon in Zone 3, taking into account the specific climate conditions and frost dates of this region. So, grab your gardening gloves and get ready to learn when and how to plant watermelon in Zone 3 for a bountiful harvest!
Best varieties of watermelon to grow in Zone 3
Watermelons are warm-season crops that thrive in zones 4-9, so growing them in Zone 3 can be challenging due to the shorter growing season and cooler temperatures. However, with careful planning and the use of season-extending techniques, it is still possible to grow watermelons in Zone 3. Here are a few varieties that have shown some success in colder climates:
- ‘Blacktail Mountain’: This variety is known for its early maturity and ability to tolerate cooler temperatures. It produces small to medium-sized fruits with sweet, red flesh.
- ‘Sugar Baby’: Another early-maturing variety, ‘Sugar Baby’ is a popular choice for colder climates. It produces small, round fruits with sweet, crisp flesh.
- ‘Yellow Doll’: This variety is a yellow-fleshed watermelon that has shown some success in cooler climates. It has a shorter growing season and produces small to medium-sized fruits.
- ‘Moon and Stars’: While not specifically bred for colder climates, ‘Moon and Stars’ watermelon has been successfully grown in Zone 3 with the help of season-extending techniques. It produces large fruits with a dark green rind and yellow spots resembling stars.
When growing watermelons in Zone 3, it is important to start seeds indoors or use transplants to get a head start on the growing season. Additionally, using techniques like raised beds, black plastic mulch, row covers, and hoop houses can help create a warmer microclimate for the plants.
When to plant watermelon in Zone 3
In Zone 3, which has a short growing season and cold temperatures, it is best to start watermelon seeds indoors about 4-6 weeks before the last expected frost date. This will give the plants a head start and allow them to mature before the first frost in the fall. Transplant the seedlings outdoors once all danger of frost has passed and the soil temperature has reached at least 70°F (21°C). This is typically around late May or early June in Zone 3.
How to grow
Growing watermelon requires careful planning and attention to detail. Here are the steps and considerations to keep in mind:
- Climate and soil: Watermelons thrive in warm climates with temperatures between 70-90°F (21-32°C). Choose a sunny location with well-drained soil that is rich in organic matter. The soil pH should be between 6.0-6.8.
- Variety selection: Choose a watermelon variety that suits your climate and growing conditions. Consider factors like size, flavor, and disease resistance. Some popular varieties include Crimson Sweet, Sugar Baby, and Jubilee.
- Seed starting: Watermelon seeds can be started indoors 2-3 weeks before the last frost date or directly sown in the garden when the soil temperature reaches at least 70°F (21°C). Plant 2-3 seeds per pot or hill, about 1 inch deep.
- Transplanting: If starting seeds indoors, transplant the seedlings outdoors when all danger of frost has passed and the soil has warmed up. Space the plants 3-4 feet apart in rows that are 6-8 feet apart.
- Watering: Watermelons have high water requirements, especially during hot and dry periods. Provide consistent moisture, aiming for 1-2 inches of water per week. Avoid overwatering, as it can lead to diseases.
- Fertilization: Watermelons are heavy feeders. Before planting, incorporate well-rotted compost or aged manure into the soil. Once the plants start to vine, side-dress with a balanced fertilizer or use a slow-release fertilizer according to package instructions.
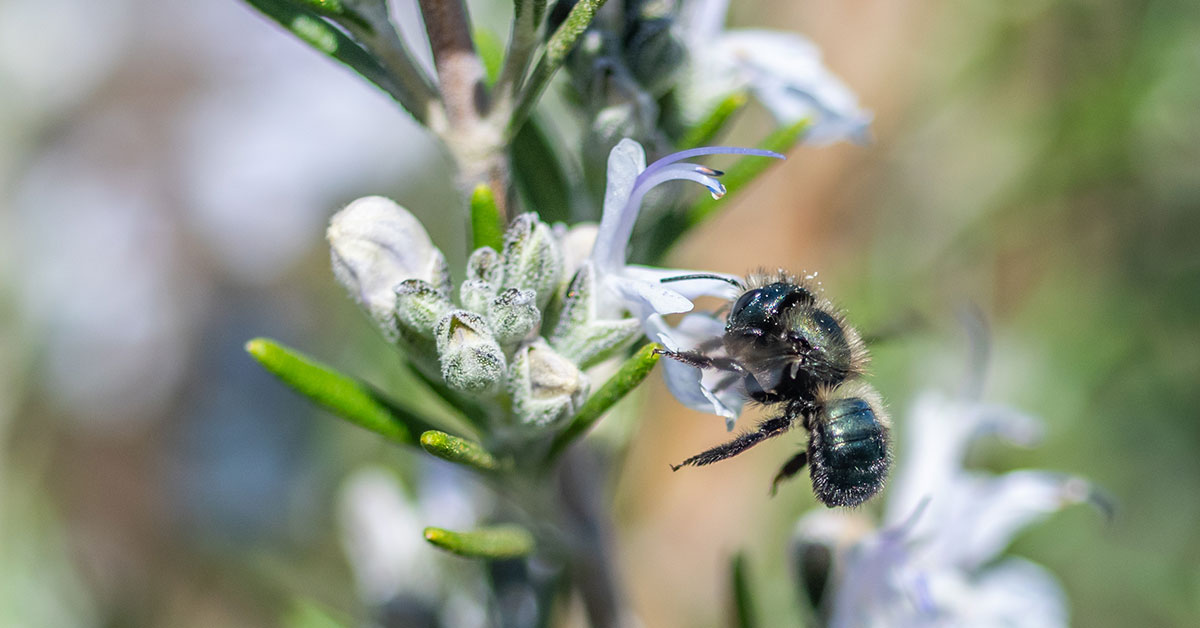
- Pollination: Watermelons require pollination for fruit set. Bees and other pollinators are essential for this process. Avoid using pesticides that may harm pollinators.
- Trellising: While not necessary, trellising watermelon vines can save space and improve air circulation, reducing the risk of diseases. Use a sturdy trellis or support system to hold the vines as they grow.
- Pest and disease management: Common pests that attack watermelons include aphids, cucumber beetles, and squash bugs. Monitor plants regularly and use organic pest control methods if necessary. Diseases like powdery mildew and fusarium wilt can also affect watermelons. Choose disease-resistant varieties and practice good crop rotation.
- Harvesting: Watermelons are ready for harvest when the fruit has a dull skin color, the bottom side turns yellow, and the tendril closest to the fruit dries up. Gently tap the fruit, and if it sounds hollow, it is likely ripe. Cut the fruit from the vine using a sharp knife or pruners.
By following these steps and considerations, you can successfully grow watermelons and enjoy a bountiful harvest.
When to harvest
In Zone 3, where the growing season is relatively short, it is important to choose watermelon varieties that have a shorter maturity period. Generally, watermelons take around 70-90 days to mature from the time of planting.
To determine the best time to harvest watermelons, you should consider a few factors:
- Days to maturity: Check the seed packet or plant label for the specific days to maturity for the watermelon variety you are growing. Count the days from planting to estimate when the watermelon should be ready for harvest.
- Size and color: Watermelons are typically ready for harvest when they reach their full size and develop a deep, uniform color. The skin color of ripe watermelons varies depending on the variety, but they should have a vibrant, consistent hue.
- Sound: Tap the watermelon gently with your knuckles. A ripe watermelon will produce a deep, hollow sound, while an unripe one will sound dull.
- Tendril drying: Check the tendril closest to the watermelon stem. If it has turned brown and dried up, it is an indication that the watermelon is nearing maturity.
- Belly spot: On the underside of the watermelon, there is usually a lighter patch called the “belly spot.” When this spot turns from white or green to a creamy yellow color, it is another sign that the watermelon is ripe.
Considering these factors, you can start checking the watermelons for ripeness around the estimated maturity date. It is advisable to monitor each watermelon individually, as they may ripen at different rates.
Common watermelon plant problems and fixes
Common problems when growing watermelon include:
- Poor pollination: Watermelon plants require proper pollination for fruit set. If there is a lack of bees or other pollinators in your area, you can hand-pollinate the flowers using a small brush or cotton swab. Gently transfer pollen from the male flowers to the female flowers.
- Blossom end rot: This is a condition where the bottom end of the fruit becomes sunken, black, and leathery. It is caused by calcium deficiency or uneven watering. To prevent blossom end rot, ensure consistent soil moisture by watering deeply and regularly. Adding calcium-rich amendments or using a calcium spray can also help.
- Powdery mildew: This fungal disease appears as a white powdery coating on the leaves, stems, and fruits. To prevent powdery mildew, provide good air circulation by spacing plants properly and avoiding overhead watering. If it occurs, treat with a fungicide specifically formulated for powdery mildew.
- Fusarium wilt: This soil-borne fungal disease causes wilting, yellowing of leaves, and stunted growth. Unfortunately, there is no cure for fusarium wilt. To prevent it, choose resistant varieties and practice crop rotation, avoiding planting watermelon in the same area for several years.
- Pest infestations: Common pests that attack watermelon include aphids, cucumber beetles, and squash bugs. Use insecticidal soaps, neem oil, or organic insecticides to control these pests. Regularly inspect plants for signs of infestation and take action as soon as you notice any.
- Over or under watering: Watermelon plants require consistent moisture, especially during fruit development. Overwatering can lead to root rot, while underwatering can cause poor fruit development. Water deeply when the top inch of soil feels dry, and use mulch to retain soil moisture.
- Poor fruit set: If your watermelon plants are not setting fruit, it could be due to high temperatures, lack of pollination, or nutrient deficiencies. Ensure proper pollination, provide shade or use shade cloth during extreme heat, and maintain balanced soil fertility with regular fertilization.
Remember, prevention is key when it comes to common problems in watermelon cultivation. Providing optimal growing conditions, practicing good hygiene, and selecting disease-resistant varieties can greatly reduce the likelihood of encountering issues.