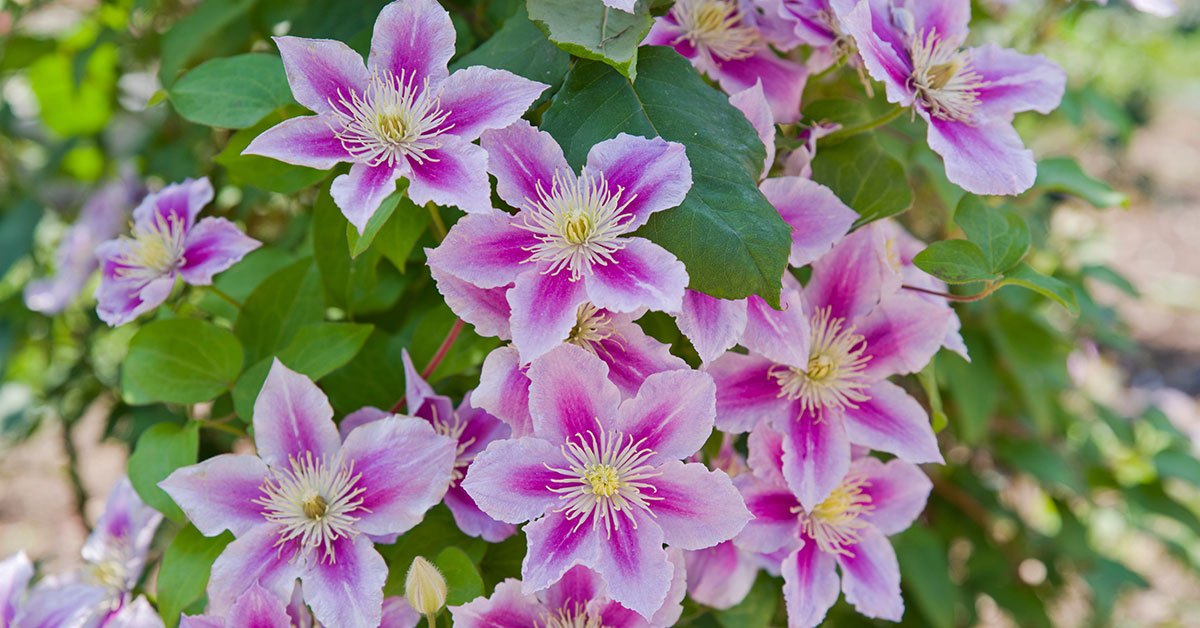

Welcome to our comprehensive guide on how to deadhead clematis, the stunning flowering vine that can add a touch of elegance and beauty to any garden or landscape. Deadheading is a crucial practice for maintaining the health and appearance of your clematis plants, as it encourages continuous blooming and prevents the formation of unsightly seed heads.
In this article, we will delve into the importance of deadheading, the best time to do it, and the step-by-step process to ensure you achieve optimal results. Whether you are a seasoned gardener or a beginner, this guide will equip you with the knowledge and techniques needed to keep your clematis thriving and producing an abundance of vibrant blooms all season long. So, let’s dive in and discover the art of deadheading clematis!
Should you deadhead clematis?
Deadheading clematis is a common practice among gardeners, but whether or not it should be done depends on the specific variety of clematis and the desired outcome. Deadheading refers to the removal of spent flowers or seed heads from a plant. The primary reason for deadheading is to encourage the plant to redirect its energy towards producing new blooms rather than setting seed. However, clematis is a diverse genus with various flowering habits, so it’s important to consider the specific type of clematis before deciding whether to deadhead.
- Group 1 Clematis: These clematis varieties bloom on old wood, meaning they produce flowers on the previous year’s growth. Deadheading is generally not necessary for these types, as they tend to have a single flush of blooms in early summer. Pruning should be done immediately after flowering to remove any dead or damaged stems and to shape the plant if needed.
- Group 2 Clematis: This group includes large-flowered hybrids that bloom on both old and new wood. Deadheading can be beneficial for Group 2 clematis, as it encourages the plant to produce a second flush of flowers on new growth. After the initial bloom, remove the spent flowers by cutting just above a set of healthy leaves. This will stimulate the plant to produce new shoots that will bear additional blooms later in the season.
- Group 3 Clematis: These clematis varieties bloom exclusively on new wood, meaning they produce flowers on the current year’s growth. Deadheading is highly recommended for Group 3 clematis to promote continuous blooming throughout the season. Once the initial bloom is finished, cut the plant back to a pair of healthy buds or a strong set of leaves. This will encourage vigorous growth and a second round of flowers.
In general, deadheading clematis can help maintain a tidy appearance and promote more blooms. However, it’s important to note that some clematis varieties produce attractive seed heads that can add interest to the garden, especially in the fall and winter. If you prefer to leave the seed heads for aesthetic or wildlife purposes, you can skip deadheading. Remember to always consult specific care instructions for the particular clematis variety you have, as there may be additional considerations or pruning requirements.
When to deadhead clematis?
Deadheading clematis is an important practice to encourage continuous blooming and maintain the overall health and appearance of the plant. The timing of deadheading clematis depends on the specific variety and its blooming habits. Here are some general guidelines to follow:
- Early-flowering clematis: These varieties bloom in early spring on old wood. They typically produce flowers before June. Deadhead these clematis immediately after they finish blooming, usually in late spring or early summer. Removing the spent flowers will prevent the plant from producing seed heads and encourage new growth for the following year.
- Mid-season and late-flowering clematis: These varieties bloom on new wood, typically from June to September. Deadheading these clematis is not necessary for continuous blooming, but it can help tidy up the plant and promote additional flowering. You can deadhead these clematis as soon as the flowers fade or wait until the end of the blooming season to do a more comprehensive deadheading.
- Repeat-flowering clematis: Some clematis varieties have the ability to produce multiple flushes of flowers throughout the growing season. Deadheading these clematis is essential to encourage continuous blooming. Remove the spent flowers as soon as they fade, cutting just above a set of healthy leaves or leaf nodes. This will stimulate the plant to produce new buds and flowers.
It’s important to note that not all clematis varieties require deadheading. Some produce attractive seed heads that can add interest to the garden, and others have non-showy flowers that don’t require removal. Always consult the specific care instructions for your clematis variety to determine the best deadheading practices.
Additionally, remember to use clean and sharp pruners or scissors when deadheading clematis to minimize the risk of disease transmission.
How to deadhead clematis
Deadheading clematis is an important task to keep your plants healthy and encourage more blooms. Here is a step-by-step guide on how to deadhead clematis:
- Timing: The best time to deadhead clematis is after the first flush of flowers has finished blooming. This is typically in late spring or early summer, depending on the specific variety of clematis you have.
- Identify spent flowers: Look for faded or wilted flowers on the clematis plant. These are the ones that need to be removed.
- Prepare your tools: Get a pair of clean and sharp pruning shears or scissors. It’s important to have clean tools to prevent the spread of diseases.
- Cut back to a healthy bud: Locate a healthy bud or leaf node just below the faded flower. Make a clean cut about 1/4 inch above the bud, at a slight angle. This will help water drain away from the bud and prevent rot.
- Remove all faded flowers: Repeat the process for all the faded flowers on the clematis plant. Take your time to ensure you don’t miss any.
- Dispose of the removed flowers: Collect all the removed flowers and dispose of them in a compost bin or green waste bin. Do not leave them on the ground near the plant, as they can attract pests and diseases.
- Mulch and fertilize: After deadheading, apply a layer of organic mulch around the base of the clematis plant. This will help retain moisture and suppress weed growth. Additionally, you can apply a balanced fertilizer according to the package instructions to provide nutrients for new growth.
- Monitor for new growth: Keep an eye on the plant for new shoots and buds. Regularly water and care for the clematis to ensure healthy growth.
- Repeat as needed: Deadheading clematis is an ongoing process throughout the blooming season. As new flowers fade, repeat the process of identifying spent flowers and removing them.
By following these steps, you can help your clematis plants stay healthy, promote more blooms, and maintain an attractive appearance throughout the growing season.
Care guide after you deadhead clematis
After deadheading a clematis, there are a few care guidelines to follow to ensure the plant remains healthy and continues to produce blooms. Here are the detailed steps:
- Pruning: Deadheading involves removing spent flowers, but you can also prune the plant lightly after deadheading to encourage new growth. Trim back any unruly or overgrown stems to maintain the desired shape and size of the clematis.
- Watering: Water the clematis thoroughly after deadheading to provide it with adequate moisture. Clematis plants generally prefer consistently moist soil, so water deeply whenever the top inch of soil feels dry. Avoid overwatering, as this can lead to root rot.
- Fertilizing: After deadheading, it’s a good idea to fertilize the clematis to promote healthy growth and blooming. Use a balanced, slow-release fertilizer or a water-soluble fertilizer formulated for flowering plants. Follow the instructions on the fertilizer packaging for application rates and frequency.
- Mulching: Apply a layer of organic mulch around the base of the clematis plant to help retain moisture, suppress weed growth, and regulate soil temperature. Use materials like wood chips, straw, or compost, and spread the mulch evenly around the root zone, leaving a small gap around the stem to prevent rot.
- Support: Check the support structure for the clematis, such as a trellis or arbor, and make any necessary repairs or adjustments. Clematis vines need sturdy support to climb and thrive, so ensure that the structure is secure and can accommodate the growth of the plant.
- Sunlight: Clematis plants generally prefer full sun to partial shade. After deadheading, assess the location of your clematis and ensure it is receiving the appropriate amount of sunlight. If necessary, consider moving the plant to a spot with better sun exposure.
- Pest and Disease Control: Keep an eye out for any signs of pests or diseases on your clematis. Common issues include aphids, powdery mildew, and wilt diseases. If you notice any problems, promptly treat them with appropriate organic or chemical controls to prevent further damage.
By following these care guidelines after deadheading your clematis, you can help promote healthy growth, encourage more blooms, and keep your plant looking its best.