

Feeding hummingbirds can be an incredibly rewarding experience, bringing these vibrant little creatures right to your backyard. However, there are some common mistakes that can inadvertently harm or even kill hummingbirds. By being aware of these pitfalls and taking the necessary precautions, you can ensure that your hummingbird feeders are safe and inviting for your feathered friends.
In this article, I’ll share ten mistakes to avoid when setting up and maintaining your hummingbird feeders. Each mistake will be thoroughly explained, along with tips on how to correct or avoid it. Let’s dive into these important tips to help keep your hummingbirds healthy and happy!
Using the Wrong Nectar Recipe

One of the most common mistakes is using the wrong nectar recipe. Hummingbird nectar should be a simple mixture of four parts water to one part white granulated sugar. Never use honey, artificial sweeteners, or red dye, as these can be harmful to hummingbirds. Honey can promote the growth of dangerous mold, and red dye has been linked to health issues in birds.
To make the perfect nectar, simply dissolve one part sugar in four parts boiling water. Let the mixture cool before filling your feeder. Always store any unused nectar in the refrigerator and replace it every few days, especially in hot weather. By providing the correct nectar recipe, you’ll ensure your hummingbirds receive the nourishment they need without any harmful additives.
Not Cleaning Feeders Regularly

Dirty feeders can be deadly for hummingbirds. Mold, bacteria, and fermented nectar can make hummingbirds sick. Feeders should be cleaned thoroughly at least once a week, and more often in hot weather when nectar spoils quickly. Use hot water and a bottle brush to clean all parts of the feeder, avoiding soap which can leave harmful residues.
I find it helpful to establish a cleaning routine to ensure the feeders stay fresh and safe. If you notice any black mold spots, use a mixture of vinegar and water or a weak bleach solution (one part bleach to nine parts water) to sanitize the feeder, then rinse thoroughly. Keeping your feeders clean is crucial for the health of your hummingbirds.
Placing Feeders in Direct Sunlight

Placing feeders in direct sunlight can cause the nectar to spoil quickly, especially in hot weather. Fermented nectar is harmful to hummingbirds and can lead to serious health problems. To avoid this, hang your feeders in a shaded or partially shaded area. This not only keeps the nectar fresh longer but also provides a more comfortable feeding spot for the birds.
In my experience, finding the right spot can make a big difference. If your garden doesn’t have much natural shade, consider using a shade cloth or placing the feeder near a tree or large shrub. This helps keep the nectar cool and reduces the need for frequent nectar changes, ensuring a healthier environment for your hummingbirds.
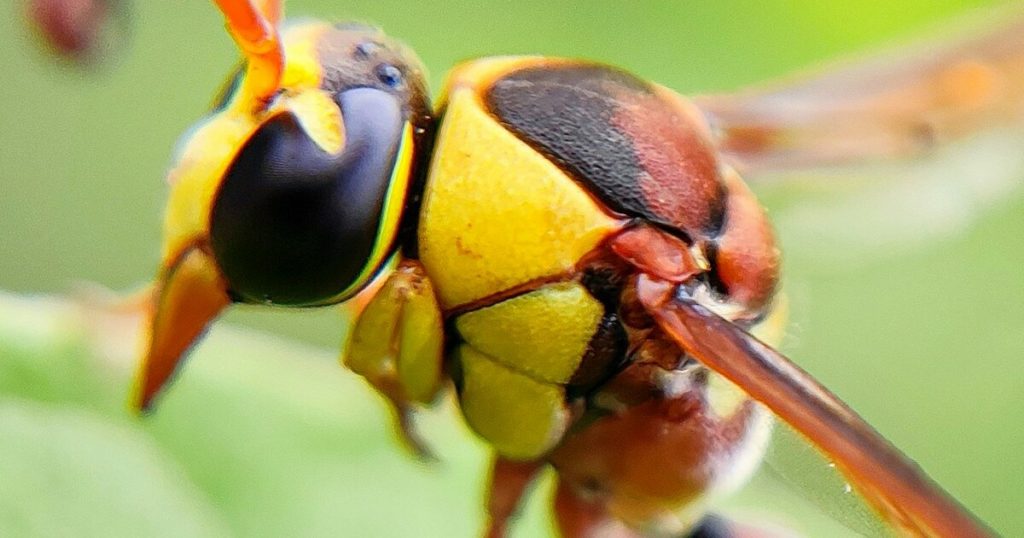
Using Feeders with Yellow Parts

Feeders with yellow parts can attract bees and wasps, which can deter hummingbirds from visiting. Bees and wasps are drawn to the color yellow and can become a nuisance, often taking over the feeder and scaring away the birds. To avoid this problem, choose feeders with red parts instead, as hummingbirds are attracted to red but not yellow.
I’ve found that switching to red-only feeders significantly reduces bee and wasp activity around the feeders. If you already have feeders with yellow parts, try painting them red or covering them with red tape. This simple change can make your feeders more inviting for hummingbirds and less attractive to unwanted insects.
Overfilling the Feeder

Overfilling the feeder can lead to waste and spoilage, as hummingbirds typically don’t consume large amounts of nectar quickly. When nectar sits too long, it can ferment or become contaminated with mold and bacteria. Instead of filling the feeder to the top, only fill it with enough nectar to last a few days, adjusting based on the activity at your feeder.
I like to monitor how quickly the nectar is being consumed and adjust accordingly. This practice not only keeps the nectar fresh but also minimizes waste. If you have multiple feeders, consider filling them halfway and placing them in different locations to attract more birds without risking spoilage.
Not Providing Perches
Hummingbirds expend a lot of energy hovering while they feed. Providing perches on or near your feeders can give these tiny birds a place to rest while they drink, conserving their energy and allowing them to feed more comfortably. Many commercial feeders come with built-in perches, but you can also add your own.
In my garden, I’ve added small twigs or thin branches near the feeders to create natural perches. Watching the hummingbirds rest and feed is delightful, and it’s clear they appreciate the extra support. Perches make your feeders more user-friendly for the birds and enhance your overall viewing experience.
Ignoring Ant Problems
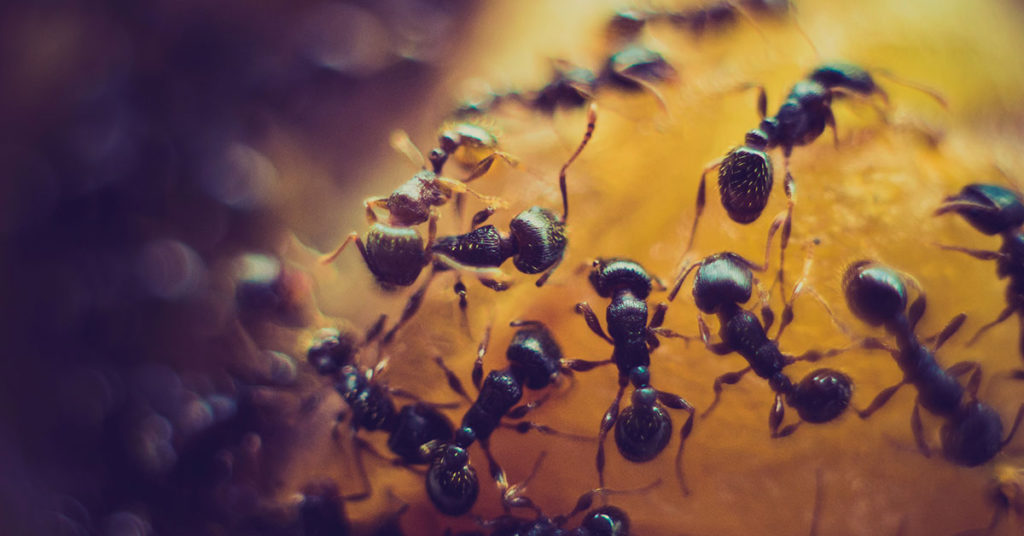
Ants can be a major problem at hummingbird feeders, contaminating the nectar and deterring birds from feeding. To prevent ants from invading your feeders, use ant moats or ant guards. Ant moats are small water-filled barriers that hang above the feeder, preventing ants from reaching the nectar.
I’ve had great success using ant moats to keep my feeders ant-free. Additionally, keeping the area around the feeder clean and free of food sources can help reduce ant attraction. Regularly checking and maintaining these barriers ensures that ants stay away and your hummingbirds can feed in peace.
Using Feeders with Leaks
Feeders with leaks can create a mess and attract unwanted insects like bees, wasps, and ants. Leaky feeders also cause the nectar to spoil more quickly, posing a health risk to hummingbirds. Check your feeders regularly for leaks and replace or repair any that are not holding nectar properly.
I recommend investing in high-quality, leak-proof feeders. If you notice a leak, try tightening the parts or replacing the seals. Ensuring your feeders are in good condition helps maintain a clean and safe feeding environment for your hummingbirds, reducing the risk of contamination and pests.
Not Changing Nectar Frequently
Even with the right nectar recipe, it’s essential to change the nectar frequently to keep it fresh. In hot weather, nectar can spoil within a couple of days, becoming dangerous for hummingbirds to consume. Change the nectar every two to three days in hot weather and at least once a week in cooler temperatures.
I keep a calendar or set reminders to ensure I change the nectar on schedule. This habit helps me maintain a consistent feeding routine and ensures the hummingbirds always have access to fresh, safe nectar. Regularly changing the nectar is a simple but crucial step in keeping your hummingbirds healthy and happy.
Placing Feeders Too Close Together

Placing feeders too close together can lead to territorial disputes among hummingbirds. These tiny birds can be surprisingly aggressive, especially when defending their feeding territory. To minimize conflicts, space your feeders at least 10-15 feet apart, allowing multiple birds to feed peacefully without feeling threatened.
In my garden, I’ve found that spreading out the feeders creates a more harmonious feeding environment. This setup encourages more hummingbirds to visit and reduces the chances of aggressive behavior. Providing multiple feeding stations around your yard ensures that all hummingbirds can enjoy the nectar without competition.