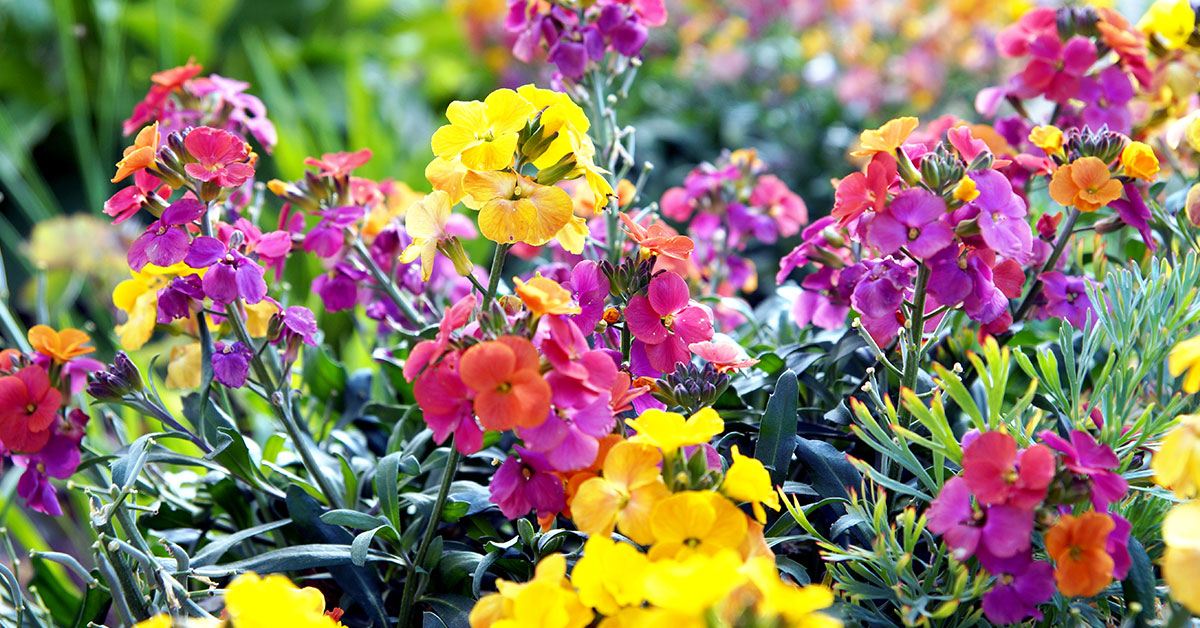

With their cheerful hues and delightful scent, wallflowers add a touch of elegance and charm to any landscape. Whether planted in flower beds, containers, or along walls, these versatile perennials are a joy to grow and a feast for the senses.
In this article, we embark on a journey into the world of wallflowers, uncovering their fascinating characteristics, exploring their wide range of varieties, and delving into the secrets of successful cultivation.
From choosing the perfect location and preparing the soil to nurturing these resilient plants through the seasons, we will provide you with a comprehensive guide to ensure your wallflowers thrive in your garden.
What is a Wallflower?
If you’ve ever strolled through a beautiful garden or admired colorful blooms in a flower shop, chances are you’ve come across the elegant and enchanting Wallflower. With its vibrant colors and delicate petals, this flowering plant is a favorite among gardeners and flower enthusiasts alike.
Wallflowers, scientifically known as Erysimum spp., are a genus of flowering plants belonging to the Brassicaceae family. There are approximately 180 species of Wallflowers, and they are native to Europe, North Africa, and parts of Asia. They are commonly found growing on rocky slopes, cliffs, and walls, hence their name.
Wallflowers are known for their compact and bushy growth habit. They typically grow to a height of 12 to 36 inches (30 to 90 cm) and produce numerous upright stems. The leaves of Wallflowers are narrow, lanceolate, and often slightly hairy. The foliage usually forms a dense rosette at the base of the plant, while the stems bear clusters of flowers.
One of the most remarkable features of Wallflowers is their stunning and fragrant flowers. The blooms come in a variety of colors, including shades of yellow, orange, pink, purple, and red. The petals are typically four in number and are arranged in a cross-like shape, characteristic of the Brassicaceae family. Wallflowers are known for their long-lasting blooms, which can grace your garden or vase for several weeks.
Where is Wallflower native?
Wallflower is a charming flowering plant that is known for its vibrant colors and delightful fragrance. While it is a popular addition to gardens and landscapes worldwide, it is essential to understand the plant’s origins to cultivate it successfully.
- Native Range:
The Wallflower plant is native to various regions around the world, including Europe, Asia, and North Africa. It has been naturalized in several other parts of the globe due to its beauty and adaptability. However, its true origin lies in the wild landscapes of specific countries. - European Origin:
The Wallflower’s primary native range is in Europe, where it can be found in abundance. Countries such as the United Kingdom, France, Spain, Italy, Greece, and Turkey are known to host diverse species of Wallflowers. These regions provide the ideal climate and conditions for the plant to thrive. - Wallflower in the United States:
In the United States, Wallflowers are not native to the entire country but can be found in specific states. While they may not be as prevalent as in their native regions, Wallflowers have been introduced and established in certain areas.
The Wallflower has naturalized in the Pacific Northwest region of the United States. States such as Oregon and Washington are known to have wild populations of Wallflowers. The cool and moist climate in these areas resembles the plant’s native habitats, allowing it to flourish.
California is another state where Wallflowers can be found growing in the wild. The Mediterranean climate of California, with its mild winters and dry summers, provides an ideal environment for Wallflowers to thrive.
Wallflowers have also been known to grow in the Rocky Mountain region, particularly in states such as Colorado, Utah, and Wyoming. The high altitudes and well-drained soils in these areas create favorable conditions for the plant to establish itself.
How to start from seed
Starting Wallflowers from seeds is an economical and rewarding choice. These instructions will guide you through the step-by-step process of gathering supplies, sowing Wallflower seeds, caring for seedlings, transplanting, and providing aftercare to ensure a successful and beautiful Wallflower garden.
Gathering the Supplies:
Before embarking on your Wallflower growing journey, gather the following supplies:
- Wallflower seeds: Choose a variety of Wallflower seeds that best suit your preferences.
- Seed trays or pots: Consider using biodegradable pots or trays to facilitate transplanting later.
- Seed-starting soil mix: Opt for well-draining soil specifically formulated for seed germination.
- Watering can or mist sprayer: Use a gentle watering method to avoid dislodging the seeds or seedlings.
- Transparent plastic wrap or a propagator: These will create a suitable germination environment.
- Grow lights or a sunny windowsill: Wallflower seeds require sufficient light for optimal growth.
Sowing Seeds:
- Fill the seed trays or pots: Fill them up to ¾ full with the seed-starting soil mix, ensuring it is evenly spread.
- Sow the seeds: Sprinkle Wallflower seeds evenly over the soil surface. Avoid overcrowding to prevent competition.
- Lightly cover the seeds: Gently pat down the soil or use a thin layer of vermiculite to cover the seeds. Do not bury them too deeply.
- Moisten the soil: Water the tray gently to ensure the soil is moist but not waterlogged.
- Create a mini-greenhouse: Cover the seed tray with transparent plastic wrap or use a propagator to retain moisture and warmth.
- Place in a warm spot: Position the tray in a warm area with a temperature range between 65°F and 75°F (18°C and 24°C).
Caring for the Seedlings:
- Germination period: Wallflower seeds usually germinate within two to three weeks.
- Remove the plastic wrap: Once germination occurs, remove the plastic wrap and ensure the seedlings receive adequate airflow.
- Light requirements: Provide bright, indirect light for at least 14-16 hours a day using grow lights or by placing them on a sunny windowsill.
- Watering schedule: Keep the soil moderately moist by watering the seedlings when the top layer of soil feels slightly dry.
- Fertilization: After the first true leaves appear, feed the seedlings with a diluted, balanced liquid fertilizer every two weeks.
- Thinning seedlings: If overcrowding occurs, thin out the weaker seedlings to prevent competition for nutrients and sunlight.
Transplanting Seedlings:
- Wait for seedling growth: Let the seedlings grow to a height of 2-3 inches (5-7 cm) before transplanting.
- Choose a planting location: Select a sunny spot in your garden with well-draining soil. Avoid areas prone to waterlogging.
- Prepare the soil: Loosen and enrich the soil with organic matter to improve drainage and fertility.
- Transplanting process: Gently lift the seedlings, keeping the roots intact. Dig planting holes in the garden and space them 8-12 inches (20-30 cm) apart.
- Plant the Wallflowers: Place each seedling in the hole, ensuring the top of the root ball is level with the soil surface. Backfill the hole and firm the soil gently around the plant.
- Water thoroughly: Water the transplanted seedlings immediately, ensuring the soil is evenly moist.
Aftercare and Maintenance:
- Watering routine: Maintain soil moisture by watering the Wallflowers deeply whenever the top inch (2.5 cm) of soil feels dry.
- Weed control: Regularly remove weeds around the Wallflowers to prevent competition for nutrients.
- Deadheading: Remove faded or wilted flowers to encourage continuous blooming.
- Fertilization: Apply a balanced, slow-release fertilizer in early spring and early fall each year to promote healthy growth and blooms.
- Disease and pest prevention: Monitor the plants regularly for any signs of diseases or pests, and take appropriate measures to combat them promptly.
How to grow this plant in your garden
With their vibrant blooms and delightful fragrance, wallflowers are a favorite among gardeners. If you’re interested in growing these lovely plants, here are some simple steps to get you started:
- Select the Right Location: Wallflowers thrive in full sunlight, so choose a spot in your garden that receives at least 6 hours of direct sunlight each day. They also prefer well-draining soil, so ensure that the area has good drainage.
- Prepare the Soil: Before planting wallflowers, it’s important to prepare the soil. Remove any weeds or debris from the area and loosen the soil with a garden fork or tiller. Incorporate organic matter, such as compost or well-rotted manure, to improve soil fertility and drainage.
- Planting Wallflowers: Wallflowers can be grown from seeds or transplants. If you choose to start from seeds, sow them directly into the prepared soil in early spring or late summer. Alternatively, you can purchase young wallflower plants from a nursery and transplant them into your garden. Dig a hole slightly larger than the root ball, place the plant in the hole, and backfill with soil. Space the plants about 6-12 inches apart to allow for proper growth.
- Watering: After planting, water the wallflowers thoroughly to settle the soil around the roots. Wallflowers have moderate water needs and prefer to be kept evenly moist. Water deeply but infrequently, allowing the soil to dry out slightly between waterings. Avoid overwatering, as this can lead to root rot and other issues.
- Fertilizing: Wallflowers are not heavy feeders, but they can benefit from a light application of balanced fertilizer in early spring. Use a slow-release granular fertilizer or a liquid fertilizer diluted to half strength. Follow the manufacturer’s instructions for proper application rates.
- Pruning and Deadheading: To encourage continuous blooming, deadhead the spent flowers regularly. This will prevent seed formation and redirect the plant’s energy towards producing more blooms. Additionally, you can prune wallflowers lightly after their main blooming period to maintain a compact and tidy appearance.
- Pest and Disease Control: Wallflowers are generally resistant to most pests and diseases. However, they may occasionally be susceptible to aphids, slugs, and snails. Monitor your plants regularly and take appropriate measures, such as handpicking or using organic pest control methods, if necessary.
- Winter Care: Most wallflower varieties are hardy perennials, meaning they can withstand cold temperatures. However, if you live in an area with severe winters, it’s a good idea to provide some winter protection. Mulch around the base of the plants with a layer of organic material, such as straw or shredded leaves, to insulate the roots and protect them from frost.
Interesting facts about Wallflower
Wallflower plants are a group of flowering plants that belong to the Brassicaceae family. These plants are known for their vibrant colors and beautiful fragrance, making them a popular choice for gardens and landscapes. Here are some interesting facts about Wallflower that will surely pique your curiosity.
- Extensive Variety: The Wallflower genus, Erysimum, consists of around 180 different species, providing a wide range of options for gardeners and plant enthusiasts. These species vary in size, color, and growth habits, ensuring there is a Wallflower plant suitable for every garden or landscape.
- Vibrant Blooms: One of the most striking features of Wallflower plants is their colorful blooms. These plants produce clusters of small, four-petaled flowers in shades of yellow, orange, pink, purple, and red. Some species even display a combination of colors in their blooms, creating a visually stunning display.
- Fragrance Galore: Wallflowers are known for their sweet and intense fragrance, which adds an extra dimension to their beauty. The scent of Wallflower flowers is often described as a delightful blend of honey, cloves, and vanilla. Placing these plants near windows or in outdoor seating areas allows you to enjoy their captivating fragrance.
- Long-Lasting Blooms: Wallflowers have an impressive blooming period, often lasting for several weeks or even months. This extended flowering time ensures that your garden remains filled with color and fragrance for an extended period, adding charm to both spring and summer landscapes.
- Attractive to Pollinators: The bright-colored blooms and enticing fragrance of Wallflowers make them highly attractive to various pollinators, such as bees and butterflies. By including Wallflower plants in your garden, you can create a haven for these beneficial insects, helping to promote pollination and biodiversity.
- Easy to Grow: Wallflowers are generally easy to grow, making them an excellent choice for both novice and experienced gardeners. These plants thrive in well-drained soil and prefer sunny locations, although they can tolerate partial shade. With proper care, Wallflowers can become long-lived perennials, providing beauty and fragrance for years to come.
- Medicinal Uses: In addition to their ornamental value, Wallflowers have a history of medicinal uses. Traditional herbal medicine practitioners have used different parts of the plant to treat various ailments, including respiratory issues, digestive problems, and skin conditions. However, it is essential to consult a healthcare professional before using Wallflower for medicinal purposes.
Wallflower is a remarkable group of plants that offer a plethora of colors, scents, and benefits. Whether you’re looking to enhance your garden’s visual appeal, attract pollinators, or enjoy their charming fragrance, Wallflowers are an excellent choice. Their diverse range of species, long-lasting blooms, and ease of cultivation make them a valuable addition to any garden or landscape.