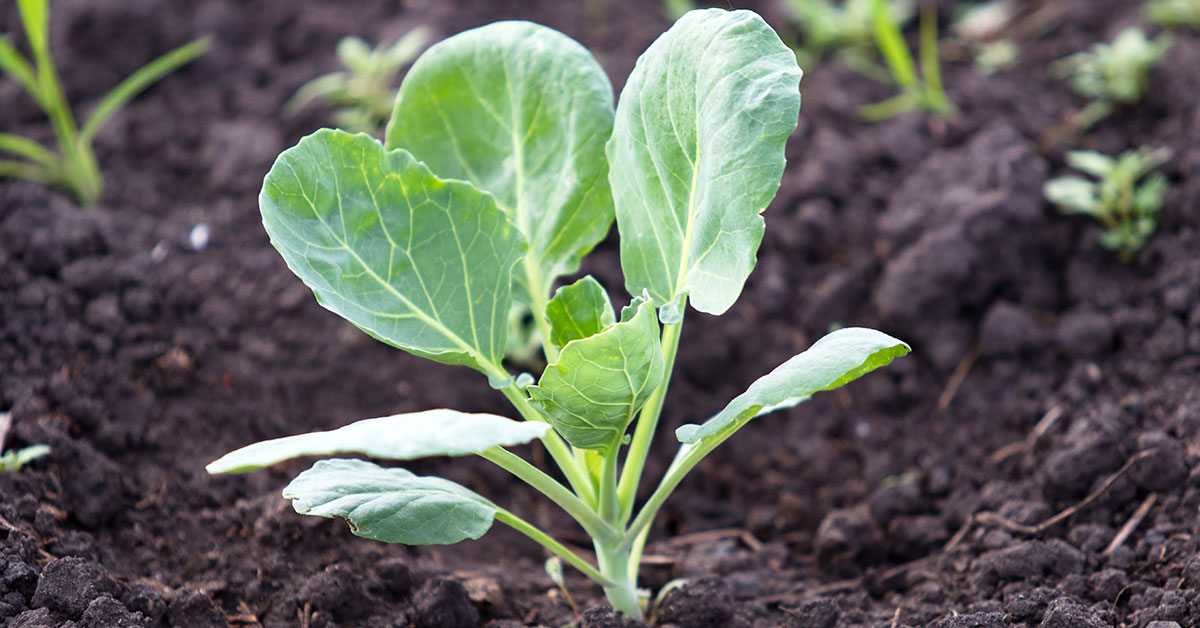

The Trafalgar Brussels Sprout is a small and mighty vegetable that meets both delicious and nutritious. As an experienced gardener, I am here to guide you through the cultivation and care of this remarkable vegetable. Trafalgar Brussels Sprouts, also known as Brassica oleracea var. gemmifera ‘Trafalgar,’ are a variety of Brussels sprouts that have gained popularity among home gardeners and chefs alike.
With their compact size, vibrant green color, and distinct flavor profile, Trafalgar Brussels Sprouts are a versatile addition to any garden or kitchen. Whether you are a seasoned gardener looking to expand your repertoire or a beginner eager to embark on a new gardening adventure, this article will provide you with all the information you need to successfully grow and enjoy Trafalgar Brussels Sprouts in your own backyard.
What is a Trafalgar Brussels Sprout?
The Trafalgar Brussels Sprout is a specific variety of Brussels sprout, known for its excellent flavor and high yield. It is a popular choice among gardeners and home growers due to its reliable performance and delicious taste. The Trafalgar Brussels Sprout plant typically grows to a height of about 2-3 feet, forming a compact and sturdy structure. The sprouts themselves are small, round, green vegetables that develop along the main stem of the plant.
They resemble miniature cabbages and are tightly packed with leaves. One of the key characteristics of Trafalgar Brussels Sprouts is their ability to produce a generous harvest. The plants are known for their high yield, making them a great choice for those who enjoy a bountiful harvest. The sprouts are typically ready for harvest in late fall or early winter, developing a sweeter flavor after exposure to cooler temperatures.
When it comes to cultivation, Trafalgar Brussels Sprouts thrive in full sun but can tolerate partial shade. They prefer well-drained soil that is rich in organic matter. Adequate watering is essential to ensure the plants stay hydrated, especially during dry spells. To cultivate Trafalgar Brussels Sprouts, it is recommended to start the seeds indoors in early spring and transplant them into the garden once the risk of frost has passed.
The plants require regular pruning to remove any yellowing or damaged leaves, promoting healthy growth and better air circulation. Trafalgar Brussels Sprouts are versatile in the kitchen and can be enjoyed in various ways. They can be steamed, roasted, sautéed, or even used in stir-fries. Their flavor is often described as nutty and slightly sweet, providing a delicious addition to any dish.
In summary, the Trafalgar Brussels Sprout is a highly regarded variety known for its flavor and abundant harvest. With proper care and cultivation, these plants can provide an enjoyable and nutritious addition to your garden and dining table.
What does Trafalgar Brussels Sprout taste like?
The Trafalgar Brussels Sprout variety is known for its excellent taste. When cooked, these sprouts have a slightly sweet and nutty flavor with a subtle bitterness. The taste is often described as complex and earthy, with a hint of cabbage-like tanginess. The texture is tender and slightly crisp, making them a delightful addition to any meal. Whether roasted, steamed, sautéed, or even enjoyed raw in salads, Trafalgar Brussels Sprouts offer a rich and satisfying taste that is sure to please your taste buds.
How to start from seed
Starting Trafalgar Brussels sprouts from seeds is a relatively simple process. Here’s a step-by-step guide to help you get started:
- Seed Selection: Choose high-quality Trafalgar Brussels sprout seeds from a reputable source. Look for fresh seeds that are not expired or damaged.
- Timing: Brussels sprouts are a cool-season crop, so it’s important to start them indoors about 6-8 weeks before the last frost date in your area. This will give the plants enough time to mature and produce sprouts before the weather gets too warm.
- Seed Starting Containers: Use seed trays or small pots with drainage holes at the bottom. Fill them with a sterile seed-starting mix or a mixture of potting soil and compost.
- Sowing Seeds: Sow the Trafalgar Brussels sprout seeds about ¼ to ½ inch deep into the soil. Plant 2-3 seeds per container to ensure germination. Space the seeds evenly and lightly press them into the soil.
- Watering: Moisten the soil gently using a spray bottle or a watering can with a fine spray nozzle. Ensure the soil remains consistently moist, but not waterlogged. Avoid overwatering, as it may lead to fungal diseases.
- Location: Place the seed trays or pots in a warm location where they can receive plenty of sunlight. A south-facing windowsill or a greenhouse with adequate light is ideal. If natural light is limited, you can also use fluorescent lights or grow lights to supplement.
- Germination: Brussels sprout seeds usually germinate within 7-14 days. Once the seedlings emerge, remove any extra or weak plants, leaving the healthiest one per container.
- Transplanting: After the seedlings have developed their first true leaves and are about 2-3 inches tall, they are ready for transplanting. Harden off the seedlings gradually by exposing them to outdoor conditions for a few hours each day. This helps them acclimate to the outdoor environment.
- Planting Outdoors: Choose a sunny location in your garden with well-draining soil. Brussels sprouts prefer fertile, loamy soil. Dig a hole large enough to accommodate the root ball of the seedling. Space the plants about 18-24 inches apart, as they require adequate room to grow.
- Care and Maintenance: Water the transplanted seedlings thoroughly after planting. Keep the soil consistently moist throughout the growing season. Mulching around the plants can help retain moisture and suppress weeds. Fertilize the plants every 4-6 weeks with a balanced organic fertilizer to provide them with essential nutrients.
- Support and Pruning: As the Trafalgar Brussels sprout plants grow taller, they may require staking or support to prevent them from toppling over due to their weight. You can use bamboo stakes or cages for support. Additionally, prune any yellowing or damaged leaves regularly to maintain plant health.
- Harvesting: Brussels sprouts take around 90-120 days to mature. Harvest the sprouts when they reach a desirable size, typically 1-2 inches in diameter. Start from the bottom of the stalk and work your way up, picking the sprouts as needed. Leave the upper part of the plant to continue growing and produce more sprouts.
By following these steps, you can successfully start and grow Trafalgar Brussels sprouts in your garden. Happy gardening!
Planting and growing Trafalgar Brussels Sprout
To plant and grow Trafalgar Brussels sprouts, you can follow these steps:
- Timing: Determine the appropriate time to plant based on your climate. Trafalgar Brussels sprouts are typically planted in early spring for a fall harvest.
- Location: Choose a spot in your garden that receives full sun (at least 6-8 hours of direct sunlight per day) and has well-drained soil. Brussels sprouts prefer slightly acidic soil with a pH between 6.0 to 6.8.
- Soil preparation: Prepare the soil by removing any weeds, rocks, or debris. Loosen the soil to a depth of about 12-15 inches and mix in organic matter such as compost or well-rotted manure to improve fertility and drainage.
- Seed starting: Start the seeds indoors about 6-8 weeks before the last frost date in your area. Sow the seeds in seed trays or small pots filled with seed-starting mix, planting them ¼ inch deep. Keep the soil consistently moist and provide warmth for germination.
- Transplanting: Once the seedlings have developed a couple of true leaves and are about 4-6 inches tall, they can be transplanted into the garden. Harden off the seedlings by gradually exposing them to outdoor conditions over a week before transplanting.
- Spacing: Plant the Trafalgar Brussels sprout seedlings about 18-24 inches apart, allowing enough space for their mature size. Ensure they are planted at the same depth as they were in the seed tray.
- Care: Water the plants regularly, keeping the soil evenly moist but not waterlogged. Mulching around the plants can help retain moisture and suppress weed growth. Fertilize every 4-6 weeks with a balanced organic fertilizer, following the package instructions.
- Support: As the plants grow taller, they may need support to prevent them from toppling over. Staking them or using cages can provide support.
- Pest and disease control: Monitor the plants regularly for pests like aphids, caterpillars, or slugs. Handpick or use organic pest control methods if necessary. To prevent diseases like clubroot or powdery mildew, rotate crops annually and ensure good air circulation around the plants.
- Harvesting: Trafalgar Brussels sprouts take around 90-100 days to mature. Harvest the sprouts from the bottom of the stalk upward as they reach a suitable size, usually when they are firm and about 1-2 inches in diameter. Remove any yellowing or damaged leaves as well.
By following these steps, you can successfully plant and grow Trafalgar Brussels sprouts in your garden and enjoy a bountiful harvest.
When to harvest
The best time to harvest Trafalgar Brussels Sprouts is when the sprouts are firm and have reached their desired size, typically around 1 to 1.5 inches in diameter. This usually occurs about 90-100 days after transplanting the seedlings into the garden. However, it’s important to note that Brussels Sprouts taste sweeter after a light frost, so if you live in a colder climate, you can wait until after the first frost to harvest them for enhanced flavor. Additionally, you can harvest the sprouts gradually, starting from the bottom of the stalk and working your way up as they mature.