
Welcome to the world of pumpkin growing! If you’re looking for a unique and stunning variety to add to your garden, look no further than the Sierra pumpkin. With its vibrant orange color, smooth skin, and impressive size, the Sierra pumpkin is a showstopper that will surely turn heads. Not only is it visually appealing, but it also boasts a deliciously sweet and flavorful flesh, making it perfect for both decorative purposes and culinary creations.
In this article, we will delve into the specifics of growing Sierra pumpkins, from selecting the right seeds to nurturing the plants and harvesting the bountiful fruits. Whether you’re a seasoned gardener or a beginner, get ready to embark on a pumpkin-growing adventure that will leave you with an abundance of beautiful Sierra pumpkins to enjoy.
What is a Sierra pumpkin?
Sierra pumpkin, also known as Cucurbita pepo ‘Sierra’, is a popular variety of pumpkin that is highly regarded for its excellent flavor and versatility. It is a medium-sized pumpkin, typically weighing between 8 to 12 pounds (3.6 to 5.4 kilograms) when fully matured.
Sierra pumpkins have a classic round shape with smooth, deep orange skin. The skin is thick and sturdy, making it ideal for carving or decorative purposes. The flesh of Sierra pumpkins is dense, sweet, and vibrant orange in color, making it perfect for culinary uses. These pumpkins are known for their exceptional taste and are often used in a variety of recipes, including pies, soups, and roasted dishes.
They have a rich, nutty flavor that is highly sought after by pumpkin enthusiasts. Sierra pumpkins are relatively easy to grow, making them a popular choice for home gardeners. They require full sun exposure and well-drained soil. It is recommended to start the seeds indoors about 2 to 4 weeks before the last frost date, and then transplant the seedlings outdoors once the soil has warmed up.
Regular watering is essential for the proper growth of Sierra pumpkins, especially during dry periods. Additionally, providing support for the vines and regularly monitoring for pests and diseases can help ensure a successful harvest. Overall, Sierra pumpkins are a fantastic choice for both culinary and decorative purposes. With their delicious flavor and attractive appearance, they are a great addition to any garden or kitchen.
What does Sierra pumpkin taste like?
Sierra pumpkins have a unique flavor profile that sets them apart from other varieties. They are known for their sweet and nutty taste, with a hint of earthiness. The flesh of Sierra pumpkins is dense and smooth, offering a creamy texture when cooked.
The flavor is often described as rich and buttery, making it perfect for both sweet and savory dishes. When roasted or baked, Sierra pumpkins develop a caramelized sweetness that enhances their overall taste. Overall, Sierra pumpkins provide a delightful combination of sweetness, nuttiness, and earthy undertones, making them a popular choice for culinary creations.
How to start Sierra pumpkin from seed
Growing Sierra pumpkins can be a rewarding experience, as these pumpkins are known for their vibrant orange color, delicious flavor, and excellent storage capabilities. Here is a step-by-step guide on how to start growing Sierra pumpkins:
- Selecting the Right Location: Sierra pumpkins require full sun exposure, so choose a location in your garden that receives at least 6-8 hours of direct sunlight daily. Ensure the soil is well-draining and rich in organic matter.
- Preparing the Soil: Before planting, prepare the soil by removing any weeds, rocks, or debris. Loosen the soil to a depth of 12-15 inches using a garden fork or tiller. Incorporate compost or well-rotted manure to improve soil fertility and drainage.
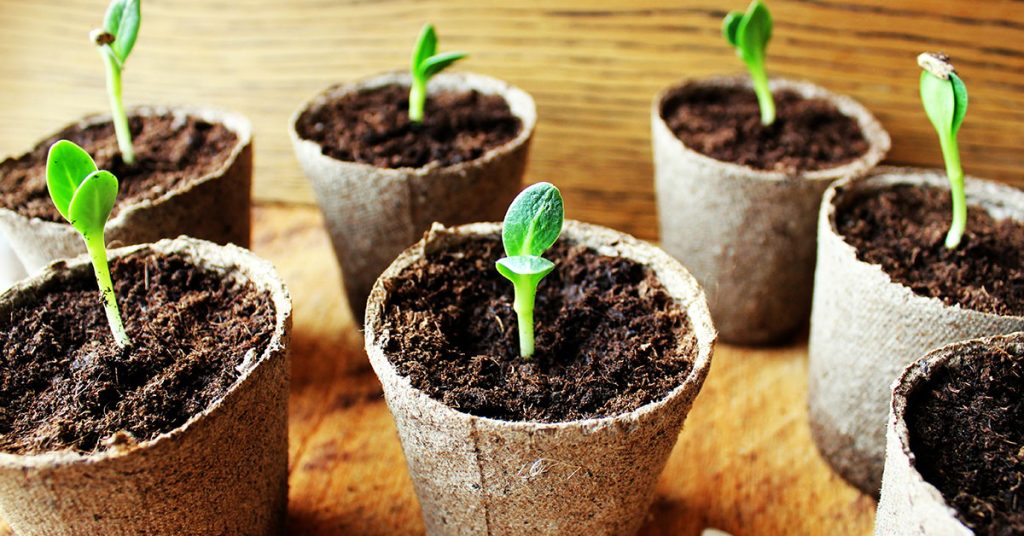
- Starting Seeds Indoors: Sierra pumpkin seeds can be started indoors 2-3 weeks before the last frost date in your area. Fill seed trays or pots with seed-starting mix and plant the seeds 1 inch deep. Keep the soil consistently moist and maintain a temperature of around 70-85°F (21-29°C) for optimal germination.
- Transplanting Seedlings: Once the danger of frost has passed and seedlings have developed 2-3 true leaves, they can be transplanted outdoors. Choose a cloudy day or evening to minimize transplant shock. Space the seedlings 3-5 feet apart in rows or hills, leaving enough space for the vines to spread.
- Direct Seeding: Alternatively, Sierra pumpkin seeds can be directly sown outdoors after the last frost date. Plant the seeds 1 inch deep and space them 3-5 feet apart. If planting in hills, create mounds of soil about 2-3 feet in diameter and sow 3-4 seeds per hill. Once the seedlings emerge, thin them to the strongest plant per hill.
- Watering: Keep the soil consistently moist but not waterlogged. Water deeply once or twice a week, providing about 1-2 inches of water per week. Avoid overhead watering to prevent the spread of diseases. Mulching around the plants can help retain moisture and suppress weeds.
- Fertilizing: Pumpkins are heavy feeders, so it’s essential to provide them with regular fertilization. Apply a balanced organic fertilizer or compost at planting time. Additionally, side-dress the plants with compost or a nitrogen-rich fertilizer when the vines start to develop.
- Pest and Disease Control: Monitor your plants regularly for pests such as aphids, squash bugs, and cucumber beetles. Use organic pest control methods like handpicking, insecticidal soaps, or neem oil if necessary. To prevent diseases, avoid overhead watering, provide good air circulation, and practice crop rotation.
- Pollination: Pumpkins require pollination to set fruit. Bees and other pollinators are essential for this process. To attract pollinators, plant flowers nearby or use a handheld pollinator to transfer pollen between male and female flowers.
- Harvesting and Storage: Sierra pumpkins are ready for harvest when the rinds are hard and the stems have dried and turned brown. Cut the pumpkins from the vine, leaving a few inches of stem attached. Cure the pumpkins in a warm, dry place for 10-14 days to harden the skin. Store them in a cool, dry area with temperatures around 50-55°F (10-13°C) and moderate humidity.
By following these steps, you can successfully grow Sierra pumpkins and enjoy a bountiful harvest of delicious, vibrant pumpkins. Happy gardening!
When to plant Sierra pumpkin outdoors
The ideal time to plant Sierra pumpkins is in late spring or early summer, when the soil has warmed up and there is no longer a risk of frost. In most regions, this would be around late May to early June. It is important to ensure that the soil temperature is consistently above 60°F (15°C) for successful germination and growth of Sierra pumpkins.
Growing & care guide
Sierra pumpkins are a popular variety known for their large size and vibrant orange color. To ensure successful growth and a bountiful harvest, it is important to follow some best practices for caring for Sierra pumpkins. Here are some guidelines to help you achieve optimal results:
- Location: Choose a sunny spot in your garden that receives at least 6-8 hours of direct sunlight each day. Pumpkins thrive in warm temperatures, so ensure the area is well-drained and protected from strong winds.
- Soil Preparation: Sierra pumpkins prefer well-draining soil with a pH level between 6.0 and 7.0. Before planting, enrich the soil with organic matter such as compost or well-rotted manure to improve its fertility and drainage. This will provide the necessary nutrients for healthy pumpkin growth.
- Planting: Wait until all chances of frost have passed before planting Sierra pumpkin seeds or seedlings. Sow the seeds directly into the ground, about 1 inch deep and 2-3 feet apart, or transplant seedlings with care, ensuring the root ball is intact. Planting in small hills or mounds can help with drainage and prevent waterlogging.
- Watering: Pumpkins require consistent moisture, especially during the fruiting stage. Water deeply, providing about 1-2 inches of water per week, either through rainfall or irrigation. Avoid overwatering, as it can lead to root rot. Mulching around the plants can help retain moisture and suppress weed growth.
- Fertilization: Pumpkins are heavy feeders, so regular fertilization is essential. Start by incorporating a balanced fertilizer into the soil before planting. As the plants grow, side-dress them with a nitrogen-rich fertilizer every 2-3 weeks until the fruit starts to develop. Switch to a phosphorus and potassium-rich fertilizer to support fruit growth and ripening.
- Pollination: Pumpkins have separate male and female flowers, and pollination is crucial for fruit development. Bees and other pollinators are usually responsible for transferring pollen between flowers. To encourage pollination, avoid using pesticides that may harm pollinators and consider planting companion plants that attract them.
- Pest and Disease Control: Keep a close eye on your Sierra pumpkins for any signs of pests or diseases. Common pests include squash bugs, cucumber beetles, and vine borers. Regularly inspect the plants and remove any pests by hand or use organic insecticides if necessary. Fungal diseases like powdery mildew can also affect pumpkins, so ensure good air circulation and avoid overhead watering.
- Pruning and Training: Sierra pumpkins tend to produce long vines that can take up a lot of space. Consider training the vines to grow in a specific direction or trellising them to save space. Prune away any excessive foliage or suckers to improve air circulation and redirect the plant’s energy towards fruit production.
- Harvesting: Sierra pumpkins are ready for harvest when the rinds are hard and the color has turned a deep, rich orange. Cut the stem with a sharp knife, leaving a few inches attached to the fruit. Handle the pumpkins with care to avoid any damage that could lead to rotting during storage.
By following these best practices, you can ensure healthy growth and a successful harvest of Sierra pumpkins. Enjoy the process and the rewarding experience of growing your own pumpkins!
Harvesting guide
Sierra pumpkins are a popular variety known for their large size and vibrant orange color. Harvesting Sierra pumpkins at the right time is crucial to ensure they are fully mature and have the best flavor and texture. Here’s a step-by-step guide on when and how to harvest Sierra pumpkins:
- Timing: Sierra pumpkins typically take around 90 to 120 days to mature from the time of planting. The exact timing can vary depending on growing conditions and climate. It’s important to keep track of when you planted the seeds or transplanted the seedlings to estimate the harvest time.
- Visual cues: One of the main indicators that a Sierra pumpkin is ready for harvest is its color. When fully mature, Sierra pumpkins develop a deep, rich orange color. The skin should be firm and hard, indicating that the pumpkin has reached its maximum size and is ready to be picked.
- Tapping test: Another way to determine if a Sierra pumpkin is ripe is by performing a tapping test. Gently tap the pumpkin with your knuckles or a small tool. If it produces a hollow sound, it is a good indication that the pumpkin is mature and ready for harvest.
- Stem drying: Check the stem of the pumpkin. When the pumpkin is mature, the stem will start to dry out and become woody. If the stem is still green and pliable, it’s best to wait a little longer before harvesting. A dry, brown stem is a sign that the pumpkin is fully mature.
- Harvesting: To harvest a Sierra pumpkin, use a sharp knife or pruning shears to cut the stem about 2 to 3 inches above the pumpkin. Be careful not to damage the pumpkin or the vine while cutting. Leaving a longer stem can help prolong the pumpkin’s shelf life.
- Handling: After harvesting, handle the pumpkins with care to avoid any bruising or damage. It’s important to support the pumpkin from the bottom while carrying it, as the weight can cause the stem to break off. Avoid carrying the pumpkin by the stem alone.
- Curing: Once harvested, Sierra pumpkins benefit from a process called curing. This involves placing the pumpkins in a warm, dry area with good air circulation for about 10 to 14 days. Curing helps harden the skin, heal any minor cuts or bruises, and improve the flavor and storage life of the pumpkin.
By following these guidelines, you can ensure that your Sierra pumpkins are harvested at their peak ripeness, resulting in delicious and vibrant pumpkins for your enjoyment.