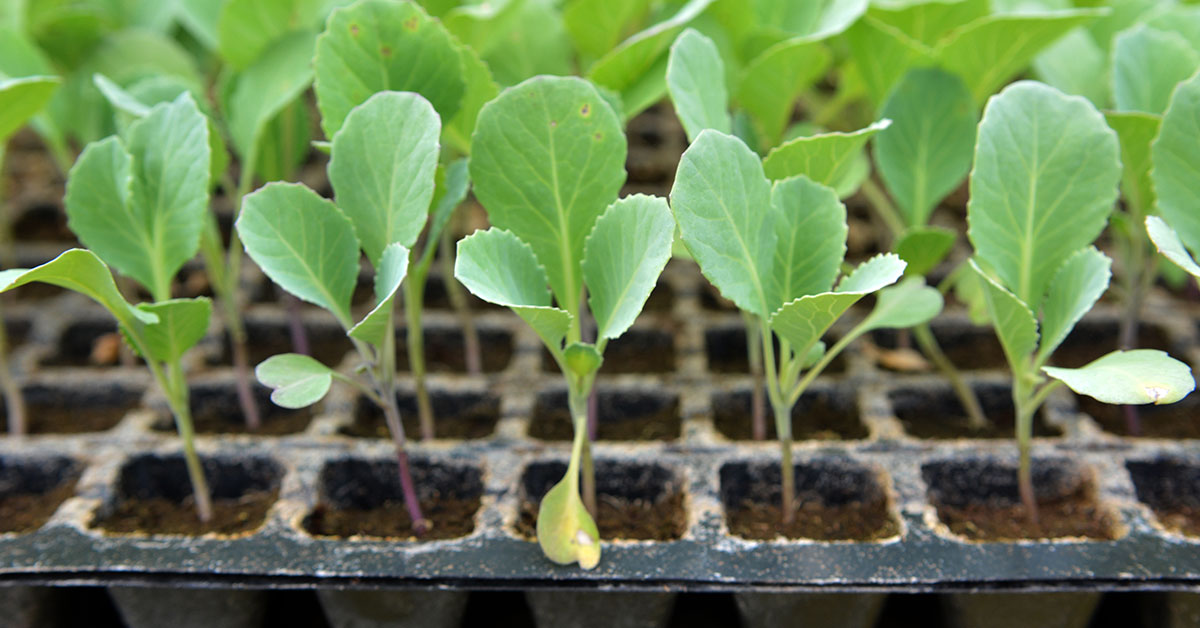

If you’re looking to add a splash of vibrant color and a burst of flavor to your vegetable garden, look no further than the Ruby Ball cabbage. This stunning variety of cabbage, also known as the Red Ball cabbage, is a true gem in the garden. With its compact size, spherical shape, and deep red-purple hue, the Ruby Ball cabbage is not only a feast for the eyes but also a treat for the taste buds.
Whether you’re a seasoned gardener or a beginner, this article will guide you through all the essential information you need to successfully grow and care for Ruby Ball cabbage in your own backyard. Get ready to elevate your garden game and enjoy the beauty and deliciousness of this unique vegetable!
What is a Ruby Ball Cabbage?
Ruby Ball Cabbage, also known as Red Cabbage or Red Drumhead Cabbage, is a popular variety of cabbage known for its vibrant red-purple color and round shape. It is a cool-season vegetable that belongs to the Brassica family, which includes other cruciferous vegetables like broccoli and kale. The Ruby Ball Cabbage typically grows to medium size, with a dense head that can reach about 6-8 inches in diameter.
The outer leaves of the cabbage are a deep red color, while the inner leaves are a lighter shade of red or even purple. The texture of the leaves is relatively smooth and crisp, making it a versatile ingredient in various culinary preparations. This cabbage variety is prized not only for its attractive appearance but also for its nutritional value. It is an excellent source of vitamins C and K, as well as dietary fiber. Ruby Ball Cabbage also contains antioxidants and other beneficial plant compounds that contribute to its health benefits.
In terms of cultivation, Ruby Ball Cabbage prefers cool temperatures and fertile, well-drained soil. It is typically grown as a biennial crop, meaning it takes approximately two growing seasons to complete its life cycle. It can be sown directly in the ground or started indoors as transplants, depending on the climate and growing conditions. Ruby Ball Cabbage is a versatile vegetable that can be enjoyed in various ways. It can be used raw in salads, coleslaw, or pickled for a tangy flavor.
When cooked, the cabbage’s vibrant color may fade slightly, but it still retains a tender texture and a slightly sweet, earthy taste. It can be sautéed, steamed, stir-fried, or even roasted to bring out its delicious flavors. Overall, Ruby Ball Cabbage is a visually striking and nutritious vegetable that adds a pop of color to any garden and brings a tasty and healthy addition to your meals.
What does Ruby Ball Cabbage taste like?
The Ruby Ball cabbage is known for its vibrant purple-red color and dense, round shape. When it comes to taste, this cabbage variety offers a delightful combination of sweetness and mild earthiness. The leaves are tender and crisp, offering a satisfying crunch when eaten either raw or cooked.
The flavor profile of Ruby Ball cabbage is often described as slightly sweeter and milder compared to other cabbage varieties. It has a subtle sweetness that balances out the natural earthy undertones, making it a versatile ingredient in various culinary preparations.
When consumed raw, the Ruby Ball cabbage has a refreshing and slightly tangy taste. It can be a great addition to salads, slaws, or even enjoyed on its own as a crunchy and nutritious snack. Cooking the cabbage brings out its natural sweetness even more, while retaining a pleasant texture. It can be sautéed, stir-fried, steamed, or roasted, adding depth and flavor to a wide range of dishes.
Overall, the Ruby Ball cabbage offers a delicious and well-balanced taste that can complement both raw and cooked preparations, making it a popular choice among gardeners and chefs alike.
How to start from seed
Starting a Ruby Ball Cabbage is a relatively straightforward process. Here’s a step-by-step guide to help you get started:
- Choose the right time: Ruby Ball Cabbage is a cool-season crop, so it’s important to plant it at the appropriate time. Start your seeds indoors about six to eight weeks before the last expected frost in your area. Alternatively, you can sow the seeds directly in the garden a couple of weeks before the last frost.
- Prepare the soil: Cabbage plants prefer well-draining soil that is rich in organic matter. Prior to planting, amend the soil with compost or well-rotted manure to improve its fertility. Make sure the soil pH is around 6.5 to 7.0, as cabbage prefers slightly acidic to neutral soil.
- Start seeds indoors (if applicable): If you are starting your Ruby Ball Cabbage seeds indoors, fill seed trays or small pots with a quality seed-starting mix. Moisten the mix before planting. Sow the seeds about a quarter to a half-inch deep in each cell or pot, and then cover them with a light layer of soil.
- Provide adequate light: Place the seed trays or pots in a location that receives bright, indirect sunlight. Alternatively, you can use fluorescent grow lights to provide sufficient light for seed germination and growth.
- Maintain proper temperature and humidity: Ruby Ball Cabbage seeds germinate best at temperatures between 60-70°F (15-21°C). Ensure the environment remains consistently warm, as fluctuating temperatures can negatively affect germination. Maintain a humidity level of around 70% by covering the seed trays or pots with plastic wrap until the seeds sprout.
- Transplant seedlings (if applicable): When the seedlings have developed their second set of true leaves, they are ready to be transplanted. Harden off the seedlings by gradually exposing them to outdoor conditions over a week. Then, transplant them into the prepared garden soil, spacing them about 12-18 inches apart.
- Provide appropriate care: Keep the soil consistently moist throughout the growing season to promote healthy growth. Water your Ruby Ball Cabbage regularly, providing about 1-1.5 inches of water per week. Mulching around the plants can help retain moisture and suppress weed growth.
- Fertilize: Cabbage plants are heavy feeders, so it’s important to provide them with sufficient nutrients. Apply a balanced fertilizer, such as a 10-10-10 or 14-14-14, according to the package instructions. Side-dress the plants with fertilizer about three weeks after transplanting and repeat every 3-4 weeks.
- Pest and disease control: Keep an eye out for common cabbage pests, such as cabbage worms, aphids, and cabbage loopers. Use organic or chemical pest control methods to manage infestations. Also, monitor for signs of diseases like clubroot or blackleg, and promptly remove and destroy any affected plants to prevent the spread.
- Harvesting: Ruby Ball Cabbage typically takes around 70-90 days to reach maturity. Harvest the heads when they are firm and solid by cutting them at the base of the plant with a sharp knife. If you notice any loose outer leaves, remove them before storing.
By following these steps, you should be able to successfully start and grow Ruby Ball Cabbage in your garden. Happy gardening!
Planting and growing Ruby Ball Cabbage
Here are the steps for planting and growing a Ruby Ball Cabbage:
- Choose the right time: Cabbages like the Ruby Ball variety are cool-season crops, so it’s best to plant them in early spring or late summer/early fall. Avoid planting during the hottest months of summer.
- Prepare the soil: Cabbages prefer well-draining soil with a pH level between 6.0 and 7.5. Amend the soil with organic matter such as compost or aged manure to improve fertility and drainage.
- Start seeds indoors: You can start Ruby Ball Cabbage seeds indoors about 6-8 weeks before the last frost date in your area. Plant the seeds in seed trays or pots filled with seed-starting mix. Keep the soil consistently moist and provide adequate light for germination.
- Transplant seedlings: Once the seedlings have developed a couple of true leaves, they can be transplanted into the garden. Harden off the seedlings by gradually exposing them to outdoor conditions over a week before transplanting. Space the seedlings about 12-18 inches apart, allowing enough room for them to grow.
- Planting in the garden: Dig a hole in the prepared soil, slightly larger than the root ball of the seedling. Gently remove the seedling from its container and place it in the hole, making sure the top of the root ball is level with the soil surface. Backfill the hole and firm the soil around the base of the plant.
- Watering and mulching: Keep the soil consistently moist, especially during dry periods. Cabbages need about 1-1.5 inches of water per week. Apply mulch around the plants to help retain moisture, suppress weeds, and regulate soil temperature.
- Fertilizing: Cabbages are heavy feeders, so apply a balanced organic fertilizer or a slow-release granular fertilizer according to package instructions. Side-dress the plants with fertilizer about 3-4 weeks after transplanting and again when they start forming heads.
- Pest and disease control: Monitor your plants regularly for common cabbage pests like cabbage worms, aphids, or slugs. Use organic pest control methods, such as handpicking or spraying with insecticidal soap, to manage any infestations. Prevent diseases by providing adequate air circulation and avoiding overhead watering.
- Harvesting: Ruby Ball Cabbages take approximately 80-100 days to mature. Harvest the heads when they are firm and compact, usually when they reach their full size of 6-8 inches in diameter. Cut the head off at the base with a sharp knife, leaving a few outer leaves intact.
By following these steps, you should be able to successfully plant and grow Ruby Ball Cabbages in your garden. Enjoy the process and the delicious harvest!
When to harvest
The best time to harvest a Ruby Ball Cabbage is typically when the head feels firm and reaches its full size. This usually occurs around 70-90 days after transplanting, depending on the specific variety and growing conditions. You can also check the outer leaves of the cabbage; if they start to loosen or turn yellow, it’s a sign that the cabbage is ready for harvest. It’s important not to wait too long, as overripe cabbages can become tough and lose their flavor.