
Redbor Kale is a stunning and nutritious addition to any garden. With its vibrant purple leaves and unique ruffled texture, Redbor Kale is not only visually appealing but also packed with health benefits. As an experienced gardener, I have had the pleasure of cultivating this remarkable variety and witnessing its growth throughout the seasons.
In this article, I will share my knowledge and insights on how to successfully grow, care for, and utilize Redbor Kale in your own garden. Whether you are a seasoned gardener or just starting out, this versatile and hardy vegetable is sure to impress and enhance your culinary creations. So, grab your gardening gloves, and let’s dive into the world of Redbor Kale!
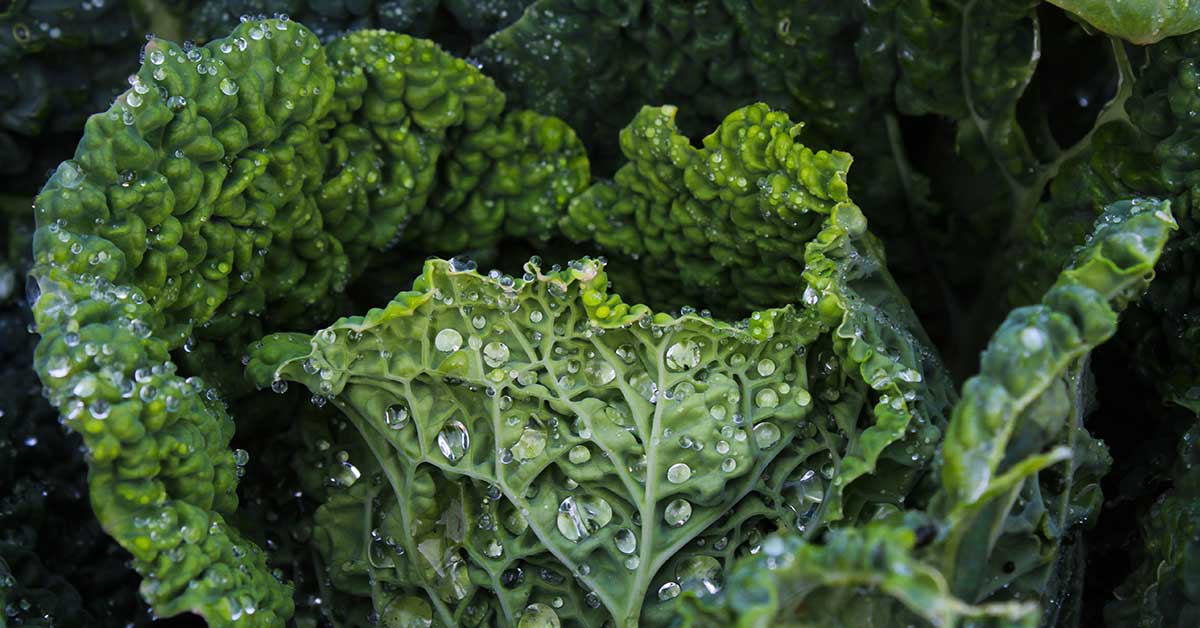
What is a Redbor Kale?
Redbor kale, also known as Red Russian kale or red kale, is a variety of kale that is prized for its beautiful deep red-purple leaves. It is a member of the Brassica oleracea species, which includes other vegetables like broccoli, cabbage, and Brussels sprouts. Redbor kale has a similar appearance to traditional kale, with its crinkled leaves and thick stalks.
However, what sets it apart is its vibrant color. The leaves range from a reddish-purple to deep burgundy, creating a striking visual display in the garden. In terms of taste, Redbor kale is slightly sweeter and milder than other varieties of kale. It has a tender texture when young, making it great for salads and raw preparations. As the leaves mature, they become more sturdy and are ideal for cooking or sautéing.
Like all kale varieties, Redbor kale is highly nutritious and packed with vitamins, minerals, and antioxidants. It is a great source of vitamin K, vitamin C, vitamin A, and fiber. It also contains compounds called glucosinolates, which have been associated with various health benefits, including anti-inflammatory and anti-cancer properties.
Redbor kale is a relatively easy plant to grow, making it popular among gardeners. It prefers cooler temperatures and can tolerate frost, making it suitable for both spring and fall planting. It thrives in full sun or partial shade and prefers well-draining soil with regular moisture.
Harvesting Redbor kale is a simple process. You can start picking the outer leaves when they reach a desirable size, allowing the inner leaves to continue growing. Alternatively, you can harvest the whole plant by cutting it at the base. Regular harvesting encourages continuous growth and ensures a fresh supply of tender leaves. Overall, Redbor kale is not only a beautiful addition to any garden but also a nutritious and versatile vegetable that can be enjoyed in a variety of culinary preparations.
What does Redbor Kale taste like?
Redbor Kale, also known as Red Russian Kale, is a variety of kale that is highly regarded for its unique taste. The leaves of Redbor Kale have a rich, earthy flavor with a hint of sweetness. The taste is often described as being milder and sweeter compared to other kale varieties.
When eaten raw, Redbor Kale has a slightly chewy texture and a crisp bite. The leaves are tender and have a pleasant crunch. As for the taste, it has a delicate bitterness that is nicely balanced with a slight sweetness, making it quite enjoyable to eat fresh in salads or as a garnish.
When cooked, Redbor Kale becomes even more flavorful. It maintains its vibrant red color, which adds a beautiful touch to any dish. The cooking process softens the leaves, making them more tender and less chewy. The taste becomes slightly sweeter and the bitterness mellows out, resulting in a delicious and slightly earthy flavor.
Overall, Redbor Kale offers a delightful taste experience. Its unique blend of flavors makes it a versatile ingredient that can be enjoyed in a variety of dishes, from salads and smoothies to sautés and stews.
How to start from seed
Starting Redbor Kale from seeds is a relatively simple process. Here are the steps to get you started:
- Seed selection: Choose a reputable source for your Redbor Kale seeds. Ensure they are fresh and viable for better germination rates.
- Timing: Redbor Kale is a cool-season crop, so it’s best to start the seeds indoors about 6-8 weeks before the last expected frost date in your area. Alternatively, you can also sow the seeds directly in the garden once the soil can be worked in early spring or late summer for a fall harvest.
- Soil preparation: Prepare a seed-starting mix or use a well-draining potting mix. Fill seed trays or small pots with the mix, leaving about ½ inch of space at the top.
- Sowing seeds: Sow 2-3 seeds per pot or cell, pressing them gently into the soil, and then cover with a thin layer of soil or vermiculite. Moisten the soil lightly using a spray bottle or a misting nozzle to avoid displacing the seeds.
- Germination: Place the trays or pots in a warm location, ideally around 70°F (21°C). Keep the soil consistently moist, but avoid overwatering, as it may cause the seeds to rot. Germination usually occurs within 7-14 days.
- Light and temperature: Once the seedlings emerge, move them to a location with bright, direct sunlight or provide them with artificial grow lights for 12-16 hours a day. Maintain a temperature of around 60-70°F (15-21°C).
- Thinning: Once the seedlings develop their first true leaves, thin them out by removing the weaker ones, leaving only the healthiest plant in each pot or cell.
- Harden off: About a week before transplanting, gradually expose the seedlings to outdoor conditions. Start by placing them outside for a few hours each day, gradually increasing the time while protecting them from harsh weather conditions.
- Transplanting: When the threat of frost has passed, and the seedlings are around 4-6 inches tall, transplant them into the garden. Space the plants around 12-18 inches apart, giving them enough room to grow.
- Care: Redbor Kale prefers fertile, well-draining soil. Water regularly, keeping the soil consistently moist but not waterlogged. Mulching around the plants will help retain moisture and suppress weed growth. Fertilize with a balanced organic fertilizer according to package instructions.
- Harvesting: Redbor Kale leaves can be harvested as soon as they reach a desirable size, usually around 55-70 days after transplanting. Start by picking the outer leaves, allowing the inner leaves to continue growing for an extended harvest period.
Remember to monitor your Redbor Kale plants for any signs of pests or diseases and take appropriate measures to prevent or treat any issues that may arise. Enjoy your homegrown Redbor Kale!
Planting and growing Redbor Kale
Planting and growing Redbor Kale can be a rewarding experience. Here are the steps to get you started:
- Select a suitable location: Redbor Kale prefers full sun but can tolerate partial shade. Choose a spot that receives at least 6-8 hours of sunlight per day. Ensure the soil is well-draining, fertile, and rich in organic matter.
- Prepare the soil: Remove any weeds or debris from the planting area. Loosen the soil using a garden fork or tiller to a depth of around 8-10 inches. Incorporate compost or well-rotted manure to improve the soil’s nutrient content and drainage.
- Sow the seeds: Redbor Kale can be started from seeds or transplants. If sowing seeds directly, plant them about ½ inch deep and 12-18 inches apart in rows that are 18-24 inches apart. If using transplants, space them similarly. Water the soil gently after planting to ensure good seed-to-soil contact.
- Watering: Keep the soil consistently moist but not waterlogged. Water deeply whenever the top inch of soil feels dry. Avoid overhead watering as it can promote disease. Mulching around the plants can help retain moisture and suppress weeds.
- Fertilization: Redbor Kale benefits from regular feeding. Apply a balanced, organic fertilizer or compost once a month during the growing season. Avoid excessive nitrogen fertilizers, as they can lead to lush foliage but reduced flavor.
- Pest and disease control: Keep an eye out for common pests like aphids, cabbage worms, and slugs. Use organic pest control methods such as handpicking, insecticidal soap, or neem oil. Proper spacing and good air circulation can help prevent diseases like powdery mildew and downy mildew.
- Harvesting: Redbor Kale leaves can be harvested when they reach a suitable size, usually around 8-10 inches in length. Begin by picking the outer leaves, leaving the central growing point intact for continuous growth. Kale leaves become sweeter after a light frost, so consider leaving the plants in the ground for an extended harvest.
- Storage: Store freshly harvested Redbor Kale leaves in the refrigerator. Rinse them thoroughly, dry them, and place them in a plastic bag with a paper towel to absorb excess moisture. They can last for up to a week when stored this way.
By following these steps, you can enjoy a productive and vibrant Redbor Kale garden. Happy gardening!
When to harvest
The best time to harvest Redbor Kale is when the leaves are mature and have reached their desired size. Typically, this occurs around 55 to 75 days after planting, depending on the growing conditions and climate. It’s important to monitor the plant closely and harvest leaves individually rather than cutting the entire plant at once. This allows the plant to continue producing new growth and extends the harvesting period. Harvesting the outer leaves first, while leaving the inner ones to grow, ensures a continuous supply of kale throughout the season.