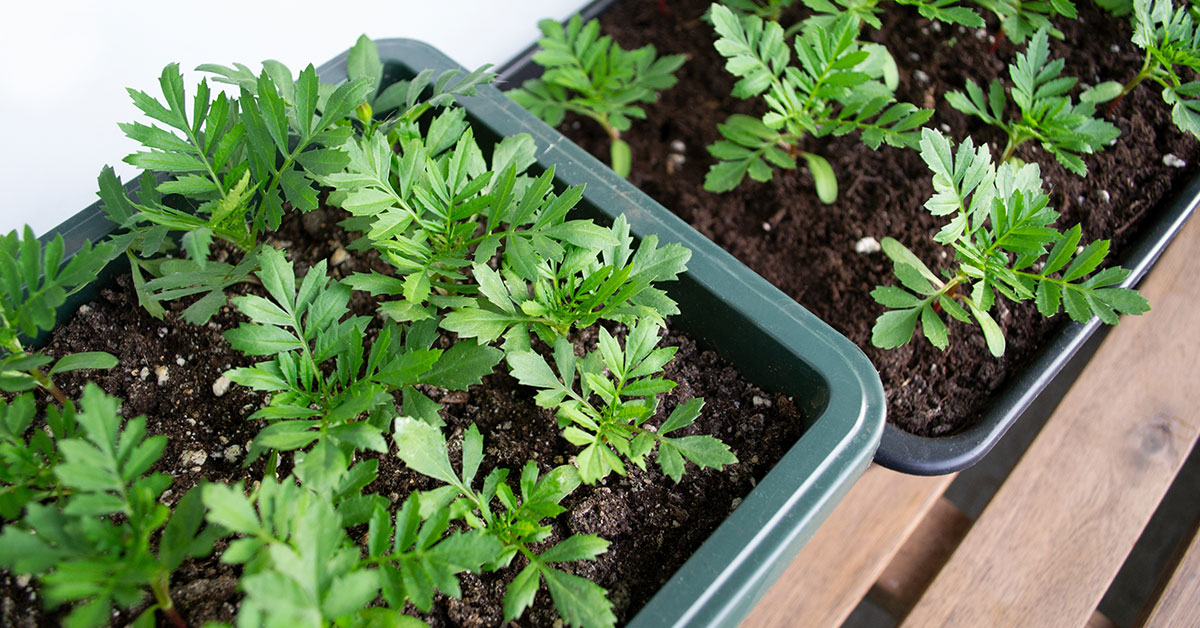

Welcome to the world of Petite Marigolds, a delightful and vibrant addition to any garden or indoor space. With their compact size and stunning blooms, these petite beauties are perfect for both beginners and seasoned gardeners alike.
Whether you’re looking to brighten up your windowsill, balcony, or garden bed, growing Petite Marigolds will bring a burst of color and cheer to your surroundings. In this article, we will explore everything you need to know about these charming flowers, from their preferred growing conditions to essential care tips. So, grab your gardening gloves and let’s dive into the wonderful world of Petite Marigolds!
What is a Petite Marigold?
A Petite Marigold, also known as Tagetes patula, is a compact and dwarf variety of the traditional marigold plant. It is a popular choice for gardeners who want to add vibrant colors to their garden or indoor spaces. Petite Marigolds typically grow to a height of 6 to 10 inches (15 to 25 cm) and have a spread of about 6 to 8 inches (15 to 20 cm). They have a bushy and mounding growth habit, forming dense clusters of flowers and foliage.
The leaves are small, dark green, and slightly serrated. The flowers of Petite Marigolds are the main attraction. They come in a variety of colors, including shades of yellow, orange, and red. The blooms are typically smaller than those of regular marigolds, measuring around 1 to 1.5 inches (2.5 to 3.8 cm) in diameter. The petals are often fringed or have a ruffled appearance, adding an extra touch of charm to the plant.
Petite Marigolds are known for their long-lasting blooms, which can persist from spring to fall in suitable growing conditions. They are also relatively low-maintenance plants, making them a great choice for beginners or those with limited gardening space. These marigolds can be grown in containers, hanging baskets, or as borders in flower beds, adding a burst of color and beauty to any setting.
In addition to their ornamental value, Petite Marigolds also have some practical benefits. They are known for their ability to repel certain pests, such as aphids and nematodes, making them a popular choice for companion planting in vegetable gardens. Overall, Petite Marigolds are delightful little plants that bring a cheerful and vibrant touch to any garden or indoor space.
Where is the Petite Marigold native?
Petite Marigold, also known as Tagetes patula, is native to Mexico and Central America. It is not considered invasive in its native range. However, when introduced to other regions, it can sometimes escape cultivation and become invasive in certain areas.
Invasive plants are those that spread aggressively and outcompete native vegetation, causing harm to the local ecosystem. While Petite Marigold is not typically classified as highly invasive, it can self-seed and spread easily under favorable conditions. This can lead to the displacement of native plants in some regions.
To prevent Petite Marigold from becoming invasive, it is important to deadhead the flowers before they produce seeds. This will help control its spread. Additionally, be cautious about planting it in areas where it could potentially escape into natural habitats and cause ecological disruption.
How to grow Petite Marigolds indoors
Petite Marigolds, also known as Tagetes patula, are beautiful and compact flowering plants that can be grown indoors. Here is a care guide to help you successfully grow Petite Marigolds indoors:
- Lighting: Place your Petite Marigold in a bright location where it can receive at least 6-8 hours of direct sunlight each day. If you don’t have access to sufficient natural light, you can use fluorescent grow lights placed 6-12 inches above the plant.
- Temperature: Petite Marigolds thrive in temperatures between 60-75°F (15-24°C). Avoid placing them near drafts or extreme temperature fluctuations.
- Watering: Water your Petite Marigold when the top inch of soil feels dry to the touch. Ensure that the pot has drainage holes to prevent waterlogging. Water thoroughly until water drains out of the bottom and remove any excess water from the saucer to avoid root rot.
- Humidity: Petite Marigolds can tolerate average indoor humidity levels, but they appreciate slightly higher humidity. You can increase humidity by placing a tray filled with water near the plant or using a humidifier.
- Soil: Use a well-draining potting mix that is rich in organic matter. A mix of peat moss, perlite, and compost works well for Petite Marigolds. Avoid heavy soils that retain too much moisture.
- Fertilizer: Feed your Petite Marigold with a balanced, water-soluble fertilizer every 2-4 weeks during the growing season (spring and summer). Follow the instructions on the fertilizer package for proper dilution and application.
- Pruning: Pinch off spent flowers regularly to encourage continuous blooming. This process, known as deadheading, redirects the plant’s energy into producing more flowers. You can also trim leggy or straggly stems to maintain a compact shape.
- Pests and diseases: Keep an eye out for common indoor plant pests like aphids, spider mites, and whiteflies. If you notice any infestation, treat it with an appropriate insecticidal soap or neem oil. Ensure good air circulation around the plant to prevent fungal diseases.
- Repotting: Petite Marigolds generally don’t require frequent repotting. However, if the plant becomes root-bound or outgrows its container, you can repot it into a slightly larger pot with fresh potting mix during the spring.
- Winter care: Petite Marigolds are annual plants, but you can try overwintering them indoors. Reduce watering and stop fertilizing during the winter months. Place the plant in a cool location with temperatures around 50-55°F (10-13°C). With reduced light, the plant may become dormant, but it may start growing again in spring if provided with adequate care.
Remember to observe your Petite Marigold regularly, as individual plant needs may vary. With proper care, you can enjoy the vibrant blooms of these lovely flowers indoors.
How to grow Petite Marigolds outdoors
Growing Petite Marigold outdoors can be a rewarding experience. Here is a care guide to help you successfully grow these beautiful flowers:
- Location: Choose a sunny spot in your garden that receives at least 6 hours of direct sunlight each day. Marigolds thrive in full sun and require warm temperatures to grow well.
- Soil: Marigolds prefer well-draining soil that is rich in organic matter. Prepare the soil by adding compost or aged manure to improve its fertility and drainage. Avoid heavy clay soils that can retain too much moisture.
- Planting: Sow the Petite Marigold seeds directly into the garden after the last frost date in your area. Make sure the soil temperature is around 70°F (21°C) for optimal germination. Scatter the seeds on the soil surface and gently press them down. Space the seeds about 6-8 inches apart.
- Watering: Keep the soil consistently moist but not waterlogged. Water the plants deeply once or twice a week, depending on the weather conditions. Avoid overhead watering, as wet foliage can lead to fungal diseases. Water at the base of the plants to keep the leaves dry.
- Fertilization: Marigolds are not heavy feeders, but you can apply a balanced, slow-release fertilizer when planting. Alternatively, you can use a liquid fertilizer every 4-6 weeks during the growing season. Follow the package instructions for proper dosage.
- Mulching: Apply a layer of organic mulch around the base of the plants to help conserve moisture, suppress weed growth, and maintain a more even soil temperature. Avoid mulching too close to the stems to prevent rotting.
- Deadheading: Regularly remove spent flowers by pinching or cutting them off. This process, known as deadheading, encourages the plant to produce more blooms and extends the flowering period.
- Pests and Diseases: Marigolds are generally resistant to pests and diseases. However, keep an eye out for aphids, slugs, and snails. If you notice any infestations, you can use organic insecticides or handpick the pests. Proper spacing and good air circulation can also help prevent fungal diseases.
- Support: Petite Marigolds usually don’t require staking or support. However, if you notice the plants becoming leggy or bending under the weight of the flowers, you can provide some support with stakes or small cages.
- Winter Care: In colder climates, Marigolds are annuals and will not survive the winter. Once the plants have finished flowering and the foliage starts to decline, you can remove them from the garden and compost them.
By following these care guidelines, you can enjoy a vibrant display of Petite Marigolds in your outdoor garden. Happy gardening!
How to grow Petite Marigolds in pots
Growing Petite Marigold in pots can be a rewarding experience. Here is a care guide to help you successfully cultivate these beautiful flowers:
- Selecting the right pot: Choose a pot that is at least 6-8 inches deep with drainage holes at the bottom. This will ensure proper drainage and prevent waterlogging.
- Soil preparation: Use a well-draining potting mix that is rich in organic matter. You can also mix in some perlite or sand to improve drainage. Avoid using heavy garden soil, as it can lead to root rot.
- Planting: Fill the pot with the prepared soil, leaving about an inch of space from the rim. Gently remove the Petite Marigold seedlings from their nursery containers and place them in the pot, spacing them about 6-8 inches apart. Lightly press the soil around the seedlings to secure them.
- Sunlight requirements: Petite Marigolds thrive in full sun, so place the pot in an area that receives at least 6-8 hours of direct sunlight per day. If you don’t have access to full sun, they can tolerate partial shade, but the flowering may be reduced.
- Watering: Water the plants thoroughly after planting to settle the soil. Once established, water the Petite Marigolds deeply whenever the top inch of soil feels dry. Avoid overwatering, as it can lead to root rot. Always check the moisture level before watering.
- Fertilization: Feed the plants with a balanced, water-soluble fertilizer every 2-3 weeks during the growing season. Follow the instructions on the fertilizer package for the correct dosage. Avoid over-fertilizing, as it can result in excessive foliage growth with fewer flowers.
- Deadheading: Regularly remove faded or spent flowers by pinching them off at the base. This process, known as deadheading, encourages continuous blooming and prevents the plant from wasting energy on seed production.
- Pests and diseases: Keep an eye out for common pests like aphids, spider mites, and whiteflies. If you notice any infestation, treat the plants with insecticidal soap or neem oil following the instructions on the product label. Proper air circulation and avoiding overwatering can help prevent fungal diseases.
- Pruning: Trim back any leggy or overgrown stems to maintain a compact and bushy appearance. Pruning also encourages branching and more flower production.
- Winter care: Petite Marigolds are annual plants, so they will not survive frost or cold temperatures. If you live in a region with harsh winters, consider bringing the pots indoors or replanting new seedlings in the following spring.
By following these care guidelines, you can enjoy a vibrant display of Petite Marigold blooms in your pots throughout the growing season. Happy gardening!
When does the Petite Marigold bloom?
Petite Marigold, also known as Tagetes patula, is a popular annual flower that blooms in the summer months. It typically starts blooming in late spring or early summer and continues to produce flowers until the first frost in the fall. The exact blooming period may vary depending on your location and growing conditions, but you can expect to enjoy the vibrant blooms of Petite Marigold throughout the summer season.
Propagation guide
To propagate Petite Marigold (Tagetes patula), you have a few options:
- Seeds: This is the most common and easiest method of propagation for marigolds. Collect the seeds from mature flowers or purchase them from a garden center. Sow the seeds in a well-draining potting mix, lightly covering them with soil. Keep the soil consistently moist and place the pot in a warm, sunny location. The seeds should germinate within a week or two. Once the seedlings have grown a few inches tall, you can transplant them into individual pots or directly into the garden.
- Stem cuttings: Take stem cuttings from a healthy, mature Petite Marigold plant. Cut a 3-4 inch stem just below a leaf node. Remove the lower leaves, leaving only a few at the top. Dip the cut end in rooting hormone (optional) and plant it in a small pot filled with a well-draining potting mix. Keep the soil moist and place the pot in a warm, bright location. After a few weeks, the cutting should develop roots. Once the roots are established, you can transplant it into a larger pot or the garden.
- Division: If you have an established Petite Marigold plant, you can propagate it through division. Carefully dig up the plant and gently separate the clumps into smaller sections, ensuring each section has roots attached. Replant the divisions in pots or directly in the garden, making sure to water them well. Division is best done in early spring or fall when the plant is dormant.
Remember to provide your newly propagated Petite Marigold plants with proper care, including regular watering, well-draining soil, and adequate sunlight.
Common pests and diseases
The common pests and diseases that can affect Petite Marigold (Tagetes patula) include:
- Aphids: These small insects feed on the sap of the plant, causing stunted growth and distorted leaves. They can be controlled by spraying the plant with a strong jet of water or using insecticidal soap.
- Spider mites: These tiny pests can cause yellowing leaves and webbing on the plant. Regularly misting the plant and keeping the humidity high can help prevent spider mite infestations. In severe cases, insecticidal soap or neem oil can be used.
- Whiteflies: These small, white insects can cause yellowing leaves and a sticky residue on the plant. They can be controlled by using yellow sticky traps or by spraying the plant with insecticidal soap.
- Powdery mildew: This fungal disease appears as a white powdery coating on the leaves and can cause stunted growth. Good air circulation and avoiding overhead watering can help prevent powdery mildew. If it occurs, fungicidal sprays can be used.
- Botrytis blight: This fungal disease causes brown spots on the leaves and flowers, and can lead to rotting. Avoid overwatering and ensure good air circulation around the plant to prevent botrytis blight. Infected parts should be removed and destroyed.
- Root rot: Overwatering or poorly draining soil can lead to root rot, causing the plant to wilt and eventually die. Ensure that the soil is well-draining and water the plant only when the top inch of soil feels dry.
Regularly inspecting your Petite Marigold for signs of pests or diseases, and taking appropriate action promptly, can help keep your plant healthy and thriving.
Facts about Petite Marigolds
Petite Marigold, also known as Tagetes patula, is a delightful and vibrant flowering plant that is popular among gardeners. Here are some interesting facts about Petite Marigold:
- Compact Size: As the name suggests, Petite Marigold is known for its small and compact size. It typically grows to a height of 6-12 inches (15-30 cm) and spreads about 6-9 inches (15-23 cm) wide. This makes it an excellent choice for container gardening or as a border plant.
- Colorful Blooms: Petite Marigold produces an abundance of colorful blooms throughout the summer and fall seasons. The flowers come in various shades of yellow, orange, and red, adding a vibrant touch to any garden or indoor space.
- Easy to Grow: Petite Marigold is relatively easy to grow, making it suitable for both beginner and experienced gardeners. It thrives in full sun but can tolerate partial shade. It prefers well-draining soil and requires regular watering, but be careful not to overwater as it can lead to root rot.
- Pest Repellent: Marigolds, including Petite Marigold, are known for their ability to repel pests. The strong scent of the flowers helps deter insects like aphids, mosquitoes, and nematodes, making them a great companion plant for vegetable gardens.
- Attracts Beneficial Insects: While Petite Marigold repels harmful insects, it also attracts beneficial insects like bees and butterflies. These pollinators play a crucial role in the garden ecosystem and help promote the growth of other plants.
- Edible Flowers: The flowers of Petite Marigold are edible and can be used to add color and flavor to salads, desserts, or as a garnish. However, it’s important to note that some people may be allergic to marigold flowers, so it’s best to exercise caution when consuming them.
- Medicinal Uses: Marigolds have been used in traditional medicine for their various medicinal properties. They are believed to have anti-inflammatory, antifungal, and antibacterial effects. However, it’s essential to consult a healthcare professional before using marigold for medicinal purposes.
- Cultural Significance: Marigolds, including Petite Marigold, hold cultural significance in many countries. They are often used in festivals, religious ceremonies, and celebrations, symbolizing joy, happiness, and good fortune.
Overall, Petite Marigold is a charming and versatile plant that adds beauty and functionality to gardens and indoor spaces. Its compact size, colorful blooms, and pest-repellent properties make it a popular choice among gardeners.