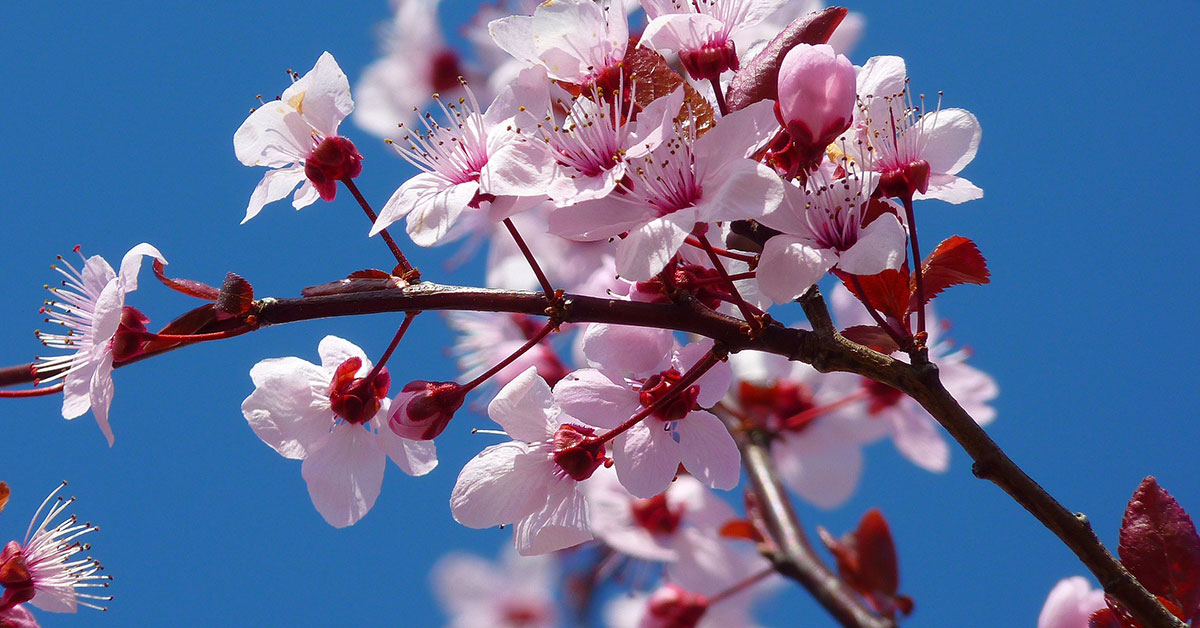
Welcome to the world of cherry tree cultivation! If you’re looking to add a touch of sweetness to your garden, the North Star Cherry (Prunus cerasus ‘North Star’) is an excellent choice. Known for its abundant harvests of tart, juicy cherries, this compact and self-pollinating tree is a favorite among home gardeners.
Whether you’re a seasoned horticulturist or a beginner with a green thumb, this article will guide you through the process of successfully growing and caring for North Star Cherry trees. From selecting the right location to providing optimal care, get ready to embark on a fruitful journey as we delve into the world of North Star Cherry cultivation.
What is a North Star Cherry?
North Star Cherry is a popular variety of sour cherry tree known for its exceptional fruit quality and compact size. It is a deciduous tree that typically reaches a height of 10 to 15 feet, making it suitable for smaller gardens or even container planting. The tree produces abundant clusters of bright red cherries that are small to medium in size, with a tart and tangy flavor. The fruit is ready for harvest in mid to late summer, usually around July. North Star Cherry trees are self-pollinating, meaning you only need one tree to ensure fruit production. They are also known for their resistance to diseases and pests, making them relatively easy to grow and maintain.
What does a North Star Cherry taste like?
North Star cherries have a unique and delightful flavor profile. They are known for their exceptional sweetness, which is balanced by a slight tartness. The cherries have a rich and intense flavor that is often described as tangy and vibrant. They have a distinct cherry taste with hints of red wine and a touch of acidity.
The flavor of North Star cherries is often compared to a combination of sweet cherries and sour cherries, making them a perfect choice for those who enjoy a balance between sweetness and tartness. The sweetness of the cherries is not overpowering, allowing the tartness to shine through and provide a refreshing and lively taste.
These cherries are also known for their juiciness, which adds to the overall flavor experience. When you bite into a North Star cherry, you can expect a burst of flavorful juice that enhances the taste and leaves a delightful aftertaste.
Whether eaten fresh, used in desserts, or made into preserves, the flavor of North Star cherries is highly sought after. Their unique combination of sweetness, tartness, and juiciness makes them a favorite among cherry enthusiasts and a versatile ingredient in various culinary creations.
How to start North Star Cherry from seed
Starting North Star Cherry trees can be a rewarding experience for any gardener. Here is a step-by-step guide to help you successfully grow North Star Cherry trees:
- Choosing the Right Location: North Star Cherry trees require full sun to thrive. Select a location in your garden that receives at least 6-8 hours of direct sunlight each day. Ensure that the soil is well-draining to prevent waterlogging.
- Soil Preparation: North Star Cherry trees prefer slightly acidic soil with a pH level between 6.0 and 6.8. Before planting, amend the soil with organic matter such as compost or well-rotted manure to improve its fertility and drainage. Remove any weeds or grass from the planting area.
- Planting: The best time to plant North Star Cherry trees is in early spring, after the last frost. Dig a hole that is wide and deep enough to accommodate the tree’s root system. Place the tree in the hole, ensuring that the bud union (the swollen area where the scion is grafted onto the rootstock) is above the soil level. Backfill the hole with soil, gently firming it around the roots.
- Watering: After planting, water the tree thoroughly to settle the soil and eliminate any air pockets. Keep the soil consistently moist but not waterlogged during the first year. Once established, North Star Cherry trees are moderately drought-tolerant but will benefit from regular watering during dry spells.
- Pruning: Pruning is essential for North Star Cherry trees to maintain their shape, promote airflow, and encourage fruit production. Prune the tree during the dormant season (late winter or early spring) to remove dead, damaged, or crossing branches. Also, thin out the canopy to allow sunlight to reach the inner branches.
- Fertilizing: Apply a balanced fertilizer specifically formulated for fruit trees in early spring, just before new growth begins. Follow the manufacturer’s instructions for application rates. Additionally, you can top-dress the tree with compost or well-rotted manure annually to provide a slow-release source of nutrients.
- Pest and Disease Control: North Star Cherry trees are susceptible to common cherry tree pests and diseases such as aphids, cherry fruit fly, and brown rot. Monitor your tree regularly and take appropriate action if you notice any signs of infestation or disease. Organic pest control methods, such as insecticidal soaps or neem oil, can be effective in managing pests.
- Harvesting: North Star Cherries are ready for harvest in mid to late summer, usually around July or August, depending on your climate. The cherries will be dark red and firm when ripe. Harvest them carefully, as they can bruise easily. Enjoy the delicious fruits fresh, or use them in various culinary applications like pies, jams, or preserves.
Remember, growing cherry trees requires patience and care. Regular maintenance, including watering, pruning, and pest control, will help ensure a healthy and productive North Star Cherry tree in your garden.
When to plant North Star Cherry outdoors
The ideal time to plant North Star Cherry trees is in the early spring, after the last frost has passed and the soil has started to warm up. This typically falls between March and May, depending on your specific location. Planting during this time allows the tree to establish its root system before the hot summer months, which promotes healthy growth and fruit production.
Growing & care guide
Caring for North Star Cherry trees requires attention to several key aspects, including planting, watering, fertilizing, pruning, and protecting against pests and diseases. Here are some best practices to ensure the health and productivity of your North Star Cherry tree:
- Choose a well-draining location with full sun exposure for your North Star Cherry tree.
- Ensure the soil pH is between 6.0 and 7.5, as cherries prefer slightly acidic to neutral soil.
- Dig a hole that is wide and deep enough to accommodate the tree’s root system without crowding or bending the roots.
- Position the tree in the hole, making sure the bud union (the swollen area where the tree was grafted onto the rootstock) is above the soil level.
- Backfill the hole with soil, gently firming it around the roots to eliminate air pockets.
- Water the tree thoroughly after planting to settle the soil.
- North Star Cherry trees require regular watering, especially during dry periods.
- Provide deep, thorough watering to ensure the entire root zone is moistened.
- Avoid overwatering, as it can lead to root rot and other problems.
- Mulch around the base of the tree to help retain moisture and regulate soil temperature.
- Apply a balanced, slow-release fertilizer in early spring before new growth begins.
- Use a fertilizer specifically formulated for fruit trees, following the manufacturer’s instructions for application rates.
- Avoid excessive nitrogen fertilization, as it can promote excessive vegetative growth at the expense of fruit production.
- Prune your North Star Cherry tree during the dormant season (late winter or early spring) to shape it and remove any dead, damaged, or diseased branches.
- Open up the center of the tree to improve air circulation and sunlight penetration.
- Remove any suckers or water sprouts that emerge from the base or along the trunk.
- Regularly prune to maintain a manageable size and encourage fruit production.
- Monitor your North Star Cherry tree regularly for common pests such as aphids, cherry fruit flies, and cherry slugs.
- Use organic or chemical insecticides as needed, following the instructions carefully.
- Protect the tree from birds by using netting or scare devices.
- Watch for signs of diseases like cherry leaf spot, bacterial canker, or brown rot, and promptly treat with appropriate fungicides or other control measures.
Remember, proper care and attention are crucial for the success of your North Star Cherry tree. Regular monitoring, timely interventions, and a well-rounded approach to maintenance will help ensure a healthy and productive tree that rewards you with delicious cherries year after year.
Harvesting guide
North Star cherries are typically ready for harvest in mid to late summer, usually around July or August, depending on your specific climate and growing conditions. To determine if the cherries are ready for harvest, look for a deep red color and a slight softness when gently squeezed. They should also be easily detached from the tree with a gentle twist.
Here are some steps to follow when harvesting North Star cherries:
- Timing: Keep an eye on your cherry tree as it approaches the expected harvest time. Look for signs of ripening, such as the deepening of the cherry’s color and a slight softness when touched.
- Gather the necessary tools: Before you start harvesting, make sure you have a pair of clean, sharp pruning shears or scissors, a clean container or basket to collect the cherries, and a ladder if needed.
- Harvesting: Carefully climb the ladder if necessary, ensuring it is stable and secure. Select the ripe cherries by gently twisting them off the tree or snipping the stems with the pruning shears. Be cautious not to damage the surrounding branches or the tree itself.
- Sorting: As you harvest the cherries, inspect them for any signs of damage, disease, or pests. Remove any cherries that are bruised, cracked, or discolored. It’s essential to only collect healthy cherries for consumption.
- Storage: After harvesting, place the cherries in a clean container or basket. If you plan to store them for a short period, you can keep them at room temperature for a day or two. For longer storage, refrigerate them in a sealed container or plastic bag. North Star cherries can also be frozen for later use by spreading them in a single layer on a baking sheet and freezing them until solid before transferring them to a freezer bag.
Remember, cherries are delicate fruits, so handle them with care during the harvesting process to avoid bruising or damaging them. Enjoy the fruits of your labor by using the freshly harvested North Star cherries in various culinary delights or simply enjoying them as a healthy snack.
