
Welcome to the world of vibrant and captivating pumpkins! If you’re looking to add a pop of color to your garden or create a unique Halloween display, then the Neon pumpkin is the perfect choice for you. With its striking fluorescent orange skin, this variety is sure to turn heads and spark conversations. But growing Neon pumpkins requires some specific knowledge and care.
In this article, we will delve into the secrets of successfully cultivating these luminous beauties, from selecting the right seeds to providing optimal growing conditions. Whether you’re a seasoned gardener or a beginner, get ready to dive into the world of Neon pumpkins and discover how to grow these stunning specimens in your own backyard.
What are Neon pumpkins?
Neon pumpkins are a unique variety known for their vibrant and eye-catching colors. These pumpkins have a bright neon orange skin that stands out in any garden or fall display. They are medium-sized, typically weighing around 10-15 pounds, making them perfect for carving or decorating. Neon pumpkins have a classic round shape with deep ribbing, adding to their visual appeal. They have a thick and sturdy stem, making them easy to handle and transport.
When it comes to taste, Neon pumpkins have a sweet and slightly nutty flavor, making them great for cooking and baking. They are also known for their excellent storage capabilities, allowing you to enjoy their beauty and taste for an extended period. Overall, Neon pumpkins are a popular choice for those looking to add a vibrant and striking element to their pumpkin patch or fall decorations.
What do Neon pumpkins taste like?
Neon pumpkins, also known as “Neon Moon” pumpkins, are a variety of pumpkin that have a unique flavor profile. The flavor of Neon pumpkins can be described as sweet and slightly nutty, with hints of earthiness. They have a smooth and creamy texture, making them ideal for various culinary uses.
When cooked, Neon pumpkins retain their vibrant orange color and develop a rich, sweet taste. The flesh is tender and moist, making it perfect for baking, roasting, or pureeing. The flavor intensifies when roasted, bringing out the natural sweetness and enhancing the nutty undertones.
Neon pumpkins are often used in recipes that call for pumpkin puree, such as pies, breads, muffins, and soups. Their sweet flavor adds depth and richness to these dishes, making them a popular choice for fall-inspired recipes. Additionally, the vibrant orange color of Neon pumpkins adds a visually appealing element to any dish.
Overall, the flavor profile of Neon pumpkins is a delightful combination of sweetness, nuttiness, and earthiness, making them a versatile and delicious choice for pumpkin lovers and culinary enthusiasts alike.
How to start Neon pumpkin seeds
Here’s a guide on starting Neon pumpkins:
- Selecting the Seeds: Start by choosing high-quality Neon pumpkin seeds from a reputable supplier or garden center. Look for seeds that are specifically labeled as Neon pumpkins to ensure you get the right variety.
- Timing: Neon pumpkins are warm-season crops, so it’s essential to start them indoors before transplanting them outside. Start the seeds about 2-3 weeks before the last expected frost date in your area. This will give the plants a head start and ensure they have enough time to mature before the first frost in the fall.
- Preparing the Soil: Neon pumpkins prefer well-draining soil that is rich in organic matter. Prepare the soil by loosening it with a garden fork or tiller. Remove any weeds or debris and incorporate compost or well-rotted manure to improve fertility and drainage.
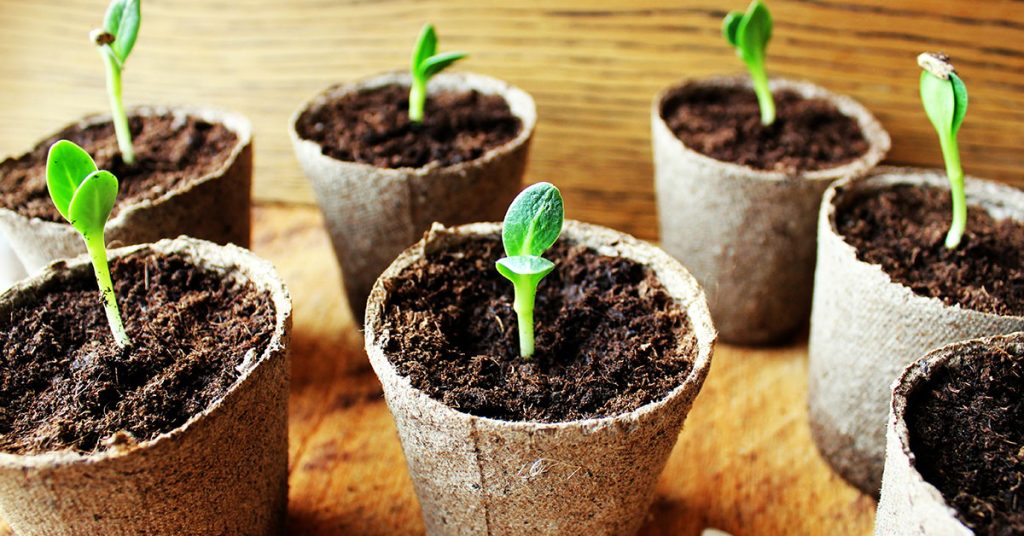
- Planting the Seeds: Fill seed trays or small pots with a seed-starting mix. Moisten the mix before planting the seeds. Plant the seeds about 1 inch deep and cover them with soil. Space the seeds 2-3 inches apart. Place the trays or pots in a warm location with temperatures around 70-85°F (21-29°C).
- Providing Optimal Conditions: Neon pumpkins require plenty of sunlight to grow well. Make sure to place the seed trays or pots in a location that receives at least 6-8 hours of direct sunlight each day. Maintain a warm and consistent temperature throughout the germination period.
- Watering: Keep the soil evenly moist but not waterlogged. Avoid overwatering, as it can lead to root rot. Water the seedlings gently from the bottom by placing the trays in a shallow tray filled with water. This allows the soil to absorb moisture without disturbing the delicate seedlings.
- Transplanting: Once the danger of frost has passed and the seedlings have developed a few sets of true leaves, they are ready to be transplanted outdoors. Choose a sunny spot in your garden with well-draining soil. Space the plants about 3-5 feet apart to provide enough room for their sprawling vines.
- Hardening Off: Before transplanting, gradually acclimate the seedlings to outdoor conditions. Start by placing them outside in a sheltered spot for a few hours each day, gradually increasing the time over the course of a week. This process, known as hardening off, helps the plants adjust to the outdoor environment.
- Planting Outdoors: Dig a hole slightly larger than the root ball of each seedling. Gently remove the seedlings from their containers, being careful not to damage the roots. Place the seedlings in the holes and backfill with soil, firming it gently around the base of the plants. Water thoroughly after planting.
- Care and Maintenance: Maintain consistent moisture levels throughout the growing season, especially during dry spells. Apply a layer of mulch around the plants to help retain moisture and suppress weed growth. Monitor for pests and diseases, and take appropriate measures if necessary. Additionally, provide support for the vines by using trellises or allowing them to trail along the ground.
- Harvesting: Neon pumpkins are typically ready for harvest when their skin turns a vibrant neon orange color and the stem starts to dry out. Use a sharp knife or pruning shears to cut the pumpkins from the vine, leaving a few inches of stem attached. Store them in a cool, dry place with good air circulation.
By following these steps, you should be able to successfully start and grow Neon pumpkins in your garden. Enjoy the process and the beautiful, vibrant pumpkins that these plants produce!
When to plant Neon pumpkins outdoors
The ideal time to plant Neon pumpkins is in late spring or early summer, when the soil temperature has reached around 60°F (15°C) and all danger of frost has passed. This is typically around May or June, depending on your specific location. Planting Neon pumpkins too early in colder temperatures can stunt their growth or even kill the plants.
Growing & care guide
Neon pumpkins, also known as Lumina pumpkins, are a unique variety of pumpkin that feature a vibrant white color. Caring for Neon pumpkins requires attention to specific factors to ensure healthy growth and optimal fruit production. Here are some best practices for caring for Neon pumpkins:
- Location and Soil: Choose a sunny location for your Neon pumpkin plants, as they require at least six to eight hours of direct sunlight daily. The soil should be well-draining and rich in organic matter. Amend the soil with compost or well-rotted manure before planting to improve its fertility and drainage.
- Planting: Neon pumpkins are typically grown from seeds. Start seeds indoors about two to three weeks before the last frost date in your area. Transplant the seedlings outdoors once the danger of frost has passed and the soil temperature has reached around 60°F (15°C). Space the plants about 3 to 4 feet apart to provide ample room for growth.
- Watering: Neon pumpkins require regular watering, especially during dry periods. Aim to keep the soil consistently moist but not waterlogged. Avoid overhead watering, as it can promote the development of fungal diseases. Instead, water at the base of the plants to ensure the roots receive adequate moisture.
- Mulching: Apply a layer of organic mulch, such as straw or wood chips, around the base of the plants. Mulching helps retain soil moisture, suppresses weed growth, and regulates soil temperature. It also acts as a barrier, preventing direct contact between the pumpkins and the soil, reducing the risk of rot.
- Fertilization: Neon pumpkins benefit from regular fertilization to support healthy growth and fruit development. Before planting, incorporate a balanced, slow-release fertilizer into the soil. Additionally, apply a side dressing of compost or a nitrogen-rich fertilizer when the plants start to vine and again when the fruit begins to form.
- Pruning and Training: Neon pumpkins tend to produce long vines, which can be trained to grow in a specific direction to save space. Regularly prune off any lateral shoots or suckers that emerge from the main vine to encourage the plant’s energy to focus on fruit production. Additionally, consider providing support, such as trellises or cages, to help the vines grow vertically.
- Pest and Disease Control: Monitor your Neon pumpkin plants regularly for signs of pests or diseases. Common pests that may affect pumpkins include squash bugs, cucumber beetles, and powdery mildew. Use organic pest control methods, such as handpicking insects or using insecticidal soaps, if necessary. To prevent diseases, avoid overhead watering, provide adequate air circulation, and practice crop rotation.
- Harvesting: Neon pumpkins are typically ready for harvest when their skin has fully turned white and the stem has become dry and corky. Use a sharp knife or pruners to cut the pumpkins from the vine, leaving a few inches of stem attached. Handle the pumpkins carefully to avoid bruising or damaging the skin.
By following these best practices, you can ensure that your Neon pumpkins thrive and produce beautiful, vibrant fruits. Enjoy the process of growing and harvesting these unique pumpkins, and have fun incorporating them into your fall decorations or culinary creations.
Harvesting guide
Neon pumpkins, also known as Lumina pumpkins, are a popular variety known for their vibrant white color. Harvesting Neon pumpkins requires careful observation and timing to ensure they are picked at the right stage of maturity. Here’s a step-by-step guide on when and how to harvest Neon pumpkins:
- Monitor the growth: Keep a close eye on your Neon pumpkins as they grow. The pumpkins will start off small and gradually increase in size over time. Typically, Neon pumpkins reach their full size within 90 to 120 days after planting.
- Check for color change: Neon pumpkins start off with a pale green color, but as they mature, they will gradually turn a bright white. When the pumpkins have achieved their characteristic white color, it’s a good indication that they are ready for harvest.
- Inspect the skin: Gently touch the skin of the pumpkin to ensure it has hardened. The skin should be firm and resistant to pressure. If the skin is still soft or easily punctured, the pumpkin needs more time to mature on the vine.
- Examine the stem: Look at the stem where it attaches to the pumpkin. A mature Neon pumpkin will have a dry, brown stem. If the stem is still green and moist, it’s an indication that the pumpkin is not yet ready for harvest.
- Time the harvest: Once the Neon pumpkins have reached their full size, turned white, and have a hardened skin with a dry stem, it’s time to harvest. Use a sharp knife or pruners to cut the pumpkin from the vine, leaving about 2 to 3 inches of stem attached to the pumpkin. This helps prevent rot and prolongs the pumpkin’s shelf life.
- Handle with care: When handling the harvested Neon pumpkins, be gentle to avoid any bruising or damage. Rough handling can lead to premature decay or rotting.
- Cure the pumpkins: After harvesting, it’s essential to cure the pumpkins to enhance their flavor and prolong their shelf life. Place the pumpkins in a warm, dry area with good air circulation for about 10 to 14 days. This process allows the skin to harden further and any minor cuts or scratches to heal.
- Store properly: Once cured, store the Neon pumpkins in a cool, dry place with a temperature between 50 to 55°F (10 to 13°C). Make sure they are kept away from direct sunlight, moisture, and extreme temperatures. Stored correctly, Neon pumpkins can last for several months.
By following these guidelines, you can ensure a successful harvest of your Neon pumpkins, allowing you to enjoy their striking white color and delicious flavor throughout the season.