
Welcome to the world of gardening! Whether you are a seasoned green thumb or just starting out, there is always something new to discover and grow. One such fascinating plant that deserves your attention is the mung bean (Vigna radiate).
Known for its versatility, nutritional benefits, and ease of cultivation, mung beans have been a staple in Asian cuisine for centuries. But this humble legume offers more than just culinary delights; it also has numerous benefits for your garden.
In this article, we will delve into the world of mung beans, exploring their history, cultivation techniques, and the many ways they can enhance your gardening experience. So, grab your gardening gloves and get ready to embark on a journey into the world of mung beans, where delicious flavors and bountiful harvests await!
What is a Mung Bean?
Mung beans, scientifically known as Vigna radiata, are a type of legume that belongs to the Fabaceae family. They are native to the Indian subcontinent and are widely cultivated in various parts of Asia. Mung beans are known for their small, oval-shaped seeds, which can be consumed in various forms. These beans are commonly used as a food source due to their high nutritional value.
They are a rich source of protein, fiber, vitamins, and minerals, making them a popular choice for vegetarian and vegan diets. Mung beans are also low in calories and fat, making them a healthy addition to any balanced diet. In terms of appearance, mung beans have a green color when fresh, but they can turn yellow when dried.
The seeds are small and round, with a smooth texture. Mung bean plants are typically short and bushy, reaching a height of about 2 feet (60 centimeters). They produce clusters of small, yellow flowers that eventually develop into pods containing the seeds. Mung beans are incredibly versatile and can be prepared in various ways.
They can be sprouted, boiled, steamed, or cooked in stews, soups, curries, and stir-fries. Mung bean sprouts are particularly popular and are commonly used in Asian cuisine, adding a crunchy texture and fresh flavor to dishes. Aside from their culinary uses, mung beans are also utilized in traditional medicine. They are believed to have several health benefits, including aiding digestion, reducing inflammation, and promoting heart health.
Additionally, mung bean starch is used in the production of noodles, vermicelli, and desserts in some Asian countries. When growing mung beans, they are typically sown directly in the soil after the last frost of spring. They prefer well-drained soil and require regular watering. The plants can tolerate a wide range of temperatures but thrive in warm and sunny conditions. With proper care and attention, mung bean plants usually reach maturity within 60-90 days, and the pods can be harvested when they turn yellow and dry.
Overall, mung beans are a nutritious and versatile legume that can be enjoyed in various culinary preparations. Whether consumed sprouted or cooked, these beans offer a range of health benefits and are a valuable addition to any garden or kitchen.
What does a Mung Bean taste like?
Mung beans have a mild, nutty flavor with a slightly earthy undertone. When cooked, they have a soft and creamy texture, similar to lentils or split peas. The taste can be described as delicate, yet satisfying. Mung beans are often used in various cuisines, such as Asian and Indian, where they are added to soups, stews, curries, or stir-fries. They also make a great addition to salads, sprouts, or even used to make desserts like mung bean paste. Overall, the taste of mung beans is versatile and enjoyable, making them a popular ingredient in many dishes.
How to start a Mung Bean from seed
Starting mung beans is a fairly simple process. Here’s a step-by-step guide to help you get started:
- Soaking: Begin by soaking the mung beans in water overnight or for at least 8 hours. This will help soften the outer layer and speed up the germination process.
- Choosing a container: Select a suitable container for growing your mung beans. It could be a pot, tray, or even a plastic container with drainage holes at the bottom to allow excess water to escape.
- Preparing the soil: Fill the container with a well-draining potting mix or a combination of garden soil and organic compost. The soil should be loose, fertile, and rich in organic matter.
- Sowing the seeds: After soaking, drain the water from the mung beans. Spread them evenly over the soil surface, ensuring they are not overcrowded. Gently press them into the soil, about 1-2 inches deep, and cover them with a thin layer of soil.
- Watering: Moisten the soil by gently watering it. Ensure that the water reaches the lower layers of the soil without causing any waterlogging. Mung beans prefer consistent moisture but avoid overwatering, as it can lead to rotting.
- Providing sunlight: Place the container in a location that receives at least 6-8 hours of direct sunlight per day. Mung beans thrive in warm temperatures, so choose a sunny spot with a temperature range of 70-85°F (21-29°C).
- Maintaining humidity: Cover the container with a plastic wrap or a transparent lid to create a greenhouse effect, which helps retain moisture and promote germination. Once the seeds sprout, remove the cover to allow airflow and prevent mold formation.
- Watering and care: Regularly check the moisture level of the soil and water whenever it feels dry to the touch. Avoid overwatering, as mung beans are susceptible to root rot. Additionally, remove any weeds that may compete for nutrients.
- Harvesting: Mung beans are ready for harvest in about 7-10 days after sprouting. You can harvest them at the sprout stage, or let them grow longer to obtain mature beans. To harvest, simply cut the sprouts or pull up the whole plant, depending on your preference.
Remember to provide proper care and attention to your mung beans throughout their growth cycle. With the right conditions and care, you can enjoy a bountiful harvest of nutritious mung bean sprouts or mature beans.
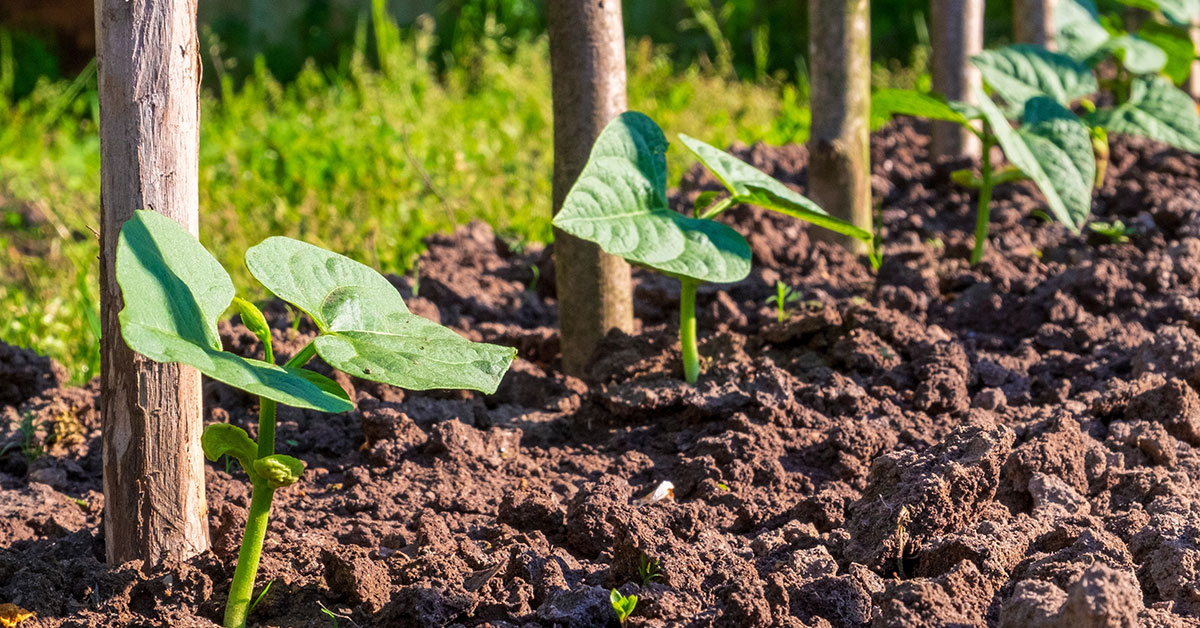
Planting and growing Mung Beans
Here are the steps for planting and growing mung beans:
- Choose a suitable location: Mung beans require full sun, so select a spot in your garden that receives at least 6-8 hours of direct sunlight each day.
- Prepare the soil: Mung beans prefer well-draining soil rich in organic matter. Remove any weeds or debris from the area and loosen the soil with a garden fork or tiller. Amend the soil with compost or aged manure to improve its fertility.
- Soak the seeds: Before planting, soak the mung bean seeds in water for about 4-6 hours. This will help to speed up germination.
- Plant the seeds: Dig small holes in the prepared soil, about 1 inch deep. Space the holes approximately 4-6 inches apart. Place one mung bean seed in each hole and cover it with soil. Gently pat down the soil to ensure good seed-to-soil contact.
- Watering: After planting, water the area thoroughly but gently to avoid dislodging the seeds. Keep the soil consistently moist but not waterlogged throughout the germination and growing period. Watering once or twice a week should be sufficient, depending on the weather conditions.
- Provide support (if necessary): If you are growing mung beans as a vine, provide a trellis or support structure for the plants to climb. This will prevent them from sprawling on the ground and make harvesting easier.
- Fertilizing: Mung beans are nitrogen-fixing plants, which means they can extract nitrogen from the air and convert it into a usable form for themselves and other plants. Consequently, they don’t require heavy fertilization. However, you can apply a balanced organic fertilizer or compost around the plants once they start growing to promote healthy development.
- Pest control: Monitor your mung bean plants regularly for any signs of pests such as aphids, beetles, or caterpillars. If you notice any infestations, use organic pest control methods like handpicking, neem oil, or insecticidal soap to manage the problem.
- Harvesting: Mung beans are typically ready for harvest within 60-90 days, depending on the variety and growing conditions. The beans should be fully mature, dry, and hard to the touch. To harvest, cut the entire plant just above the soil level. Hang the plants upside down in a well-ventilated area to dry further. Once fully dry, thresh the plants to separate the beans from the pods.
By following these steps, you should be able to successfully plant and grow mung beans in your garden. Enjoy the process and the delicious, nutritious beans you’ll harvest!
When to harvest Mung Beans
The best time to harvest mung beans is when the pods are fully mature and dry. This usually occurs around 90 to 100 days after planting. You can tell that the beans are ready for harvest when the pods turn yellowish-brown or tan in color and become brittle. You can also gently shake the pods, and if you hear rattling sounds, it indicates that the beans are dry and ready for harvest. It’s important not to wait too long to harvest, as the pods may split open and scatter the beans, making it difficult to collect them.