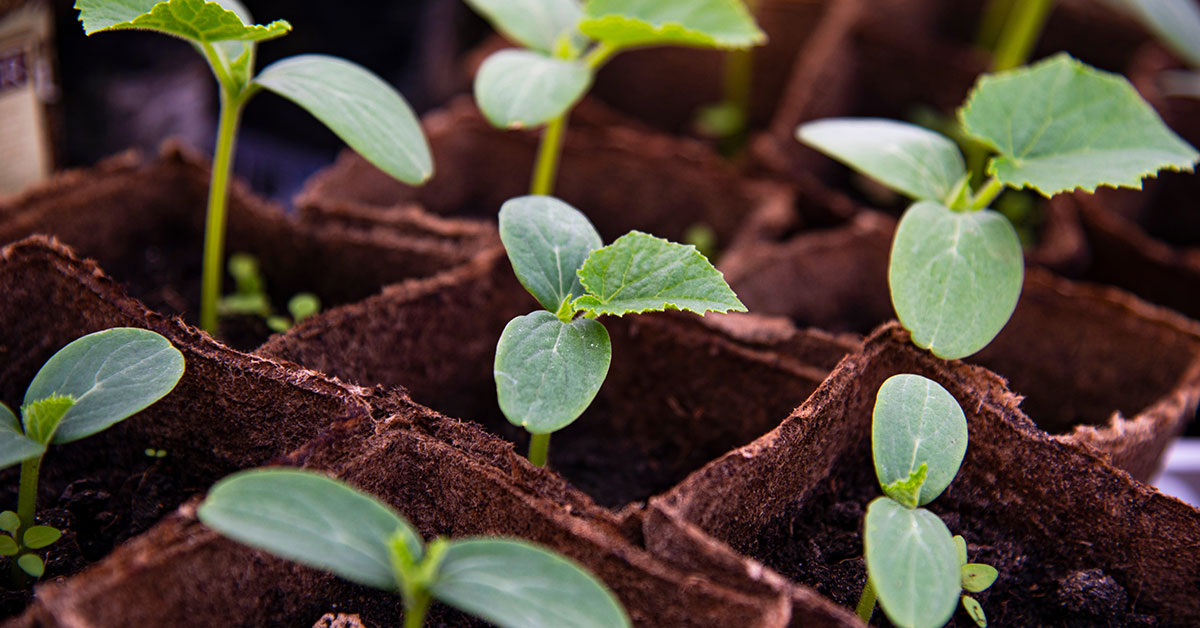

Welcome to the wonderful world of gardening, where we explore the vast array of fruits and vegetables that can be cultivated right at home. Today, we will delve into the fascinating realm of the Muncher cucumber.
Known for their crisp texture, refreshing taste, and versatility in the kitchen, Muncher cucumbers are a gardener’s delight. Whether you are a seasoned horticulturist or a novice green thumb, these cucumbers are a fantastic addition to any garden.
In this article, we will explore the origins, growing conditions, and care tips for Muncher cucumbers, ensuring that you have all the knowledge you need to successfully cultivate these delightful vegetables in your own backyard. So, let’s roll up our sleeves and embark on a journey to discover the secrets of growing Muncher cucumbers!
What is a Muncher Cucumber?
The Muncher cucumber is a popular variety of cucumber known for its crisp texture and mild, refreshing flavor. It is a burpless cucumber, which means it is easier to digest and less likely to cause indigestion or gas. The Muncher cucumber is typically smaller in size compared to other cucumber varieties, usually measuring around 6-8 inches long.
It has a smooth, thin skin that is light green in color, making it perfect for eating fresh without the need for peeling. The skin is also non-bitter, adding to its pleasant taste. One of the standout features of the Muncher cucumber is its versatility.
It can be enjoyed in various ways, making it a great addition to salads, sandwiches, or even as a snack on its own. Its crispy texture makes it ideal for pickling as well. In terms of cultivation, Muncher cucumbers are generally easy to grow and are a favorite among home gardeners.
They thrive in warm climates and require ample sunlight, regular watering, and well-drained soil. It is worth noting that these cucumbers are known for their high productivity, meaning they tend to produce a plentiful harvest.
Whether you are a seasoned gardener or a beginner, the Muncher cucumber is an excellent choice to grow in your garden. With its delicious taste, versatility, and ease of cultivation, it is sure to satisfy your cucumber cravings all season long.
What does Muncher Cucumber taste like?
The Muncher cucumber is known for its refreshing and mild taste. It has a crisp texture and a subtly sweet flavor that is often compared to a mix of a traditional cucumber and a melon. The skin of the Muncher cucumber is tender and can be eaten, adding a slightly bitter note to the overall taste. When eaten fresh, Muncher cucumbers provide a cool and hydrating experience, making them a popular choice for salads, sandwiches, and even pickling.
How to start Muncher Cucumber from seed
Starting Muncher Cucumbers from seeds is a relatively easy process. Here is a step-by-step guide to get you started:
- Seed selection: Choose high-quality Muncher Cucumber seeds from a reputable source. Look for seeds that are specifically labeled as Muncher Cucumbers.
- Indoor sowing: Start the seeds indoors 4-6 weeks before the last frost date in your area. Fill seedling trays or small pots with a well-draining seed starting mix.
- Sowing the seeds: Plant 2-3 seeds per pot or cell, about 1/2 to 1 inch deep. Gently cover the seeds with soil and lightly pat it down.
- Watering: Moisten the soil thoroughly after sowing the seeds. Ensure the soil remains consistently moist but not waterlogged throughout the germination period.
- Germination: Place the seed trays or pots in a warm location with temperatures around 70-80°F (21-27°C). Germination usually takes about 7-10 days. Once the seeds sprout, remove any weaker seedlings, leaving the strongest one per pot.
- Light and temperature: After germination, provide bright light to the seedlings. If natural sunlight is insufficient, use fluorescent grow lights placed a few inches above the plants. Maintain a temperature of around 65-75°F (18-24°C) during the day and slightly cooler at night.
- Transplanting: When the seedlings have developed 2-3 true leaves and the danger of frost has passed, usually around 3-4 weeks after germination, they are ready to be transplanted outdoors. Harden off the seedlings by gradually exposing them to outdoor conditions over the course of a week.
- Outdoor planting: Choose a sunny location in your garden or a large container with good drainage. Prepare the soil by adding compost or well-rotted organic matter to improve its fertility and drainage. Space the cucumber plants about 12-18 inches apart, allowing for adequate air circulation.
- Planting depth: Dig a hole slightly larger than the root ball of the seedling. Gently remove the seedling from its pot, being careful not to damage the roots, and place it in the hole. Backfill with soil, firming it gently around the base of the plant.
- Watering and care: Water the newly planted seedlings thoroughly and regularly to keep the soil consistently moist. Cucumbers require regular watering, especially during dry spells. Mulching around the plants can help retain moisture and suppress weeds.
- Support and trellising: Muncher Cucumbers are vining plants, so it’s beneficial to provide support such as a trellis or fence. This helps maximize space and keeps the fruits off the ground, reducing the risk of disease and pests.
- Fertilizing: Cucumbers are heavy feeders, so fertilize them with a balanced organic fertilizer or a slow-release granular fertilizer according to package instructions. Apply fertilizer a few weeks after transplanting and repeat every 4-6 weeks during the growing season.
- Pest and disease management: Monitor the plants regularly for common cucumber pests like aphids, cucumber beetles, and powdery mildew. Use organic pest control methods or consult a local gardening expert for recommendations.
- Harvesting: Muncher Cucumbers are typically ready for harvest about 60-70 days after transplanting. Harvest the fruits when they reach a desirable size, usually around 6-8 inches long. Regular harvesting encourages the plant to produce more cucumbers.
By following these steps, you should be able to successfully start and grow Muncher Cucumbers in your garden. Happy gardening!
Planting and growing Muncher Cucumber
To plant and grow Muncher Cucumbers, follow these steps:
- Choose the right time: Muncher Cucumbers are warm-season vegetables, so wait until all danger of frost has passed before planting. The soil temperature should be consistently above 60°F (15°C).
- Select a suitable location: Choose a spot in your garden that receives full sun for at least 6-8 hours a day. Ensure the soil is well-draining and rich in organic matter.
- Prepare the soil: Loosen the soil to a depth of about 12 inches (30 cm) using a garden fork or tiller. Remove any weeds, rocks, or debris. Incorporate compost or well-rotted manure to improve soil fertility and drainage.
- Sow the seeds: Create small mounds or hills about 1-2 feet apart, with each mound being 2-3 feet in diameter. Plant two to three Muncher Cucumber seeds about 1 inch deep in each mound. Alternatively, you can start the seeds indoors 3-4 weeks before the last frost date and transplant the seedlings when they have several true leaves.
- Watering: Keep the soil consistently moist but not waterlogged. Provide regular deep waterings, ensuring the soil doesn’t dry out between waterings. Avoid overhead watering to prevent leaf diseases; instead, use a soaker hose or drip irrigation.
- Provide support: Muncher Cucumbers are vining plants and benefit from vertical support. Install trellises or stakes near the plants to allow them to climb and keep the fruits off the ground. This helps prevent rot and keeps the plant more disease-resistant.
- Fertilization: Apply a balanced organic fertilizer or compost tea every 3-4 weeks to promote healthy growth and fruit production. Follow the recommended dosage on the product label.
- Mulching: Apply a layer of organic mulch, such as straw or wood chips, around the base of the plants to suppress weeds, conserve moisture, and maintain a more even soil temperature.
- Pest and disease control: Monitor your plants regularly for signs of pests like aphids, cucumber beetles, or caterpillars. Use organic pest control methods like handpicking, neem oil, or insecticidal soap if necessary. Fungal diseases like powdery mildew can be prevented by ensuring good air circulation around the plants and avoiding overhead watering.
- Harvesting: Muncher Cucumbers are typically ready for harvest in about 50-60 days after planting. Harvest the cucumbers when they reach a length of 6-8 inches. Regularly picking the cucumbers encourages the plant to produce more fruits.
By following these steps, you should be on your way to successfully planting and growing Muncher Cucumbers in your garden. Enjoy your fresh and delicious harvest!
When to harvest Muncher Cucumber
The best time to harvest Muncher cucumbers is when they reach their ideal size, which is typically around 6-8 inches in length. However, it’s important to note that the exact timing can vary depending on the specific variety and growing conditions.
To determine if a Muncher cucumber is ready for harvest, you can look for the following indicators:
- Size: As mentioned earlier, the cucumber should be around 6-8 inches in length. It should feel firm and well-filled out, without any signs of shriveling or soft spots.
- Color: Muncher cucumbers are typically bright green in color. Avoid harvesting them if they are still pale or yellowish, as they are not fully matured.
- Texture: The skin of a mature Muncher cucumber should have a slightly rough or bumpy texture. If it’s too smooth and shiny, it might be underripe.
It’s generally recommended to check your cucumber plants daily once they start producing fruits, as cucumbers can grow rapidly. Harvesting them regularly not only ensures that you pick them at their peak flavor and tenderness but also encourages the plant to continue producing more cucumbers.