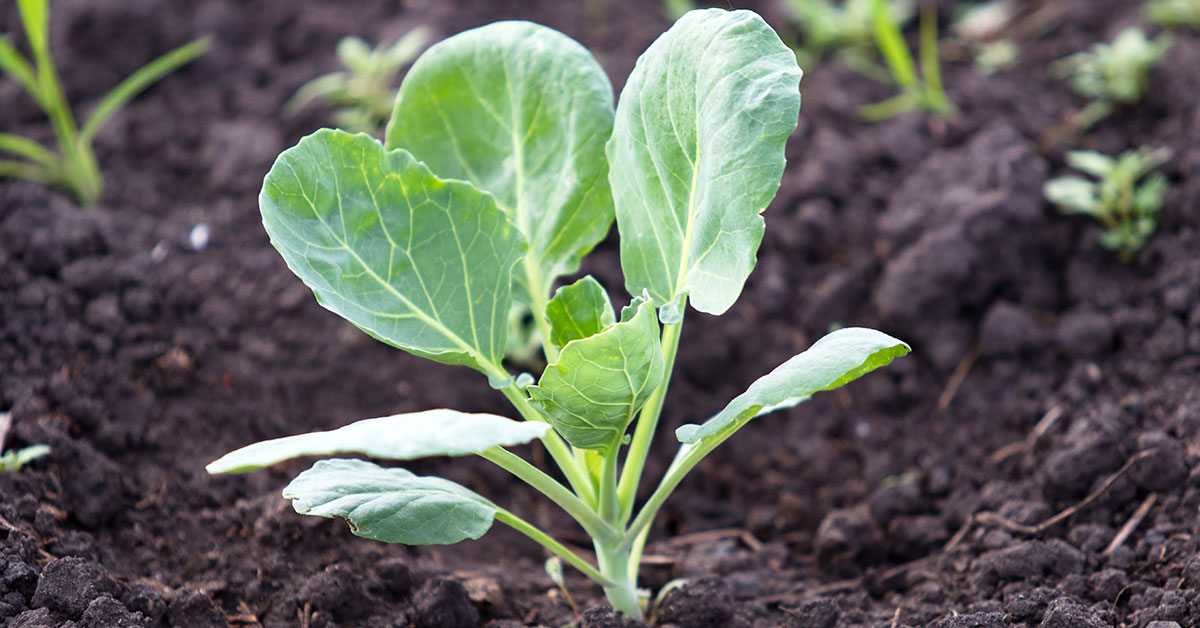

Long Island Improved Brussels Sprout is a delightful winter vegetable that is sure to please the taste buds of any avid gardener or culinary enthusiast. With its compact size and unique appearance, this variety of brussels sprout is a popular choice among home gardeners who are looking to add some variety to their winter harvest.
Long Island Improved Brussels Sprout is known for its excellent flavor and high yields, making it a rewarding choice for those who are willing to put in the effort to grow it. In this article, we will explore the history, cultivation, and care tips for this wonderful vegetable, ensuring that you have all the knowledge you need to successfully grow and enjoy this delicious winter treat.
What is a Long Island Improved Brussels Sprout?
The Long Island Improved Brussels Sprout is a popular and highly regarded variety of Brussels sprouts. It is known for producing large, firm, and flavorful sprouts that are perfect for culinary use. This variety typically grows to a height of about 2-3 feet, with sturdy stalks that can support the weight of the sprouts. The sprouts themselves are small, round, and tightly packed, resembling miniature cabbages. They usually measure about 1-1.5 inches in diameter when fully matured.
Long Island Improved Brussels Sprouts are known for their vibrant green color, which signals their freshness and readiness for harvest. One of the key features of this variety is its ability to withstand cooler temperatures, making it a great choice for fall and winter gardening. The flavor of Long Island Improved Brussels Sprouts is often described as nutty and slightly sweet, with a pleasant bitterness that enhances the overall taste.
When growing Long Island Improved Brussels Sprouts, it is important to provide them with full sun exposure and well-draining soil. These plants require regular watering to keep the soil consistently moist, but be careful not to overwater as it may lead to root rot. They also benefit from nutrient-rich soil and regular fertilization. Harvesting Long Island Improved Brussels Sprouts is typically done when the sprouts are firm and fully developed. Start by picking the lower sprouts first, allowing the upper ones to continue growing. This staggered harvesting approach ensures a prolonged harvest period.
Long Island Improved Brussels Sprouts are a versatile vegetable that can be enjoyed in a variety of ways. They can be roasted, sautéed, steamed, or even used in stir-fries and soups. Their compact size and robust flavor make them a popular choice for many culinary creations. Overall, the Long Island Improved Brussels Sprout is a reliable and delicious variety that is highly regarded by gardeners and cooks alike. Its ability to thrive in cooler temperatures and produce abundant, flavorful sprouts makes it a valuable addition to any garden.
What does Long Island Improved Brussels Sprout taste like?
The Long Island Improved Brussels Sprout has a unique and delightful taste. It has a mild, slightly sweet, and nutty flavor with a hint of bitterness. When cooked properly, the sprouts become tender and have a pleasant texture. The taste intensifies when roasted or sautéed, bringing out a rich, caramelized flavor. Overall, the Long Island Improved Brussels Sprout offers a delicious combination of earthy, sweet, and slightly bitter notes that make it a delightful addition to any dish.
How to start from seed
Starting Long Island Improved Brussels Sprouts is a relatively straightforward process. Here’s a step-by-step guide to help you get started:
- Timing: Brussels sprouts are a cool-season crop, so it’s important to start them at the right time. Start indoors about 6-8 weeks before the last expected frost in your area. Alternatively, you can direct sow the seeds in the garden about 2-3 weeks before the last frost date.
- Seed selection: Choose high-quality Long Island Improved Brussels Sprout seeds from a reputable supplier. Look for seeds that are fresh, viable, and disease-free.
- Seed starting containers: Use seed trays, peat pots, or any other containers with drainage holes for starting your seeds indoors. Ensure they are clean and sterilized to avoid any potential diseases.
- Soil mix: Prepare a well-draining seed starting mix by combining equal parts of sterile potting soil, perlite, and vermiculite. Moisten the mix before filling the containers.
- Sowing seeds: Sow the Brussels sprout seeds about ¼ to ½ inch deep in the seed starting mix. Plant 2-3 seeds per cell or container, as not all seeds may germinate. Cover the seeds lightly with the mix and gently pat it down.
- Germination: Brussels sprout seeds usually germinate within 7-14 days when provided with the right conditions. Maintain a consistent temperature between 65-75°F (18-24°C) and keep the soil moist but not waterlogged. You can cover the trays with a plastic dome or wrap them in a plastic bag to create a greenhouse-like environment.
- Light and temperature: Once the seeds germinate and sprout, remove the plastic cover and place the seedlings in a location with bright, indirect light. Ideally, provide them with 14-16 hours of light per day using fluorescent grow lights, if natural light is insufficient. Maintain a temperature around 60-70°F (15-21°C) during the day and slightly cooler at night.
- Transplanting: When the seedlings have developed a few sets of true leaves and are about 4-6 inches tall, they are ready for transplanting. Harden off the seedlings by gradually exposing them to outdoor conditions for a week before transplanting.
- Garden preparation: Choose a sunny location in your garden with well-draining soil. Amend the soil with compost or aged manure to improve its fertility and drainage.
- Transplanting in the garden: Dig a hole slightly larger than the root ball of the seedling. Gently remove the seedling from the container, being careful not to damage the roots. Place the seedling in the hole and backfill with soil, firming it gently around the roots. Space the plants about 18-24 inches apart in rows that are 2-3 feet apart.
- Care and maintenance: Provide regular watering to keep the soil evenly moist, especially during dry periods. Mulching around the plants can help retain moisture and suppress weeds. Fertilize with a balanced organic fertilizer every 4-6 weeks to promote healthy growth.
- Pest and disease control: Brussels sprouts are susceptible to pests like aphids, cabbage worms, and flea beetles. Monitor your plants regularly and take appropriate measures like handpicking or using organic insecticides if necessary. Keep an eye out for diseases such as clubroot or powdery mildew and take prompt action if you notice any signs.
- Harvesting: Long Island Improved Brussels Sprouts usually take around 90-100 days to mature. Harvest the sprouts when they are firm and about 1-2 inches in diameter. Start from the bottom of the plant and work your way up, picking the sprouts as needed. Leave the top of the plant intact as it will continue to produce more sprouts.
By following these steps, you will be well on your way to growing delicious Long Island Improved Brussels Sprouts in your garden. Happy gardening!
Planting and growing Long Island Improved Brussels Sprout
To plant and grow Long Island Improved Brussels Sprouts, follow these steps:
- Choose the right time: Brussels sprouts are a cool-season crop, so it’s best to start planting them in late summer or early fall, about 90-100 days before the first expected frost date in your area.
- Select a suitable location: Brussels sprouts require full sun, which means they need at least 6-8 hours of direct sunlight per day. They also prefer well-draining soil that is rich in organic matter.
- Prepare the soil: Before planting, amend the soil with compost or well-rotted manure to improve its fertility and moisture retention. Remove any weeds or debris from the planting area.
- Start seeds indoors (optional): If you want to get a head start, you can start the seeds indoors about 6-8 weeks before the intended planting date. Sow the seeds in trays or pots filled with seed-starting mix. Keeping them consistently moist and providing sufficient light until they develop true leaves.
- Transplant seedlings: Once the seedlings are 4-6 inches tall and have developed a strong root system, they are ready to be transplanted into the garden. Space the seedlings 18-24 inches apart in rows that are 24-36 inches apart.
- Planting directly in the garden: If you didn’t start seeds indoors, you can sow the seeds directly in the garden. Plant them about ¼-½ inch deep and space them 18-24 inches apart, thinning them later to the desired spacing.
- Watering: Keep the soil consistently moist but not waterlogged. Brussels sprouts require an inch of water per week, either through rainfall or supplemental irrigation.
- Fertilizing: Brussels sprouts benefit from regular feeding. Apply a balanced organic fertilizer every 4-6 weeks throughout the growing season. Follow the manufacturer’s instructions for application rates.
- Mulching: Apply a layer of organic mulch around the base of the plants to conserve moisture, suppress weed growth, and regulate soil temperature.
- Support: Tall varieties of Brussels sprouts may require staking to support the weight of the plants and prevent them from toppling over in strong winds. Install stakes or cages early in the season to avoid damaging the roots later.
- Pests and diseases: Brussels sprouts are prone to certain pests like aphids, cabbage worms, and cabbage loopers. Regularly inspect the plants and take appropriate measures such as handpicking, using organic insecticides, or introducing beneficial insects to control infestations. Watch out for diseases like powdery mildew and clubroot, and promptly address any issues.
- Harvesting: Brussels sprouts take around 90-100 days to mature. The sprouts will be ready for harvest from the bottom of the stalk upward, starting when they are about 1-2 inches in diameter. Twist or cut off the sprouts, starting from the bottom but leaving the upper leaves intact to allow the remaining sprouts to continue growing.
By following these steps, you can successfully plant and grow Long Island Improved Brussels Sprouts and enjoy a bountiful harvest.
When to harvest
The best time to harvest Long Island Improved Brussels sprouts is typically when the sprouts are firm and about 1-2 inches in diameter. This usually occurs around 90-100 days after transplanting, depending on the growing conditions and climate. It’s important to start monitoring the development of the sprouts as they mature because they can quickly become overripe or develop a bitter taste if left on the plant for too long. Additionally, a light frost can improve the flavor of Brussels sprouts. Harvesting them before the first hard freeze is recommended.