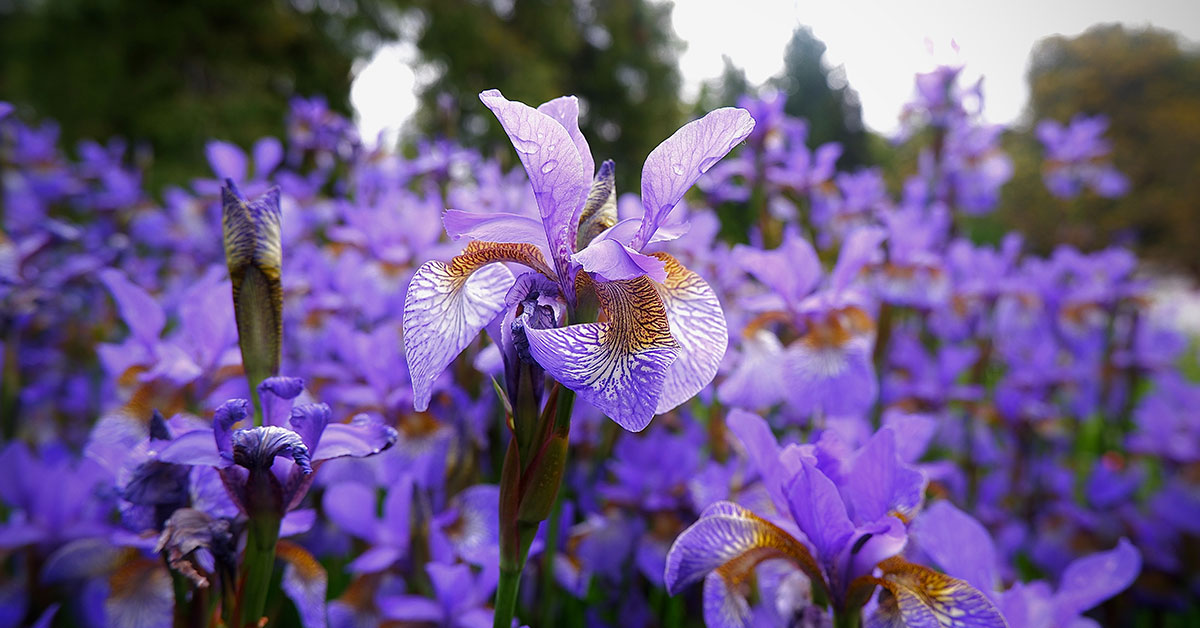

Why harvest your own iris seed pods?
Iris plants, known for their stunning and diverse blooms, produce seed pods that contain the potential for new life and genetic variation. Harvesting iris seed pods serves several essential purposes, benefiting gardeners, botanists, and the broader ecosystem alike. Here are some compelling reasons why the process of harvesting iris seed pods is valuable:
1. Plant Propagation and Hybridization: Harvesting iris seed pods enables gardeners and horticulturists to propagate and create new hybrid varieties. Iris seeds carry the genetic information from both parent plants, which opens up possibilities for introducing new colors, shapes, and patterns in the resulting offspring. Controlled breeding through seed pod collection allows for the intentional selection of desired traits, leading to the development of unique and visually captivating iris cultivars.
2. Biodiversity Conservation: As with any plant species, iris populations can face threats due to habitat loss, climate change, and disease. By harvesting iris seed pods, enthusiasts and conservationists can safeguard the genetic diversity of iris plants. Preserving a wide range of genetic material increases the species’ resilience to environmental changes and potential diseases, ensuring that future generations can continue to appreciate these beautiful flowers.
3. Preservation of Rare and Endangered Species: In some cases, certain iris species may be rare or endangered in their natural habitats. Harvesting seed pods from these threatened species can play a crucial role in their conservation efforts. By cultivating iris plants from seeds and establishing them in protected environments like botanical gardens or conservation areas, experts can help ensure the survival of these delicate species and prevent their extinction.
4. Educational and Scientific Research: Harvesting iris seed pods contributes to educational and scientific pursuits in the botanical field. Researchers can study the germination process, growth patterns, and genetic inheritance of iris seeds. This knowledge is valuable for understanding the broader principles of plant reproduction, genetics, and evolution. Additionally, the information gathered from such research can aid in the development of more effective conservation strategies for iris and other plant species.
5. Personal Enjoyment and Gardening Passion: For avid gardeners and iris enthusiasts, collecting seed pods is an exciting and rewarding process. It offers a sense of connection and accomplishment, as they witness the complete lifecycle of these captivating flowers, from the initial bloom to the maturation of seed pods. Growing iris plants from seeds also allows them to witness the uniqueness and surprises each new plant brings, fostering a deep appreciation for the wonders of nature.
When to harvest iris seed pods
The process of harvesting iris seed pods requires careful consideration of the plant’s growth and maturation stages. To ensure successful seed collection and viable offspring, gardeners should be attentive to the following guidelines:
Observation of Seed Pod Maturation: The first step in determining the right time for harvesting iris seed pods is closely monitoring the development of the pods. After the iris flowers have bloomed and pollination has taken place, seed pods will start to form at the base of the flower stem. These pods are initially green and plump but will gradually change color and texture as they mature. Wait until the pods have ripened fully, turning brown or tan, and become slightly dry and papery to the touch. At this stage, the seeds inside the pod are likely to be mature and ready for collection.
Patience and Timing: Harvesting iris seed pods requires patience, as the pods can take several weeks to reach full maturity after pollination. Rushing the process and collecting seed pods too early can result in immature seeds that are unlikely to germinate successfully. On the other hand, waiting too long may cause the pods to split open, and the seeds could be lost or become damaged. Regular monitoring and gentle handling of the seed pods will help ensure they are harvested at their peak readiness.
Climate Considerations: The timing for harvesting iris seed pods may vary depending on the local climate and weather conditions. In temperate regions, where iris plants experience distinct seasons, seed pods generally mature in late summer to early autumn. However, in warmer climates, the process may occur earlier, while in cooler climates, it may be delayed. Understanding the typical growth and flowering patterns of iris varieties in a particular region can assist gardeners in predicting the best time for seed pod collection.
Color and Texture Indicators: As the seed pods approach maturity, they may undergo visual changes that indicate readiness for harvesting. Mature iris seed pods usually take on a dry and brittle texture, and the color changes from green to brown or tan. Additionally, the seed pods might start to split open naturally, revealing the ripe seeds inside. This visual assessment helps gardeners determine whether the seed pods are ready for collection.
Early Harvest for Hybridization: If the intention is to use the collected seeds for hybridization purposes, gardeners might choose to harvest the seed pods slightly earlier than full maturity. Harvesting the pods while they are still slightly green but beginning to dry out can increase the chances of viable seeds for breeding experiments. However, this approach requires experience and knowledge of the specific iris species being crossed.
Storing your iris seeds
Storing iris seeds properly is crucial to maintain their viability and increase the likelihood of successful germination when you are ready to plant them. Here are some essential steps and tips for storing iris seeds:
Drying the Seeds: Before storing iris seeds, make sure they are completely dry. After harvesting the seed pods, spread the seeds out in a single layer on a paper towel or a clean, dry surface. Allow them to air dry for a few days in a well-ventilated area. Drying the seeds helps prevent mold and fungal growth during storage.
Cleaning the Seeds: Once the seeds are dry, remove any remaining chaff or debris from them. Gently blow on the seeds or use a soft brush to clean away any impurities. Handling the seeds with care ensures they remain intact and undamaged during the cleaning process.
Selecting the Storage Container: Choose a suitable storage container for the iris seeds. Ideal containers include paper envelopes, small paper bags, or glass jars with airtight lids. Avoid using plastic bags or containers as they can trap moisture, which may lead to mold formation.
Adding Desiccant (Optional): If you live in a humid climate or expect your storage area to have high humidity levels, you can add a desiccant to the storage container to absorb excess moisture. Silica gel packets or powdered desiccants can help keep the seeds dry during storage.
Labeling the Seeds: It is essential to label the storage container with the iris species or hybrid’s name and the date of seed collection. Proper labeling prevents confusion and helps you keep track of the seeds’ age.
Storing in a Cool, Dry Location: Find a cool, dark, and dry location for storing the iris seeds. A temperature of around 40 to 50 degrees Fahrenheit (4 to 10 degrees Celsius) is ideal for maintaining seed viability. Avoid areas with direct sunlight or significant temperature fluctuations, as these can degrade the seeds.
Checking the Seeds Periodically: Check the seeds periodically during storage to ensure they remain dry and free from mold. If any seeds appear to be moldy or show signs of deterioration, remove them immediately to prevent mold from spreading to other seeds.
Proper Seed Saving Duration: Iris seeds can remain viable for a few months to a couple of years, depending on the species and storage conditions. However, it’s best to plant the seeds as soon as possible, ideally within the first year, to increase germination success.
Scarification (Optional): Some gardeners use a process called scarification to improve germination rates. Scarification involves gently nicking or scratching the seed coat with a small file or sandpaper. This can be done just before planting to help water penetrate the seed coat more easily.
By following these steps and taking proper precautions, you can store iris seeds successfully and increase the chances of enjoying vibrant, new iris plants when you sow the seeds in your garden.
How to grow irises from seed
Growing irises from seed can be a rewarding and exciting process, but it requires patience and attention to detail. Here’s a step-by-step guide to help you successfully grow irises from seed:
1. Seed Collection: Harvest iris seeds as described in the previous section, ensuring that the seed pods have fully matured and dried. Clean and prepare the seeds for planting as soon as possible after harvesting.
2. Stratification (Cold Treatment): Most iris seeds require a period of cold stratification to break dormancy and encourage germination. To achieve this, place the cleaned seeds in a moistened paper towel or a damp sand/vermiculite mixture. Seal them in a plastic bag or a small container and refrigerate them for 8 to 10 weeks. This mimics the natural winter conditions that the seeds would experience outdoors.
3. Preparing the Planting Medium: While the seeds are undergoing stratification, prepare the planting medium. Irises prefer well-draining soil, so a mix of equal parts of potting soil and perlite or vermiculite works well. Fill small pots or seed trays with the planting medium, leaving about an inch of space from the top.
4. Sowing the Seeds: After the stratification period, take the seeds out of the refrigerator and sow them on top of the prepared planting medium. Gently press the seeds into the surface, but do not bury them, as irises need light to germinate. Water the seeds lightly to settle them into the soil.
5. Providing Bottom Heat (Optional): To improve germination rates, you can provide bottom heat to the pots or trays. This can be achieved using a seedling heat mat or by placing the containers on top of a warm surface like a refrigerator or a water heater. Bottom heat can help simulate the warmer soil temperatures of spring and encourage germination.
6. Keeping the Soil Moist: Keep the soil consistently moist but not waterlogged during the germination period. Water the pots from the bottom, using a tray filled with water, to avoid disturbing the seeds’ delicate position on the surface. You can cover the pots or trays with clear plastic to create a mini-greenhouse effect, which helps retain moisture and warmth.
7. Germination: Germination times for iris seeds can vary significantly, ranging from a few weeks to several months. Be patient and continue to monitor the pots regularly. As the seedlings emerge, remove the plastic cover to prevent excess moisture buildup and the risk of fungal issues.
8. Transplanting: When the seedlings have grown to a suitable size and have developed a few sets of true leaves (usually after several months), they can be transplanted into individual pots. Use a well-draining potting mix and give each seedling enough space to develop a robust root system.
9. Growing On: Continue caring for the iris seedlings by providing them with adequate sunlight, water, and nutrients. Gradually acclimate them to outdoor conditions if you plan to plant them in the garden.
10. Planting Outdoors: After the seedlings have grown into robust young plants, typically after one or two growing seasons, they can be planted outdoors in a sunny location with well-draining soil. Space them according to the specific iris variety’s requirements.
Growing irises from seed can be a bit more challenging than propagating from divisions, but it offers a unique opportunity to witness the full lifecycle of these captivating flowers. With careful attention and a little patience, you can enjoy the rewards of your efforts as your iris seedlings bloom into beautiful mature plants.