Welcome to the world of growing Independence Nectarine trees! If you’re looking to add a touch of sweetness to your garden, these delightful fruit trees are a perfect choice. The Independence Nectarine, a popular cultivar known for its exceptional flavor, is a self-fertile variety that produces juicy, aromatic nectarines with a beautiful red blush. In this article, we will explore the various aspects of growing Independence Nectarine trees, from selecting the right location and preparing the soil to planting, pruning, and caring for these trees throughout the seasons.
Whether you are a seasoned gardener or a beginner, this comprehensive guide will equip you with the knowledge and skills needed to successfully cultivate your very own Independence Nectarine tree and enjoy the bountiful harvest it brings. So, let’s dive in and discover the secrets to growing these delicious fruits in your own backyard!
What is Independence Nectarine?
Independence Nectarine is a popular variety of nectarine tree known for its delicious and juicy fruit. It is a self-fertile tree, meaning it does not require another tree for pollination. The fruit is medium to large in size, with a smooth, firm skin that is red-blushed over a yellow background. The flesh is yellow, freestone, and has a sweet and tangy flavor.
Independence Nectarine trees are known for their high productivity and can be grown in a variety of climates, including areas with mild winters. They require full sun and well-drained soil to thrive. The tree is also relatively disease-resistant, making it a great choice for home gardeners looking to grow nectarines.
What does Independence Nectarine taste like?
The Independence nectarine is known for its exceptional flavor profile, making it a popular choice among fruit enthusiasts. It offers a delightful combination of sweetness and acidity, creating a well-balanced taste that is both refreshing and satisfying.
The flavor of Independence nectarines can be described as intensely sweet, with a rich and juicy texture. The sweetness is often likened to that of honey or tropical fruits, such as mango or pineapple. This sweetness is complemented by a subtle tartness, which adds a pleasant tang to the overall flavor.
One of the distinguishing characteristics of Independence nectarines is their aromatic quality. When fully ripe, they release a fragrant aroma that is reminiscent of summer fruits and flowers. This aromatic quality enhances the overall sensory experience and adds to the enjoyment of eating this delicious fruit.
The flesh of Independence nectarines is typically smooth and firm, with a melting texture that practically melts in your mouth. This makes them perfect for enjoying fresh as a snack or incorporating into various culinary creations. Whether eaten on their own, added to salads, used in desserts, or even grilled, the flavor of Independence nectarines shines through and adds a delightful burst of sweetness to any dish.
Overall, the flavor profile of Independence nectarines is a harmonious blend of sweetness, acidity, and aromatic notes, making them a true delight for the taste buds.
How to start Independence Nectarine from seed
Starting an Independence Nectarine tree can be done through grafting or growing from a seed. However, grafting is the preferred method as it ensures the tree will produce the same quality and characteristics as the parent tree. Here is a guide on how to start an Independence Nectarine tree from graft stock:
- Obtain graft stock: Purchase a healthy Independence Nectarine scion from a reputable nursery or obtain it from a mature Independence Nectarine tree. The scion should be a 1-year-old shoot with 3-5 buds.
- Prepare the rootstock: Select a compatible rootstock for grafting, such as a peach or plum tree. The rootstock should be a young, vigorous tree with a diameter of about 1/2 inch (1.3 cm). Trim the rootstock to a height of about 18-24 inches (45-60 cm) above the ground.
- Make a whip-and-tongue graft: Use a sharp, sterilized knife to make a long, sloping cut on both the scion and rootstock. The cuts should be about 2-3 inches (5-7.5 cm) long and meet at the center, forming a “V” shape. Make sure the cuts match up perfectly.
- Join the scion and rootstock: Carefully fit the scion and rootstock together, ensuring the cambium layers (the green layer just beneath the bark) align. The cambium layers need to make contact for successful grafting.
- Secure the graft: Wrap the graft union tightly with grafting tape or parafilm to hold the scion and rootstock together. Make sure the tape is snug but not too tight to allow for growth.
- Provide support: Insert a stake next to the graft union to provide support for the newly grafted tree. Tie the tree to the stake using a soft, flexible material that won’t damage the bark.
- Protect the graft: Cover the graft union with grafting wax or grafting compound to prevent drying out and to protect against pests and diseases.
- Care for the grafted tree: Place the grafted tree in a location with full sun and well-draining soil. Water regularly to keep the soil moist but not waterlogged. Monitor for any signs of pests or diseases and take appropriate action if necessary.
- Monitor growth: Over time, the scion and rootstock will fuse together, and new growth will emerge from the scion. Once the graft has successfully taken, remove any side shoots or buds below the graft union.
- Provide ongoing care: Prune the tree annually to maintain its shape and remove any dead or diseased wood. Fertilize with a balanced fruit tree fertilizer according to the package instructions. Continue to monitor for pests and diseases and take appropriate measures to protect the tree.
Remember, grafting can be a delicate process, so it’s essential to follow proper techniques and take care to ensure a successful graft. If you’re unsure about grafting, it’s best to consult with a professional or experienced gardener for assistance.
When to plant Independence Nectarine outdoors
The ideal time to plant Independence Nectarine trees is during the late winter or early spring, before the tree breaks dormancy. This typically falls between February and April, depending on your specific climate and location. Planting during this time allows the tree to establish its roots before the warmer months, ensuring better growth and fruit production.
Growing & care guide
The Independence Nectarine is a popular and delicious variety of nectarine tree that requires specific care to thrive and produce abundant fruit. Here are some best practices for caring for Independence Nectarine trees:
- Planting: Choose a sunny location with well-draining soil for planting the Independence Nectarine tree. The soil should be slightly acidic, with a pH level between 6.0 and 6.5. Dig a hole that is wide and deep enough to accommodate the tree’s root system, and ensure that the graft union is above the soil level.
- Watering: Nectarine trees, including the Independence variety, require regular watering to establish strong roots and promote healthy growth. Water deeply and thoroughly, ensuring that the soil is moist but not waterlogged. During the growing season, provide about 1 to 1.5 inches of water per week. Adjust the watering frequency based on the weather conditions and the moisture needs of the tree.
- Fertilizing: Nectarine trees benefit from regular fertilization to ensure optimal growth and fruit production. Apply a balanced fertilizer, such as a 10-10-10 or 14-14-14 formula, in early spring before new growth begins. Follow the manufacturer’s instructions for application rates. Additionally, consider applying organic matter, such as compost or well-rotted manure, around the base of the tree to improve soil fertility.
- Pruning: Pruning is essential for maintaining the shape, size, and health of the Independence Nectarine tree. Prune in late winter or early spring before new growth emerges. Remove any dead, damaged, or diseased branches. Thin out crowded branches to improve air circulation and sunlight penetration. Prune to maintain an open center or vase shape, which allows for better fruit production and reduces the risk of disease.
- Pest and Disease Control: Independence Nectarine trees are susceptible to various pests and diseases, including aphids, peach leaf curl, and brown rot. Regularly inspect the tree for signs of infestation or disease, such as curled leaves, discoloration, or rotting fruit. Use organic or chemical insecticides and fungicides as necessary, following the instructions carefully. Applying dormant oil spray in late winter can help control overwintering pests and diseases.
- Thinning Fruit: To ensure larger and healthier fruit, thinning is necessary. When the fruit is about the size of a marble, remove excess fruit to allow proper spacing and airflow. Thin the fruit clusters, leaving only one or two fruits per cluster. This practice helps prevent overcrowding, improves fruit quality, and reduces the risk of disease.
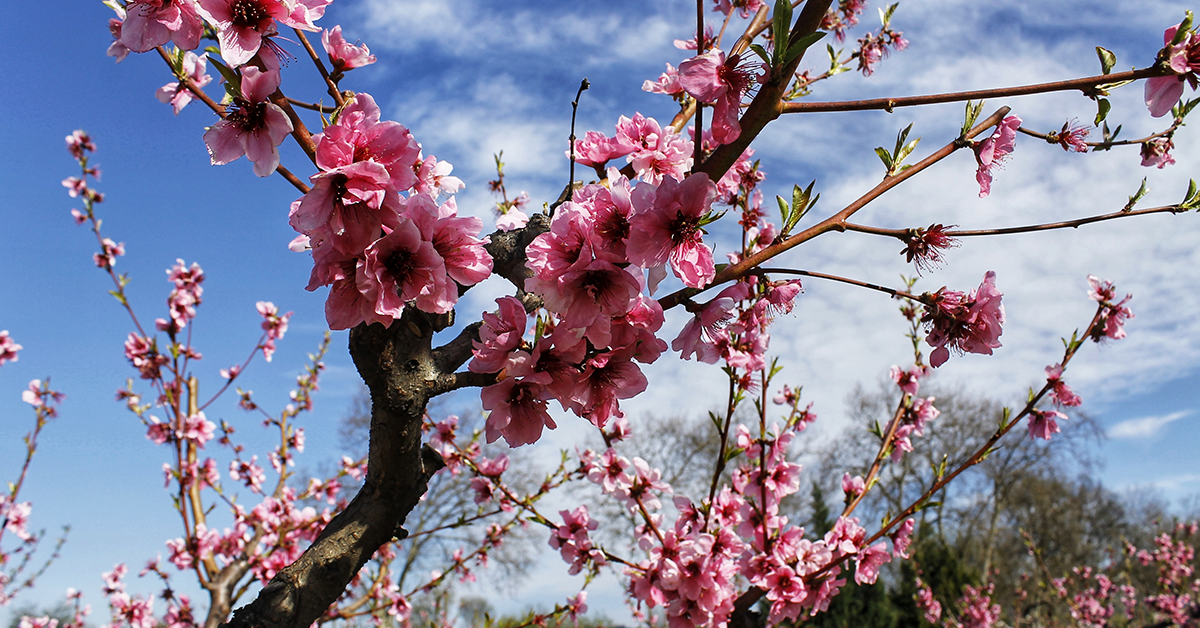
- Winter Protection: Independence Nectarine trees are vulnerable to frost damage, especially during late winter or early spring when they are in bloom. Consider using frost blankets or installing a frost protection system to shield the tree from freezing temperatures. Applying a layer of organic mulch around the base of the tree can also help insulate the roots during cold weather.
By following these best practices, you can ensure the successful growth and fruit production of your Independence Nectarine tree. Remember to monitor the tree regularly, provide adequate care, and address any issues promptly to maintain a healthy and thriving tree.
Harvesting guide
The Independence Nectarine is a popular variety known for its juicy and flavorful fruit. To ensure a successful harvest, it is important to know when and how to pick the nectarines.
- Timing: Harvesting time for Independence Nectarines typically falls in late summer, usually around mid to late August, depending on your specific climate and growing conditions. The fruit should be left on the tree until it is fully ripe and has developed its characteristic color and flavor.
- Color and Firmness: When the nectarines are ready to be harvested, they should have a deep orange or red color, depending on the specific variety. The fruit should also be slightly soft to the touch, indicating that it is ripe and ready to be picked. Avoid harvesting nectarines that are still firm or green, as they will not have reached their full sweetness and flavor.
- Twist and Lift Method: To harvest Independence Nectarines, gently twist and lift the fruit upwards, giving it a slight twist to detach it from the branch. Avoid pulling or tugging forcefully, as this can damage the fruit or the tree. If the nectarine does not come off easily, it may not be fully ripe, so it is best to leave it on the tree for a few more days before attempting to harvest it again.
- Harvesting Tools: If you have difficulty reaching the higher branches, you can use a fruit picker or a long pole with a basket attachment to safely harvest the nectarines without causing any damage to the tree or the fruit.
- Handling and Storage: Handle the harvested nectarines with care to avoid bruising or damaging the fruit. Place them gently in a shallow container or basket, making sure not to stack them on top of each other. Nectarines are best consumed fresh, but they can also be stored in the refrigerator for a few days to prolong their shelf life.
Remember, the sweetness and flavor of Independence Nectarines are at their peak when they are fully ripe on the tree. So, be patient and wait until the fruit is ready before harvesting for the best taste experience.
