

I have been a lover of houseplants for a long time and one of my favorites has been the spider plant (Chlorophytum comosum). They are so easy to care for and are very low maintenance, making them great for those who don’t have a lot of time to look after plants. Plus, propagating them is so simple. In this article, we’ll go over how to propagate new spider plants using 3 incredibly easy propagation methods.
Propagating spider plants in water
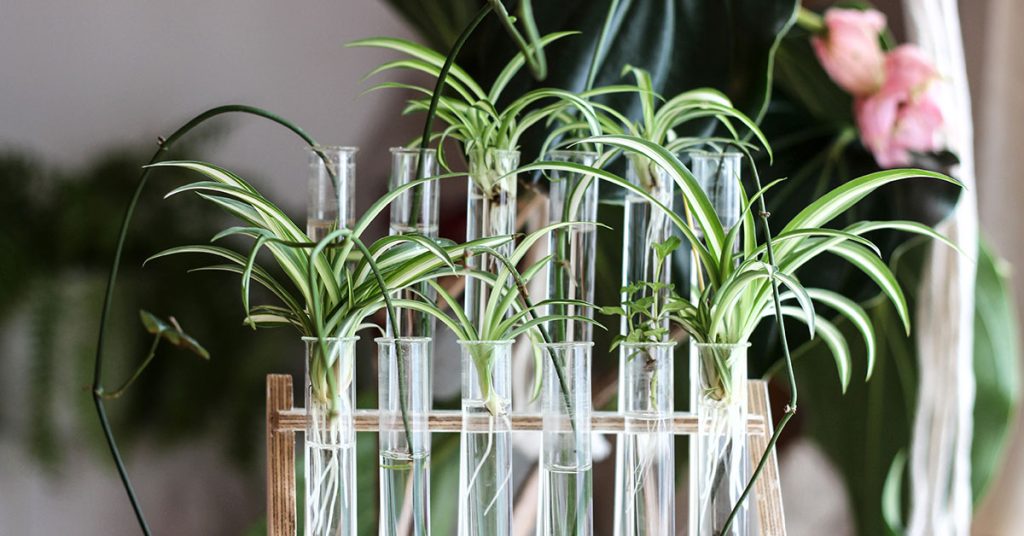
Spider plants will often readily send out runners with a small “pup” at the end. The pup looks like a miniature spider plant. Propagating a spider plant pup in water is a simple and easy process that can be done in just a few steps. First, cut the pup off the main plant and make sure the pup has roots. Then, place the pup in a glass or jar filled with room-temperature water.
Change the water every few days to avoid bacterial growth. You can add a water plant fertilizer at this stage as well, but it’s not required. Once the pup has grown several roots, pot it in a potting mix and water it. If you would like to speed up the process, you can add liquid fertilizer to the water. After a few weeks, you will have a healthy and vibrant new spider plant pup.
Propagating spider plants in soil
You can easily propagate spider plants in soil. It’s a rather straight-forward process! First, you’ll need to select a healthy pup from the mother plant. Gently twist or cut it off and make sure that it has some roots attached. Next, choose a pot filled with well-draining soil and make a hole in the center. Place the pup in the hole and backfill with soil, lightly patting it down. Make sure the pup is firmly rooted in the soil. Finally, water the soil and keep it moist. Place the plant in a sunny location and give it time to grow. With proper care, your spider plant pup should start to develop new roots and shoots in a few weeks.
Stolon propagation
Propagating a new spider plant using the stolon method is similar to the soil method but with a twist. Stolon propagation gets its name from the stolon, which is the long, runner-like branch that grows out from the plant and develops a spider plant “pup” at the end. Stolon propagation is probably the surest way to propagate a spider plant baby because it follows what would happen in nature.
For the stolon propagation method, follow all of the same steps as the above soil propagation method, but keep the pup attached to the parent plant while it gets rooted. Keeping the pup attached to the plant a little bit longer will help ensure that the pup is able to get rooted and thrive. After a few weeks, once your pup is established and beginning to grow roots and new leaves, you can cut the stolon like an umbilical cord and allow the new spider plant to grow on its own!
Caring for newly propagated spider plants
Now that you’ve propagated a brand new spider plant, it’s important that you take the time to treat it extra nicely. Follow this simple guide for new spider plant care:
- Water the newly propagated spider plant sparingly. The soil should be kept lightly moist, but not soggy.
- Place the newly propagated spider plant in bright, indirect light. Too much direct sunlight can cause the leaves to burn.
- Fertilize the newly propagated spider plant once every two weeks with a liquid fertilizer diluted to half strength.
- Prune the leaves of the newly propagated spider plant occasionally to encourage healthy growth and to keep the plant looking tidy.
- Repot the newly propagated spider plant into a slightly bigger pot once it has outgrown its current pot. Use a potting mix specifically designed for houseplants.
- Check the newly propagated spider plant for pests regularly and treat them if necessary.