
Propagating peperomia is a great way to expand your houseplant collection. Peperomia plants are easy to propagate, making them perfect for beginner plant parents. With a few simple steps, you can have a thriving new plant in no time. In this article, we’ll cover everything you need to know about propagating peperomia. From what supplies you’ll need to the step-by-step process and the best methods to use, we’ll help you get started. With the proper care and patience, you’ll soon have a full collection of beautiful peperomia plants.
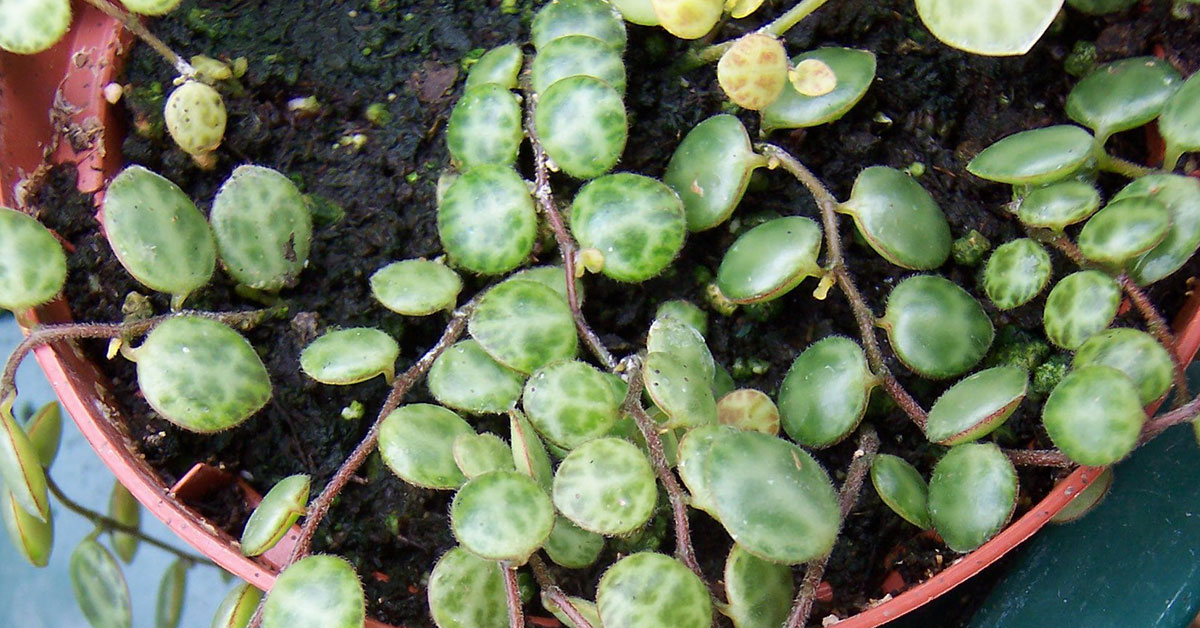
What Are Peperomia Plants?
Peperomia plants are popular houseplants due to their easy care and attractive foliage. They require minimal pruning and care, making them ideal for busy individuals. Peperomia plants also come in a variety of shapes, sizes, and colors, allowing for a lot of diversity in a home or garden setting. Additionally, peperomia plants are known for their air-purifying properties, helping to keep the air in your home or office clean and fresh. With all these benefits, it is no wonder that people often choose to grow peperomia plants in their homes and gardens.
How To Propagate Peperomia From Seeds
Propagating peperomia plants from seed is a relatively easy process. To begin, you should obtain fresh, viable peperomia seeds from a reputable source. Once you have them, you should prepare a soil mixture of equal parts compost and perlite or coarse sand. Then, lightly sprinkle the seeds on the surface of the soil, and cover them with a thin layer of the soil mixture. Finally, lightly mist the soil with water and place it in a warm, bright location. Keep the soil moist, but not soggy, and the seeds should germinate in a few weeks. To ensure success, always use fresh, viable seeds and provide the correct soil conditions for germination.
How To Propagate Peperomia From Cuttings
Propagating peperomia plants from cuttings is easy and rewarding. First, take a stem cutting of the desired plant and remove the leaves from the lower part of the stem. Dip the base of the cutting in rooting hormone and plant it in a sterile potting mix. Keep the potting mix moist and warm, and make sure it has good drainage. Place the pot in indirect sunlight and mist the cutting occasionally. After several weeks, you should see new growth, which is an indication that the cutting has taken root. Once new growth is visible, you can transplant the cutting into its own pot and enjoy your new peperomia plant!
Peperomia Aftercare
Propagated peperomia plants require low to moderate light and moderate to high humidity. They should be watered when the top inch of soil feels dry to the touch. They should be fertilized every two to four weeks with a liquid fertilizer. However, be sure to reduce the frequency to once a month in the fall and winter months. Your peperomia plant will thrive when it’s fertilized regularly with a 20-20-20 fertilizer containing equal parts of nitrogen, potassium, and iron. Be sure to dilute it to half-strength. The plants should be repotted every two to three years and the soil should be well-draining. If the plant becomes leggy or stretched, it should be pruned back. Finally, check for pests such as spider mites or mealybugs and treat them as necessary.
How To Prune Peperomia
As the cuttings become established, it is important to prune them to promote healthy growth and encourage a bushy shape. To prune propagated peperomia plants, begin by cutting off any dead, yellowing, or discolored leaves. As well as any leaves that are growing out of the pot. Next, trim back any stems that have become too long or are growing too close together. Finally, pinch off the tips of the stems to encourage side branches to grow, which will result in a full, bushy plant. Pruning should be done regularly to keep the plant in shape and promote healthy growth.