
Garlic, with its pungent aroma and distinct flavor, has long been a beloved staple in kitchens around the world. But did you know that you don’t need a sprawling garden to cultivate this flavorful herb? Whether you’re limited on space or simply want to enjoy the convenience of fresh garlic at your fingertips, growing garlic in pots is a rewarding endeavor that allows you to nurture this culinary gem right on your doorstep.
In this article, we’ll delve into the fascinating world of container gardening and guide you through the step-by-step process of successfully growing garlic in pots. So, roll up your sleeves, gather your gardening tools, and let’s embark on a journey to create a thriving mini garlic garden that will not only delight your senses but also enhance your culinary creations.
Best varieties of garlic to grow in pots
When it comes to growing garlic in pots, choosing the right garlic varieties is a crucial first step on your gardening journey. Not all garlic varieties are equally suited to container cultivation, so it’s essential to opt for those that thrive in limited space and yield impressive results. Let’s explore some of the best garlic varieties that are well-suited for pot gardening:
- Lettuce Leaf: This softneck garlic variety is known for its mild flavor and beautiful, broad green leaves. Lettuce Leaf garlic is an excellent choice for container gardening due to its compact size and adaptability. It produces multiple cloves within a single bulb, making it a rewarding option for those seeking a bountiful harvest.
- Chinese Pink: Another fantastic softneck variety, Chinese Pink garlic, is prized for its mild and slightly sweet taste. Its bulbs are generally smaller in size, making it an ideal contender for container growth. The cloves are easy to peel, making it a favorite among cooks.
- Purple Glazer: For gardeners seeking a touch of elegance, the hardneck Purple Glazer garlic is a wonderful choice. With its stunning purple-striped wrappers, this variety adds aesthetic appeal to your container garden. Its bold, robust flavor is a favorite among culinary enthusiasts.
- Chesnok Red: If you’re a fan of rich, complex flavors, consider planting Chesnok Red garlic. This hardneck variety offers cloves with a deep, sweet taste that intensifies when roasted. While it may produce fewer cloves per bulb, the large size of the cloves ensures a rewarding harvest.
- Susanville: For those in regions with colder climates, Susanville garlic is a dependable option. This softneck variety is known for its adaptability to various growing conditions and its resistance to harsh winters. Its medium-sized bulbs are perfect for container gardening.
When selecting garlic varieties for pot cultivation, keep in mind the space available, the flavor profile you prefer, and the climatic conditions in your area. Experiment with a few different varieties to discover which ones thrive best in your container garden. With the right garlic variety, you’ll be well on your way to cultivating a bountiful and aromatic harvest right on your doorstep.
Tips for growing garlic in pots
Embarking on the journey of growing garlic in pots is not only rewarding but also a wonderful way to enjoy fresh, flavorful cloves right from your own home. To help you achieve a successful container garden filled with robust garlic, here are some essential tips to keep in mind:
- Choose the Right Containers: Select containers that are at least 6-8 inches deep and have sufficient drainage holes. This ensures proper aeration and prevents waterlogged soil, which can lead to rot.
- Opt for Quality Soil: Use a well-draining potting mix enriched with compost or organic matter. Garlic prefers soil that is slightly acidic to neutral, with a pH range of 6.0 to 7.0.
- Select the Right Garlic Cloves: Purchase high-quality garlic bulbs from reputable sources or local nurseries. Break the bulbs into individual cloves and choose the largest, healthiest ones for planting.
- Planting Depth and Spacing: Plant garlic cloves with the pointed end facing up and about 2 inches deep into the soil. Space the cloves about 4-6 inches apart to allow room for proper growth.
- Provide Adequate Sunlight: Place your containers in a location that receives at least 6-8 hours of direct sunlight daily. If you’re gardening in a spot with limited sunlight, consider using a reflective surface to maximize light exposure.
- Watering Routine: Keep the soil consistently moist but not soggy. Water the containers when the top inch of soil feels dry to the touch. Avoid overwatering, as garlic bulbs can rot in waterlogged conditions.
- Mulching Matters: Apply a layer of organic mulch, such as straw or chopped leaves, to help retain moisture and regulate soil temperature. Mulch also helps prevent weed growth around your garlic plants.
- Fertilize Wisely: Feed your garlic plants with a balanced, slow-release fertilizer during the growing season. Avoid excessive nitrogen, as it can lead to excessive leaf growth instead of bulb development.
- Watch for Pests and Diseases: Keep an eye out for common pests like aphids and onion thrips. Regularly inspect your plants for any signs of disease, such as yellowing leaves or moldy bulbs.
- Prune Scapes: Hardneck garlic varieties produce scapes, curly stems that emerge from the center of the plant. To redirect energy toward bulb development, snip off the scapes when they form, but don’t discard them—scapes are edible and offer a mild garlic flavor for culinary use.
- Harvest at the Right Time: Garlic is ready for harvest when the lower leaves start to turn yellow or brown. Gently dig around the bulbs and lift them from the soil. Allow the bulbs to cure in a dry, well-ventilated area for a couple of weeks before trimming the foliage and storing them.
By following these fundamental tips, you’ll be well-prepared to nurture healthy garlic plants in your containers. Gardening is a journey of patience and discovery, so don’t hesitate to experiment and adapt your approach based on the unique conditions of your growing space.
When to plant your garlic bulbs
When it comes to planting garlic, timing plays a crucial role in ensuring a successful and abundant harvest. The ideal time to plant garlic is during the fall season, typically between September and November, depending on your climate zone. Here’s why fall is the key time for planting garlic:
Cool Soil Conditions: Garlic requires a period of cold exposure to stimulate bulb formation. By planting in the fall, you allow the cloves to experience the chill of winter, which triggers their growth and development.
Root Establishment: Fall planting allows garlic to establish a strong root system before the onset of winter. This root development sets the stage for robust growth and better bulb formation when spring arrives.
Natural Growth Cycle: Garlic is a cold-hardy crop that naturally follows the rhythm of the seasons. Planting in fall aligns with garlic’s natural growth cycle, ensuring that the plant develops properly and produces healthy bulbs.
Optimal Soil Conditions: Fall-planted garlic benefits from well-draining soil that has warmed up during the summer months. This provides a favorable environment for root growth and minimizes the risk of fungal diseases.
Spring Advantages: When you plant garlic in the fall, it gets a head start in the spring. As the weather warms and days lengthen, your garlic plants will be well-established and ready to capitalize on the growing conditions for robust foliage and bulb growth.
To determine the best planting time for your specific location, consider your local climate and frost dates. In regions with milder winters, planting in October is generally a good option. If you’re in a colder climate, planting in September might be more suitable to allow enough time for root development before freezing temperatures arrive.
In conclusion, fall is undoubtedly the optimal time to plant garlic. By following this seasonal guideline, you’ll be setting the stage for a successful and rewarding garlic-growing experience, ensuring flavorful bulbs that are ready to be harvested the following summer.
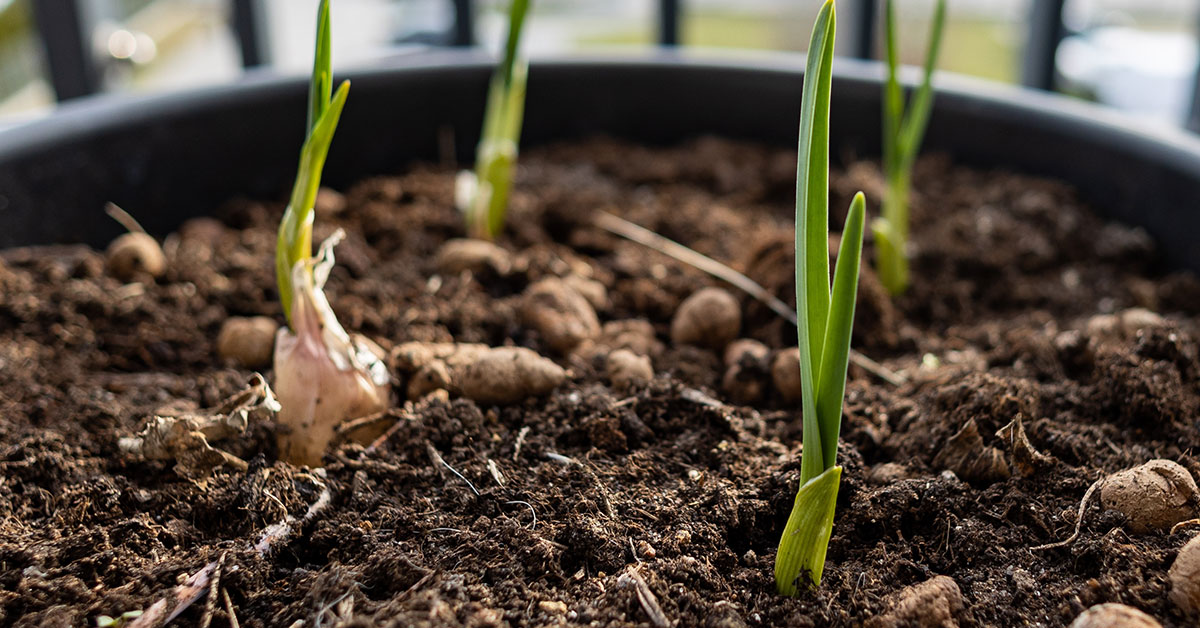
How to plant garlic in pots
The process for planting garlic in pots is quite straightforward, and with a little care, you’ll be enjoying homegrown garlic in no time. Let’s dive into the step-by-step guide on how to plant garlic in pots:
Materials You’ll Need:
- Garlic bulbs (choose high-quality ones from a nursery or garden center)
- Potting mix (well-draining and enriched with compost)
- Containers (6-8 inches deep with drainage holes)
- Watering can or hose with a gentle spray attachment
- Mulch (organic material like straw or leaves)
- Fertilizer (balanced, slow-release)
Step 1: Choose the Right Containers Select containers that are at least 6-8 inches deep and have drainage holes at the bottom. These holes prevent water accumulation and ensure your garlic doesn’t sit in soggy soil.
Step 2: Prepare the Potting Mix Fill the containers with a well-draining potting mix, leaving about 2 inches of space below the rim. You can mix in compost to improve soil fertility and texture.
Step 3: Break and Plant Garlic Cloves Gently break apart the garlic bulb into individual cloves, making sure the papery outer skin stays intact. Plant the cloves with the pointed end facing up and the flat end down. Push each clove about 2 inches deep into the soil.
Step 4: Spacing Garlic Cloves Give your garlic cloves room to grow by spacing them 4-6 inches apart in all directions. This spacing allows each clove to develop into a full bulb without overcrowding.
Step 5: Watering After planting, give the soil a thorough but gentle watering. Ensure the soil is consistently moist, but avoid overwatering, as garlic bulbs can rot in waterlogged conditions. Water whenever the top inch of soil feels dry to the touch.
Step 6: Mulch Application Apply a layer of organic mulch, such as straw or chopped leaves, around the garlic plants. Mulch helps retain moisture, regulate soil temperature, and suppress weed growth.
Step 7: Sunlight Place your containers in a spot that receives at least 6-8 hours of direct sunlight each day. If you’re gardening in a location with limited sunlight, consider using reflective surfaces to bounce light onto your plants.
Step 8: Fertilizing Feed your garlic plants with a balanced, slow-release fertilizer during the growing season. Follow the manufacturer’s instructions for application rates. Avoid over-fertilizing, as excessive nitrogen can lead to lush foliage but smaller bulbs.
Step 9: Care and Maintenance Keep an eye out for pests and diseases. Regularly inspect your plants for signs of trouble, such as yellowing leaves or damaged bulbs. Prune off any scapes that appear to direct energy toward bulb growth.
Step 10: Harvesting Your garlic will be ready to harvest when the lower leaves start turning yellow or brown. Gently dig around the bulbs and lift them from the soil. Allow the bulbs to cure in a dry, well-ventilated area for a couple of weeks before trimming the foliage and storing them.
By following these steps, you’ll be well on your way to successfully growing garlic in pots. Remember, gardening is a learning experience, so don’t hesitate to adapt your approach based on your observations and the unique conditions of your gardening space.
When to harvest garlic
The anticipation of harvesting garlic, with its aromatic scent and promise of culinary delights, is a rewarding moment for any gardener. Knowing when to harvest garlic is essential to ensure that your bulbs reach their full potential in flavor and size. Here’s a guide to help you determine the perfect time to harvest your garlic crop:
Observing Leaf Color: As the garlic plants mature, keep an eye on the color of their leaves. When about half of the lower leaves have turned yellow or brown, it’s a sign that the bulbs are nearing maturity. This transition usually occurs during the later stages of spring or early summer, depending on when you planted your garlic.
Checking Bulb Size: Gently brush away the soil around one of the plants to assess the size of the bulb. Garlic bulbs should have formed individual cloves, and they should feel firm and plump to the touch. If the cloves are well-developed and the bulb has a good size, it’s an indication that they’re ready for harvesting.
Scapes and Flower Stalks: If you planted hardneck garlic varieties, you may notice the emergence of scapes, which are curly flower stalks that grow from the center of the plant. Removing these scapes helps direct the plant’s energy toward bulb growth. Harvest the scapes when they curl one or two times, usually a few weeks before the main garlic bulbs are ready for harvest. Scapes are edible and offer a mild garlic flavor for your culinary creations.
Curing Process: Once you’ve determined that your garlic bulbs are ready for harvest, gently loosen the soil around each bulb and carefully lift them from the ground. Shake off excess soil, but avoid removing the papery outer layers. To improve the bulbs’ storage quality and flavor, it’s essential to cure them. Place the bulbs in a dry, well-ventilated area with good air circulation, away from direct sunlight. Allow them to cure for about two to three weeks, during which time the outer layers will dry and the flavors will intensify.
Trimming and Storing: After the curing period, trim the roots and cut the stalks to about an inch above the bulb. This prepares the garlic bulbs for storage. Store your cured garlic in a cool, dark, and dry place. A mesh bag, a braided bunch, or a well-ventilated container works well for garlic storage.
Remember that the timing of garlic harvest can vary based on factors such as climate, garlic variety, and local growing conditions. As you gain experience, you’ll become more attuned to the nuances of garlic growth and the ideal moment for harvest. By following these guidelines and paying attention to the signals your garlic plants give you, you’ll be rewarded with flavorful and aromatic bulbs that elevate your culinary creations to new heights.