
Welcome to our gardening blog, where we explore all things related to growing your own vegetables! In today’s article, we will delve into the wonderful world of growing the Little Finger Carrot. These petite and delicious vegetables are not only a treat for the taste buds but also a delight to grow in your own backyard.
Whether you are an experienced gardener or a beginner, we have all the tips and tricks you need to successfully cultivate these charming little carrots. So put on your gardening gloves and let’s get started on this exciting journey of growing Little Finger Carrots!
What is Little Finger Carrot?
Little Finger Carrot, also known as baby carrot or Paris Market carrot, is a petite variety of carrot that is prized for its small size and sweet flavor. This carrot variety is typically harvested when it is only a few inches long, making it perfect for snacking, salads, and gourmet dishes.
Unlike traditional carrots, Little Finger Carrots have a slender shape and a vibrant orange color. They are often compared to the shape of a finger, hence their unique name. While they may be small in size, these carrots pack a punch in terms of taste and nutritional value.
Little Finger Carrots are rich in vitamins, minerals, and fiber, making them a healthy addition to any diet. They are particularly high in beta-carotene, which is converted into vitamin A by the body. Vitamin A is essential for maintaining healthy vision, promoting immune function, and supporting overall well-being.
These mini carrots are also a great source of antioxidants, which help protect the body against free radicals and reduce the risk of chronic diseases. Additionally, they contain dietary fiber, which aids in digestion and helps maintain a healthy weight.
When it comes to cooking with Little Finger Carrots, their small size makes them versatile and convenient. They can be eaten raw as a crunchy snack, or they can be incorporated into a variety of recipes. Whether roasted, steamed, sautÈed, or added to soups and stews, these carrots add a delightful sweetness and vibrant color to any dish.
In summary, Little Finger Carrots are a unique and flavorful variety of carrots that are loved for their petite size and sweet taste. Packed with essential nutrients, they are a healthy addition to any diet. Whether you enjoy them raw or cooked, these mini carrots are sure to add a burst of flavor and nutrition to your meals.
What does Little Finger Carrot taste like?
When it comes to carrots, most people are familiar with the standard orange varieties found in supermarkets. However, there is a lesser-known variety that deserves some attention ñ the Little Finger Carrot. This petite and slender carrot not only stands out for its unique appearance but also for its distinct flavor. In this section, we will explore what makes the Little Finger Carrot taste so special.
Delicate and Sweet: One of the defining characteristics of the Little Finger Carrot is its delicate and sweet flavor. Unlike larger carrots, which can sometimes be woody or fibrous, Little Finger Carrots have a tender and crisp texture. Their small size ensures that they are not overly dense, allowing for a more enjoyable eating experience. The natural sweetness of these carrots is often compared to that of young, fresh garden carrots, making them a delightful addition to any dish.
Mild and Nutty: In addition to its sweetness, the Little Finger Carrot also possesses a mild and nutty undertone. This subtle flavor profile adds depth and complexity to the overall taste. The nuttiness can be likened to that of a roasted almond or a delicate pecan, enhancing the overall culinary experience. Whether enjoyed raw as a snack, cooked in a stir-fry, or incorporated into a salad, the Little Finger Carrot’s mild and nutty flavor is sure to impress.
Versatility in Culinary Applications: The unique taste of the Little Finger Carrot makes it a versatile ingredient in various culinary applications. Its mild and sweet flavor pairs well with a wide range of dishes. Whether you’re using it as a raw ingredient in salads or as a cooked component in soups, stews, or side dishes, the Little Finger Carrot’s flavor complements other ingredients without overpowering them. Its small size also makes it ideal for garnishing plates or adding a pop of color to your culinary creations.
Conclusion
The Little Finger Carrot’s taste is truly something special. Its delicate sweetness, combined with a mild and nutty undertone, sets it apart from its larger counterparts. Whether eaten raw or cooked, these petite carrots bring a unique flavor profile to the table. So, the next time you’re looking to add a touch of sweetness and depth to your dishes, consider incorporating the Little Finger Carrot ñ a tiny vegetable with big flavor.
How to start Little Finger Carrot Seeds
Are you a gardening enthusiast looking to add some variety to your vegetable patch? If so, the Little Finger Carrot might just be the perfect addition. Known for its slender and sweet roots, this miniature carrot variety is not only delicious but also easy to grow from seed. In this blog section, we will guide you through the process of starting Little Finger Carrot from seed, so you can enjoy a bountiful harvest of these delightful carrots in no time.
Choosing the Right Seeds
Before you can start growing Little Finger Carrot, it is important to select the right seeds for your garden. Look for quality seeds from a reputable source, ensuring that they are fresh and viable. Additionally, keep in mind the climate and growing conditions in your area, as some carrot varieties may perform better in certain environments. Once you have obtained your Little Finger Carrot seeds, you are ready to move on to the next step.
Preparing the Soil
Little Finger Carrots prefer loose, well-draining soil that is rich in organic matter. Begin by clearing the area where you plan to grow the carrots, removing any weeds or debris. Loosen the soil with a garden fork or tiller, breaking up any clumps and creating a fine, crumbly texture. Incorporate compost or well-rotted manure into the soil to improve its fertility and moisture retention. Smooth the surface of the soil, ensuring it is level and ready for planting.
Planting the Seeds
Little Finger Carrot seeds are small and delicate, so it is important to handle them with care during planting. To promote successful germination, soak the seeds in water for a few hours before planting. This will help soften the seed coat and encourage faster sprouting. Once soaked, carefully scatter the seeds over the prepared soil, spacing them about one inch apart. Gently press the seeds into the soil, ensuring they are covered with a thin layer of soil, approximately 1/4 inch deep.
Watering and Care
After planting, it is crucial to keep the soil consistently moist to support seed germination and subsequent growth. Water the area gently but thoroughly, making sure not to wash away the seeds. As the seeds sprout and seedlings emerge, continue to water regularly, ensuring the soil remains evenly moist. Avoid overwatering, as this can lead to rot or fungal diseases. Additionally, keep the area free from weeds, as they can compete with the young carrot plants for nutrients and water.
Thinning and Transplanting
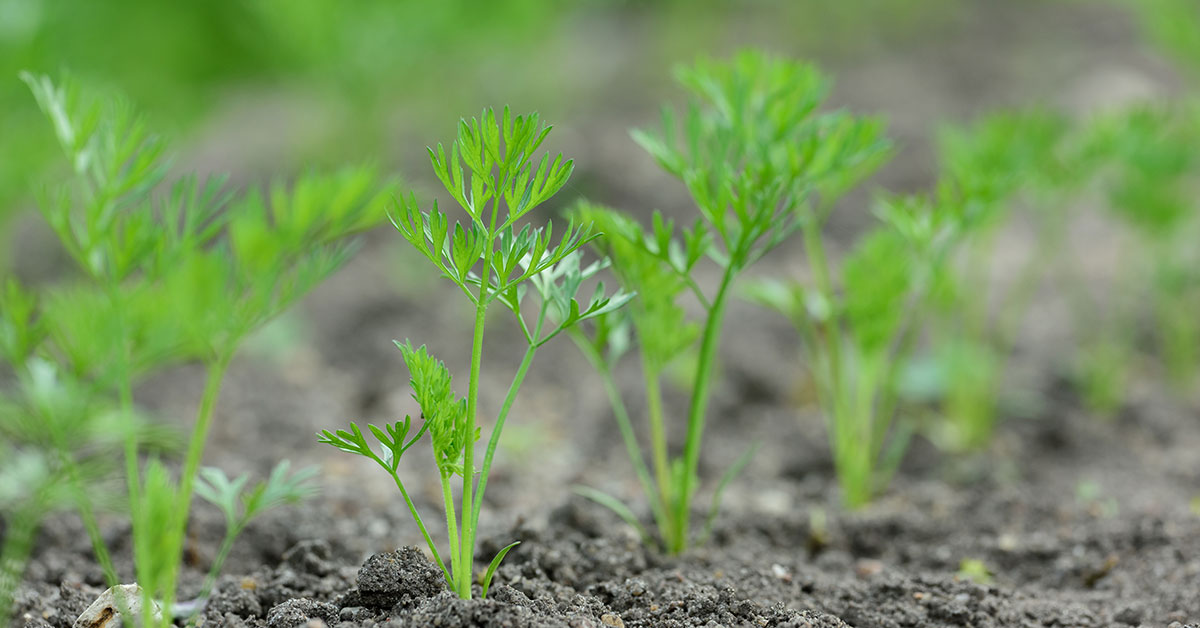
Once the Little Finger Carrot seedlings have grown to a few inches tall, it is time to thin them out. Crowded seedlings can stunt each other’s growth, so thinning is essential for proper development. Carefully remove the weaker seedlings, leaving the strongest ones with ample space to grow. Consider transplanting the thinned seedlings to another area of your garden, allowing them to mature into full-sized carrots.
Conclusion
Starting Little Finger Carrot from seed is a satisfying and rewarding experience for any gardener. With proper preparation, planting, and care, you can enjoy a plentiful harvest of these delicious and nutritious miniature carrots. Remember, patience is key, as carrots take time to grow and develop their full flavor. So, roll up your sleeves, grab your seeds, and embark on the journey of growing your own Little Finger Carrots. Happy gardening!
How to grow Little Finger Carrot
Growing your own vegetables can be a rewarding and fulfilling experience. One vegetable that is particularly popular among gardeners is the Little Finger Carrot. This miniature variety of carrot is known for its sweet and tender flavor, making it a great addition to salads, stir-fries, and as a healthy snack. In this section, we will discuss the steps involved in growing Little Finger Carrots in your own backyard.
- Choose the Right Location:
Little Finger Carrots thrive in well-draining soil with plenty of sunlight. Choose a location in your garden that receives at least 6 hours of direct sunlight each day. Additionally, ensure that the soil is loose, free from rocks, and has a pH level between 6.0 and 7.0. - Prepare the Soil:
Before planting your Little Finger Carrot seeds, it is essential to prepare the soil properly. Start by removing any weeds or debris from the planting area. Then, loosen the soil using a garden fork or tiller, ensuring it is free from clumps. Incorporate organic matter, such as compost or well-rotted manure, to improve the soil’s fertility and drainage. - Planting Little Finger Carrot Seeds:
Sow the Little Finger Carrot seeds directly into the prepared soil. Dig shallow trenches about 1/4 inch deep, spaced approximately 3 inches apart. Place the seeds in the trenches, spacing them about 1 inch apart. Cover the seeds lightly with soil and gently firm it down. - Watering and Maintenance:
After planting, water the soil thoroughly to provide the seeds with the moisture they need to germinate. Ensure that the soil remains consistently moist but not waterlogged throughout the growing season. Carrots are sensitive to drought, so regular watering is crucial.
To help prevent weed competition, consider using a layer of organic mulch around the carrot plants. This will also help retain soil moisture and regulate soil temperature.
- Thin the Seedlings:
Once the seedlings have emerged and have grown to about 2-3 inches tall, it is time to thin them out. Thin the plants to about 1-2 inches apart to provide enough space for the carrots to develop properly. This step is essential to avoid overcrowding, which can result in misshapen or stunted carrots. - Pest and Disease Control:
While Little Finger Carrots are generally resistant to many pests and diseases, it is still important to monitor your plants for any signs of trouble. Look out for common carrot pests such as carrot flies, aphids, or slugs. Consider using organic pest control methods or companion planting to deter these pests. - Harvesting Little Finger Carrots:
Little Finger Carrots typically reach maturity within 60-70 days after planting. At this point, the carrots should be about 3-4 inches long and have a bright orange color. Gently loosen the soil around the carrots and carefully pull them out. Enjoy the small, sweet, and tender carrots in your favorite dishes or as a healthy snack.
Conclusion
Growing Little Finger Carrots can be a fun and rewarding experience. By following these steps, you can successfully cultivate these delicious miniature carrots in your own backyard. Remember to provide them with proper care, regular watering, and monitor for any pests or diseases. With a little patience and effort, you’ll soon be enjoying the sweet and crunchy taste of homegrown Little Finger Carrots.