
Drumhead cabbage, scientifically known as Brassica oleracea var. capitata f. alba, is a beloved vegetable in the world of gardening and culinary arts. With its tightly packed, round heads and crisp, tender leaves, this variety of cabbage has become a staple in kitchens worldwide. Drumhead cabbage is not only a versatile ingredient in various dishes but also a popular choice for sauerkraut and coleslaw enthusiasts. Its robust flavor, nutritional benefits, and remarkable ability to thrive in different climates make it a favored choice among both home gardeners and professional growers.
In this article, we will delve into the world of drumhead cabbage, exploring its history, cultivation techniques, potential health benefits, and exciting recipes to elevate your culinary creations. Whether you are an experienced gardener or a novice enthusiast, join us on this journey to discover the wonders of drumhead cabbage and unlock its potential in your own garden and kitchen.
What is a Drumhead Cabbage?
Drumhead cabbage, also known as cabbage drumhead or simply drumhead, is a popular variety of cabbage that is characterized by its large, round, and tightly packed heads. It is named “drumhead” due to its resemblance to the shape of a drum. The leaves of the drumhead cabbage are smooth and thick, forming a dense head that can range in size from 5 to 10 inches in diameter.
The outer leaves are typically a deep green color, while the inner leaves are lighter in shade. The texture of the leaves is firm and crisp, making it ideal for a variety of culinary uses. This cabbage variety is known for its mild and sweet flavor, making it a versatile ingredient in many dishes. It can be used raw in salads, coleslaws, or wraps, or cooked in stir-fries, soups, stews, or steamed as a side dish. Drumhead cabbage is also commonly used in traditional dishes such as sauerkraut, kimchi, or stuffed cabbage rolls.
One of the advantages of drumhead cabbage is its ability to store well, allowing it to be enjoyed throughout the winter months. When properly stored in a cool and dry place, it can maintain its freshness and quality for several weeks. As a gardener, drumhead cabbage is relatively easy to grow, making it a popular choice for home gardeners. It prefers a sunny location with well-drained soil and regular watering. It is a cool-season crop that can be planted in early spring or late summer for a fall harvest.
Regular fertilization and protection from common cabbage pests, such as cabbage worms or aphids, are important for successful cultivation. In summary, drumhead cabbage is a versatile and flavorful variety of cabbage with large, round heads, firm leaves, and a mild taste. It is a popular choice for both culinary and gardening enthusiasts due to its numerous culinary applications and ease of cultivation.
What does Drumhead Cabbage taste like?
Drumhead Cabbage is a variety of cabbage that is known for its large, round, and tightly-packed heads. When it comes to taste, Drumhead Cabbage offers a delightful and mild flavor. It has a slightly sweet and earthy taste, with a crisp and crunchy texture. The leaves are tender and have a smooth, almost buttery quality when cooked. The sweetness of the cabbage intensifies when it is cooked, making it a versatile and delicious addition to various dishes. Whether you enjoy it raw in salads, steamed, sautéed, or used in soups and stews, Drumhead Cabbage is sure to provide a refreshing and satisfying taste.
How to start from seed
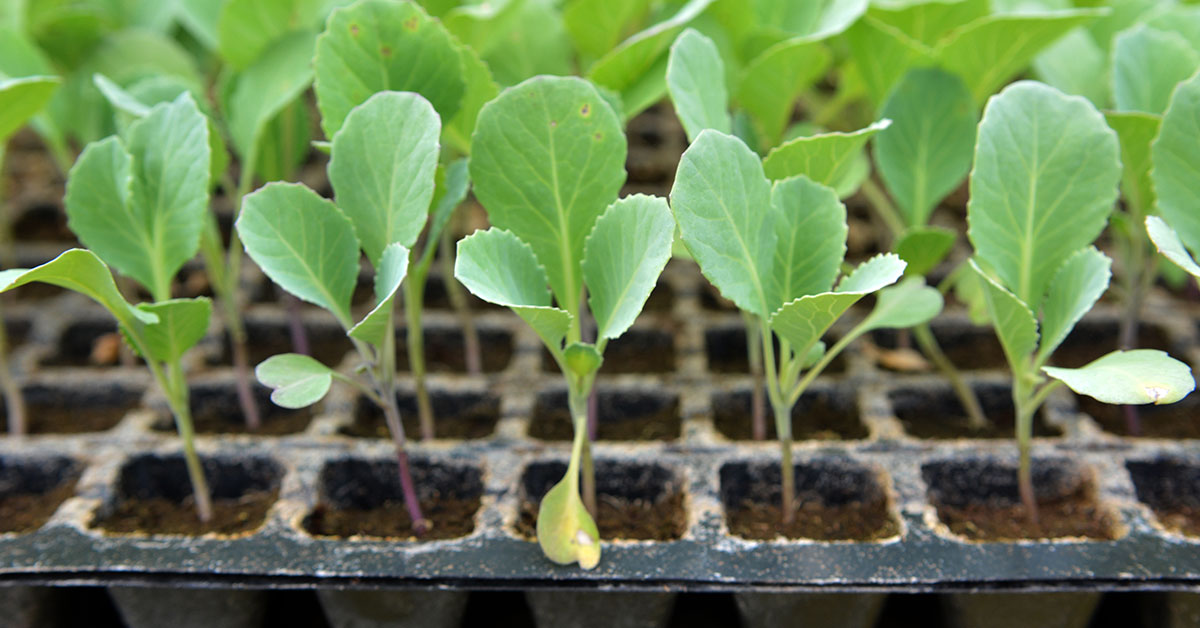
Starting a Drumhead Cabbage (also known as Dutch white cabbage or simply cabbage) from seed is a fairly straightforward process. Here’s a step-by-step guide to help you get started:
- Selecting the seeds: Choose high-quality Drumhead Cabbage seeds from a reputable source. Look for seeds that are fresh and have a high germination rate.
- Timing: Cabbage is a cool-season crop, so it’s best to start the seeds indoors 4-6 weeks before the last expected frost in your area. This will give the seedlings ample time to grow before transplanting them outdoors.
- Seed starting containers: Use seed trays, pots, or cell packs to start your cabbage seeds. Make sure the containers have drainage holes to prevent waterlogging.
- Soil preparation: Fill the containers with a well-draining seed-starting mix or a combination of compost, peat moss, and vermiculite. The soil should be moist but not soggy.
- Sowing the seeds: Sow the cabbage seeds on the soil surface, spacing them about 1 inch apart. Gently press them into the soil, ensuring good seed-to-soil contact.
- Covering the seeds: Sprinkle a thin layer of soil or vermiculite over the seeds, about 1/4 inch deep. Mist the soil surface with water to settle it.
- Light and temperature: Place the seed trays in a warm location with temperatures around 70-75°F (21-24°C). Cabbage seeds need consistent warmth for germination. Once the seeds sprout, move the trays to a bright location or under grow lights for at least 14-16 hours a day.
- Watering: Keep the soil consistently moist but not waterlogged. Water the seedlings gently using a spray bottle or a watering can with a fine rose attachment.
- Thinning the seedlings: Once the seedlings develop their first set of true leaves, thin them out by removing weaker or overcrowded seedlings, leaving only the strongest ones. This will give the remaining plants enough space to grow.
- Fertilization: After the seedlings have grown a few inches tall, you can start fertilizing them with a balanced, water-soluble fertilizer according to the package instructions. This will provide them with essential nutrients for healthy growth.
- Harden off and transplanting: About a week before transplanting the seedlings outdoors, gradually expose them to outdoor conditions by placing them outside for a few hours each day. This process is called “hardening off” and helps acclimate the seedlings to the outdoor environment. Once they are hardened off, transplant them into your prepared garden bed or containers.
- Outdoor care: Choose a location for your cabbage plants that receives full sun (at least 6-8 hours of direct sunlight per day) and has well-draining soil. Cabbage plants prefer cool temperatures and consistent moisture. Water them regularly, providing about 1 inch of water per week, adjusting as needed based on rainfall.
- Harvesting: Drumhead Cabbage typically takes around 75-85 days from transplanting to mature heads. Harvest the cabbage heads when they are firm and solid, and the outer leaves begin to turn slightly yellow. Cut the heads off at the base using a sharp knife.
By following these steps, you should be able to successfully start and grow your own Drumhead Cabbage. Happy gardening!
Planting and growing Drumhead Cabbage
Here are the steps for planting and growing Drumhead Cabbage:
- Choose a suitable location: Select a spot in your garden that receives full sun for at least 6-8 hours a day. The soil should be well-draining and rich in organic matter.
- Prepare the soil: Remove any weeds or debris from the planting area. Loosen the soil using a garden fork or tiller, and incorporate compost or well-rotted manure to improve the soil’s fertility.
- Start seeds indoors (optional): If you want an early start, you can begin the seeds indoors about 6-8 weeks before the last expected frost date. Sow the seeds in seed trays or pots filled with seed-starting mix. Keep the soil moist and maintain a temperature around 70°F (21°C) until the seedlings emerge.
- Direct sow seeds: Alternatively, you can sow the seeds directly into the garden when the soil temperature reaches around 50°F (10°C). Plant the seeds about 1/4 to 1/2 inch deep and 12-18 inches apart, in rows spaced about 2-3 feet apart.
- Watering: Keep the soil consistently moist, but not waterlogged. Cabbage plants require regular watering, especially during dry periods. Aim to provide about 1 inch of water per week, either through rainfall or manual irrigation.
- Fertilization: Cabbage plants benefit from regular feeding. Apply a balanced, slow-release fertilizer or side dress with compost or well-rotted manure once the seedlings are established. Repeat the feeding every 3-4 weeks throughout the growing season.
- Mulching: Mulching around the cabbage plants helps to retain moisture, suppress weeds, and regulate soil temperature. Apply a layer of organic mulch, such as straw or shredded leaves, around the base of the plants, being careful not to mound it against the stems.
- Pest and disease control: Monitor your plants regularly for any signs of pests or diseases such as cabbage worms, aphids, or clubroot. Take appropriate measures, such as using insecticidal soap or organic pest control methods, to prevent or control infestations.
- Harvesting: Drumhead Cabbage typically takes around 70-90 days to mature, depending on the variety. Harvest the cabbage heads when they are firm and fully formed. Use a sharp knife to cut the cabbage heads off at the base, just above the soil level.
- Storage: Store the harvested cabbage heads in a cool, dark, and humid place, such as a root cellar or refrigerator. Properly stored cabbage can last for several weeks.
By following these steps, you should be able to successfully plant and grow Drumhead Cabbage in your garden. Good luck with your gardening endeavors!
When to harvest
The best time to harvest a Drumhead Cabbage is when the head feels firm and solid to the touch. This usually occurs when the cabbage reaches its full size, which is typically around 70-90 days after planting, depending on the variety. The head of the cabbage should be fully developed and tightly packed, with the outer leaves starting to curve inward. Additionally, the cabbage leaves will have a dark green color and a waxy appearance. Harvesting too early may result in a small and underdeveloped head. While waiting too long may cause the head to split or become tough.