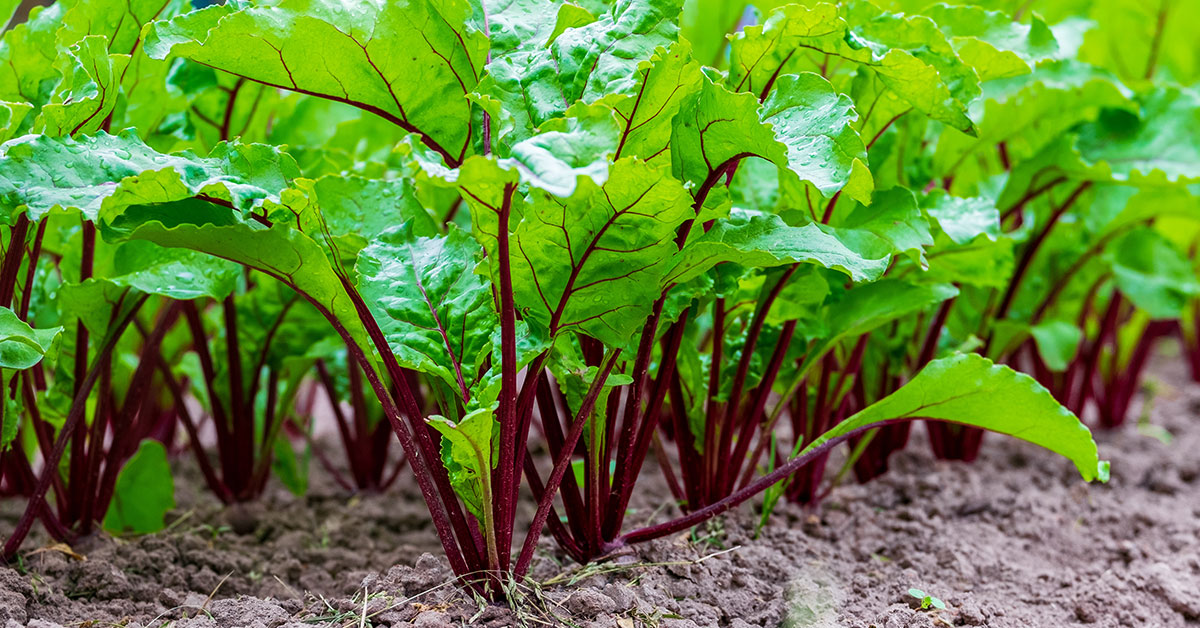

Welcome to the world of gardening, where we explore the abundance of nature’s gifts and the joy they bring to our lives. Today, we are delighted to introduce you to the Chioggia beet, a fascinating and visually stunning vegetable that will add a vibrant touch to your garden and culinary creations.
Named after the Italian coastal town of Chioggia, these beets showcase a mesmerizing array of candy-striped rings inside, making them a true showstopper. With their mild, slightly sweet flavor and versatile use in both raw and cooked dishes, Chioggia beets are a must-have for any gardener or food enthusiast looking to elevate their kitchen adventures.
Join us as we delve into the enchanting world of Chioggia beets, exploring their history, cultivation tips, and delicious recipes that will leave you craving for more.
What is a Chioggia Beet?
A Chioggia beet, also known as a candy cane or striped beet, is a unique and visually stunning variety of beetroot. It is named after the town of Chioggia in Italy, where it originated. What sets the Chioggia beet apart from other beet varieties is its beautiful interior coloring. When you cut into a Chioggia beet, you will be greeted with vibrant concentric rings of pink and white, resembling a bullseye or a candy cane. The alternating rings create a striking visual appeal, making it a popular choice among food enthusiasts and gardeners alike. In terms of size, Chioggia beets are typically medium-sized, similar to other beet varieties. They have a round shape and a smooth, firm skin that can range in color from deep red to pale pink. The leaves of the Chioggia beet are also edible and can be used in salads or cooked like spinach. Like other beets, Chioggia beets are rich in nutrients and offer various health benefits. They are a good source of fiber, folate, potassium, vitamin C, and antioxidants. Additionally, they have a mild and slightly sweet flavor, making them versatile for use in both raw and cooked dishes. When it comes to growing Chioggia beets, they require similar conditions to other beet varieties. They thrive in well-drained soil with a pH level of around 6 to 7. The seeds can be sown directly into the ground or started indoors and transplanted once the seedlings have grown a few inches tall. They prefer full sun but can tolerate partial shade. As the Chioggia beets grow, it is important to thin them out to provide enough space for each plant to develop properly. Regular watering is essential to keep the soil consistently moist. Harvesting can take place around 50 to 60 days after planting, or when the beets have reached the desired size. Whether you decide to enjoy Chioggia beets raw in salads, roasted, pickled, or cooked in various dishes, their unique appearance and delicious taste make them a delightful addition to any garden or kitchen.
What do Chioggia Beets taste like?
The Chioggia beet, also known as the candy cane beet or bullseye beet, is a unique and visually stunning vegetable. Its taste can be described as earthy and sweet, with a slightly mild and less intense flavor compared to other beet varieties.
When consumed raw, Chioggia beets have a crisp and crunchy texture, similar to a radish or a carrot. The vibrant pink and white rings inside the beet add an attractive visual element to dishes, making it a popular choice for salads or garnishes.
When cooked, the Chioggia beet tends to lose some of its vibrant colors, but its flavor becomes more mellow and sweeter. It can be roasted, boiled, steamed, or even pickled, and still retains its earthy undertones. The sweetness of the Chioggia beet pairs well with various ingredients, such as goat cheese, citrus fruits, and nuts, allowing for a range of delicious flavor combinations in both savory and sweet dishes.
Overall, the Chioggia beet offers a delightful taste experience, combining earthiness with a natural sweetness, making it a versatile and enjoyable ingredient to incorporate into your culinary creations.
How to start Chioggia Beets from seed
Starting Chioggia beets from seeds is a relatively simple process. Here is a step-by-step guide to help you get started:
- Seed Selection: Choose high-quality Chioggia beet seeds from a reputable source. Look for seeds that are fresh and have a high germination rate.
- Soil Preparation: Prepare a well-draining garden bed or container with loose, fertile soil. Beets prefer slightly acidic soil with a pH level between 6.0 and 7.0. Remove any weeds, rocks, or debris from the planting area.
- Sowing Seeds: Sow the Chioggia beet seeds directly into the prepared soil. Plant the seeds about 1/2 inch deep, spacing them approximately 1-2 inches apart. You can create rows or plant in a grid pattern depending on your preference.
- Watering: After sowing the seeds, water the planting area gently but thoroughly. Ensure the soil remains consistently moist throughout the germination process. Avoid overwatering, as it may lead to rotting or fungal diseases.
- Germination: Chioggia beet seeds typically take around 7-14 days to germinate. During this time, keep the soil evenly moist and provide the seeds with adequate sunlight. The ideal temperature for germination is between 50-85°F (10-29°C).
- Thinning: Once the seedlings have emerged and are a few inches tall, it’s essential to thin them out. Thin the seedlings to maintain a spacing of around 3-4 inches between plants. This allows sufficient room for the beets to grow and develop properly.
- Fertilizing: Beets are heavy feeders, so it’s beneficial to provide them with regular fertilization. Apply a balanced organic fertilizer according to the package instructions or incorporate well-rotted compost into the soil before planting.
- Care and Maintenance: As the Chioggia beets continue to grow, it’s crucial to provide them with adequate care. Keep the soil consistently moist throughout the growing season. Regularly monitor for pests and diseases, such as aphids or leaf spot, and take appropriate measures if necessary.
- Harvesting: Chioggia beets are usually ready for harvest in around 50-60 days after sowing, but this may vary depending on growing conditions. Harvest the beets when they reach a desirable size, usually around 2-3 inches in diameter. Gently pull them out of the soil, taking care not to damage the roots.
Remember, beets can also be grown as microgreens, harvested at a very young stage for their tender leaves. This allows you to enjoy the beet flavor and nutrition before they fully mature.
By following these steps, you should be able to successfully start and grow Chioggia beets in your garden. Enjoy the process and the delicious, vibrant beets they produce!
Planting and growing Chioggia Beet
Here are the steps for planting and growing Chioggia beets:
- Choose the right time: Chioggia beets prefer cool weather, so plan to sow the seeds in early spring or late summer for a fall harvest.
- Prepare the soil: Select a sunny spot in your garden with well-draining soil. Remove any weeds or debris and loosen the soil to a depth of about 8 inches. Incorporate organic matter like compost to improve fertility and drainage.
- Sow the seeds: Create rows or furrows in the soil, spacing them about 12 inches apart. Sow the Chioggia beet seeds about 1 inch apart and cover them with a thin layer of soil, around 1/2 inch deep. Water the area gently to ensure good seed-to-soil contact.
- Watering and care: Keep the soil consistently moist but not waterlogged. Adequate and even watering is crucial for the healthy growth of Chioggia beets. Aim to provide about 1 inch of water per week. Mulching around the plants can help retain moisture and suppress weed growth.
- Thin the seedlings: Once the seedlings emerge, they will need to be thinned to allow proper spacing. Thin them to about 2-3 inches apart, which will give each plant enough room to grow and develop roots.
- Fertilize: Chioggia beets benefit from regular fertilization. Apply a balanced organic fertilizer according to the manufacturer’s instructions or side-dress the plants with compost or well-rotted manure.
- Harvesting: Chioggia beets are usually ready to harvest around 60-70 days after planting. You can start harvesting when the roots are about 1-2 inches in diameter, or wait until they reach their full size of 3-4 inches. Gently pull the beets out of the ground, taking care not to damage the foliage.
- Storage: Remove the foliage, leaving about an inch of the stem attached to the beet. Store the beets in a cool, dark place such as a root cellar or refrigerator. They can last for several weeks to a few months if stored properly.
By following these steps, you should be able to successfully plant and grow Chioggia beets in your garden. Enjoy the process and the delicious, vibrant, and unique beet roots they produce!
When to harvest Chioggia Beets
The best time to harvest Chioggia beets is usually when they have reached a diameter of about 2-3 inches, or approximately 50-75mm. This typically occurs around 50-60 days after sowing the seeds, although it can vary depending on growing conditions and the specific variety of Chioggia beet you are growing. To check if they are ready for harvest, gently brush away some of the soil around the top of the beet and assess its size. You can also check the maturity by looking at the color of the beet’s skin. Chioggia beets are known for their distinctive red and white rings, and when the rings are clearly visible and vibrant in color, it is a good indication that the beets are ready to be harvested.