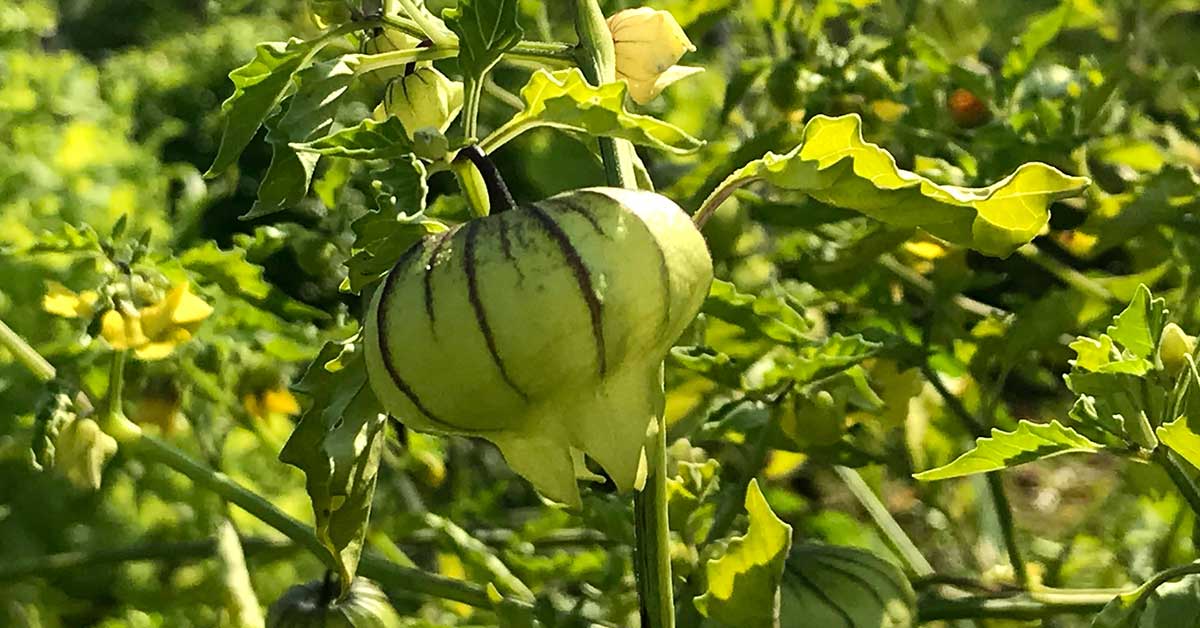

Tomatillos (Physalis philadelphica), those charming fruits encased in papery husks, hail from the highlands of Mexico and Central America, where they’ve been a staple in salsas and stews for centuries. When you grow them in your own garden, you’re inviting a piece of that vibrant culinary heritage into your backyard—and giving local wildlife a treat, too. Native bees often nest in nearby hollow stems, and hoverflies sip on the tiny blooms before they set fruit. Best of all, tomatillos aren’t invasive; they’ll play nicely alongside your other edibles when given the right care.
I know how frustrating it can be to sow promising little seeds only to see leggy seedlings or to water diligently and still get sparse yields. Whether you’re mastering your very first tomatillo patch or you’ve battled blossom drop and pest damage before, these twelve tips—gleaned from my own trial-and-error adventures—will have you harvesting abundant, tangy tomatillos all season long!
Monitor and Manage Common Pests

Even though tomatillos are fairly resilient, they can attract aphids, flea beetles, and cutworms—each capable of stunting growth or chewing tender leaves. I once found a cluster of aphids under each new leaf and knew I had to act fast before my young plants wilted!
Inspect your plants weekly, squishing off small colonies by hand or blasting them with a strong spray of water. Encourage predatory insects—ladybugs, lacewings, and ground beetles—by planting companion flowers like marigolds and alyssum nearby. This balanced ecosystem approach keeps pest levels in check without resorting to harsh chemicals.
Start Seeds Indoors Early

Tomatillos need a long, warm season to mature, so sowing seeds indoors six to eight weeks before your last frost date gives them a head start. I remember cranking up my grow lights and watching those tiny seedlings stretch toward the warmth—an exciting sign of things to come!
Keep seedlings under bright light to prevent leggy growth, and transplant into small pots once they develop their first true leaves. Sturdy, stocky transplants handle the big move into the garden far better than spindly ones, setting the stage for a robust harvest of husk-fruit clusters.
Choose a Sunny, Warm Site

Tomatillos adore full sun—at least six to eight hours of direct light—and temperatures consistently above 65°F (18°C). In too much shade, plants become leggy and fruit production dips. I once overlooked a shaded corner and ended up with tall plants that bore only a handful of undersized tomatillos!
Pick the sunniest spot you have, ideally where evening breezes help dry dew and reduce fungal risks. The warmth not only ripens fruits with that signature tang but also encourages pollinators like bumblebees to visit your yellow, star-shaped blossoms for nesting materials later in the year.
Provide Adequate Spacing for Airflow

Crowding tomatillos can lead to mildew, blossom drop, and tangled branches that trap moisture. Too often I’ve pulled apart sprawling vines only to find mold hiding beneath!
Space plants about 2–3 feet apart in rows at least 3–4 feet apart. This generous layout ensures good air circulation, which hastens leaf drying after rain or dew and reduces disease pressure. Plus, you’ll have room to weave in beneficial groundcovers—like creeping thyme—that host predatory insects.
Feed with Balanced, Low-Nitrogen Fertilizers

While tomatillos appreciate fertile soil, too much nitrogen encourages lush foliage at the expense of fruit set. After a few experiments with high-nitrogen feeds that left me chasing endless green leaves, I switched to a balanced 5-10-10 blend!
Apply fertilizer at planting and again when fruits begin to form. Phosphorus and potassium support strong root systems and bountiful blooms, translating to heavier clusters of ripe tomatillos ready for salsa verde. And those sturdy roots create burrows for earthworms, improving soil health season after season.
Prepare Fertile, Well-Draining Soil

In their native highland habitats, tomatillos grow in loose, loamy soils that drain swiftly yet hold enough moisture for developing fruits. Heavy clay can suffocate roots, while pure sand dries out too quickly. After one disastrous trial in clay, I learned to enrich my beds with plenty of compost and a touch of coarse sand!
Aim for a soil mix with about 60% native soil, 20% compost, and 20% coarse sand or perlite. This blend offers nutrients, drainage, and aeration—key for vigorous root growth. A healthy root network also provides nesting tunnels for solitary bees and ground beetles that patrol for pests.
Attract Natural Pollinators

Tomatillos are self-incompatible, meaning they need pollen transferred between plants to fruit—so attracting pollinators is essential. Plant clusters of native wildflowers—like blanket flower or bee balm—nearby to draw butterflies, bees, and hoverflies that will visit your tomatillo blossoms in search of nectar.
Consider adding a small water feature or shallow dish with stones for pollinators to sip from safely. Happy pollinators mean fuller fruit set, and you’ll love watching the activity as bees nest in hollow stems come late summer!
Use Supports or Cages

Tomatillo plants sprawl as they grow, and heavy fruit clusters can pull branches to the ground, risking rot and pest access. I solved this by installing stout tomato cages at planting time—no more trampled stems after rainstorms!
Secure main stems to the cage with soft ties and gently tuck side shoots inside as they emerge. This vertical support keeps fruit off moist soil, improves airflow around branches, and makes harvests easier—plus, nearby nesting birds have clear perches to scout for insects.
Transplant After Threat of Frost

Even a late spring frost can devastate tender tomatillo transplants. I learned the hard way by planting too early and seeing my seedlings blacken overnight!
Wait until nighttime temperatures stay above 50°F (10°C) and harden off your seedlings by gradually exposing them to outdoor conditions over a week. Proper acclimation helps prevent shock, and planting into warm soil jumpstarts root development for a stronger, more productive plant.
Mulch to Conserve Moisture and Suppress Weeds

A two-inch layer of straw, leaf mulch, or grass clippings keeps soil moist, reduces weed competition, and moderates soil temperature. In one particularly hot July, my mulched tomatillos stayed plump and green while unmulched rows wilted under the sun!
Mulch also provides hiding spots for ground beetles and spiders that prey on slugs and other nocturnal pests. Just be sure to pull mulch slightly away from stems to prevent excess moisture that could invite rot.
Water Deeply and Regularly

Tomatillos need about an inch of water per week—more during heatwaves—to support fruit development. Inconsistent watering leads to blossom drop and split husks. I once watered daily with a quick sprinkle and ended up with cracks on every tomatillo!
Switch to a deep soak twice weekly, letting water reach six inches deep. This encourages roots to grow downward, improving drought resilience and keeping plants vigorous enough to set heavy clusters of delicious fruits.
Harvest at Peak Ripeness and Save Seeds
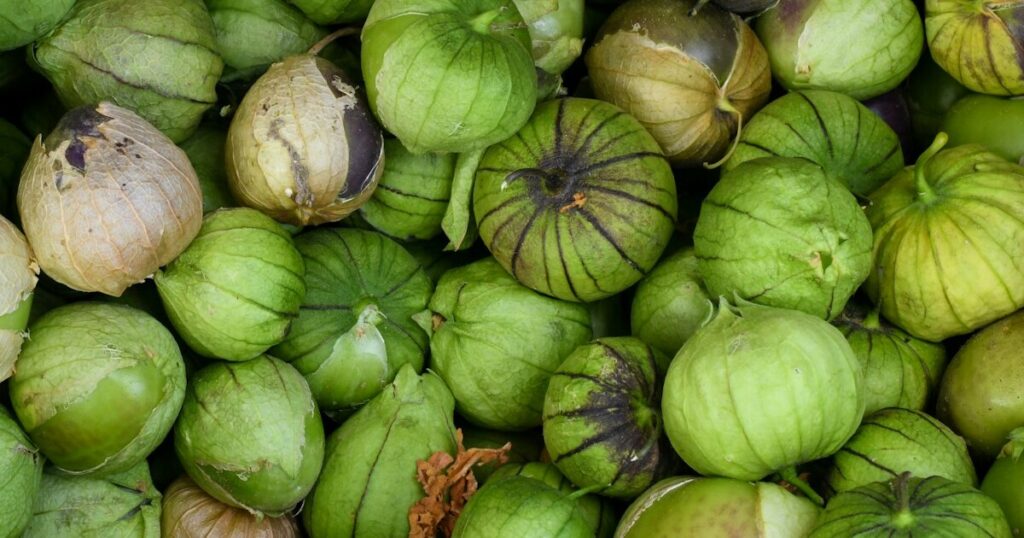
Tomatillos are ready when their husks turn papery and split, and the fruit inside fills the shell with a slight wobble. Harvesting too early yields tart, underdeveloped fruits; too late, and they may dry out inside. I found the perfect window by testing one husk daily around midseason!
Collect fully ripe fruit for immediate use or green tomatillos for pickling. Leave a few on the vine to mature fully for seed saving—simply dry the pulp, harvest seeds, and store in a cool, dry place. Next year, you’ll have homegrown seed stock for early starts and new flavor explorations!