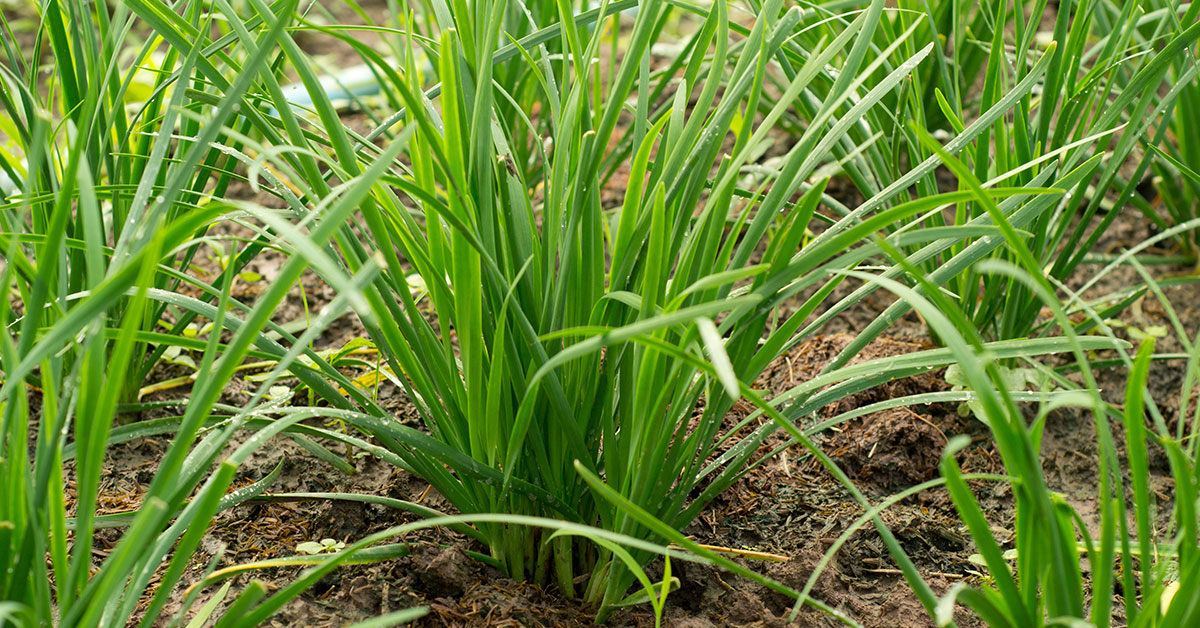

Chives are one of those herbs that quietly become essential in the garden. Whether you’re sprinkling them fresh over scrambled eggs or letting their globe-like purple blooms dance in the breeze, a full, bushy patch of chives is a joy to have. But it’s such a disappointment when they come in sparse, floppy, or weak! Luckily, with a few strategic gardening practices, you can grow lush clumps of chives that keep giving from early spring through fall.
Chives (Allium schoenoprasum) are native to temperate regions across Europe, Asia, and North America. They’re not considered invasive, but they will expand slowly by clumping if left undisturbed. What makes chives such an appealing herb—besides their mild onion flavor—is how resilient and rewarding they can be when treated right. These ten tips are the best ways I’ve found to keep chives looking full, flavorful, and downright gorgeous!
Cut Them Back Often and Aggressively
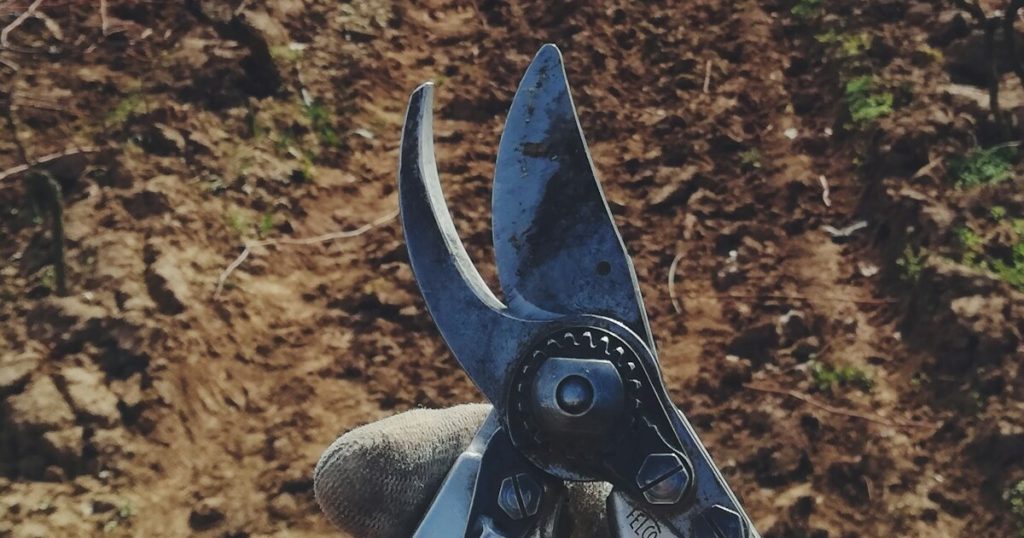
One of the biggest secrets to growing thick, bushy chives is not being shy about harvesting. Regularly cutting your chives keeps them from getting tall and floppy and encourages new growth from the base. If you only snip a few leaves here and there, the plant gets top-heavy and hollow inside. But when you cut chives down to about 2 inches above the soil, they respond with dense, vibrant regrowth.
I usually give my chive clumps a good haircut every few weeks during the growing season. Don’t worry—it won’t hurt the plant! In fact, this practice mimics natural grazing or harsh weather and signals the chive to bounce back stronger. After a full trim, the plant pushes out a thicker flush of stems, keeping the mound tight, compact, and easy to harvest again.
Divide Every Few Years to Rejuvenate
Like many perennials, chives can get overcrowded and woody in the center over time. If your chive patch starts thinning out in the middle or losing vigor, it’s probably time to divide. This not only rejuvenates growth but also gives you bonus clumps to replant or share with friends!
The best time to divide chives is in early spring or fall. I dig up the entire clump, pull it gently apart into smaller chunks (each with some roots and green growth), and replant them a few inches apart. Each division bounces back quickly with fresh leaves, and the renewed airflow helps prevent fungal issues. It’s such a satisfying process—turning one tired clump into a handful of vigorous new ones!
Keep the Soil Moist But Not Soggy

Chives like evenly moist soil, especially when they’re actively growing. But they really dislike soggy roots, which can lead to rot or fungal problems. If you’re seeing yellowing leaves or mushy bases, overwatering or poor drainage is probably to blame. On the flip side, letting the soil dry out too much can cause chives to go dormant early or produce tough, bitter stems.
I find that a 2–3 inch layer of mulch around the base of the plant helps hold moisture without waterlogging the soil. In containers, be sure there are good drainage holes, and in garden beds, amend heavy soil with compost or sand to improve texture. Chives are surprisingly low-maintenance once you strike that moisture balance—they’ll reward you with healthy, tender leaves all season long!
Give Them Plenty of Sunlight

Chives are sun-lovers, plain and simple. They can tolerate part shade, but for the fullest, most productive plants, give them at least 6 hours of direct sunlight a day. Sun exposure helps keep the clump dense, prevents floppy growth, and enhances the rich green color of the stems.
If your chives are reaching awkwardly or producing thin, pale leaves, it’s likely they need more light. I like to plant chives in the front of beds or near paths so they stay front and center—and they really do look great as edible edging. In pots, make sure they’re in a bright spot, and rotate the container if needed to keep growth even on all sides.
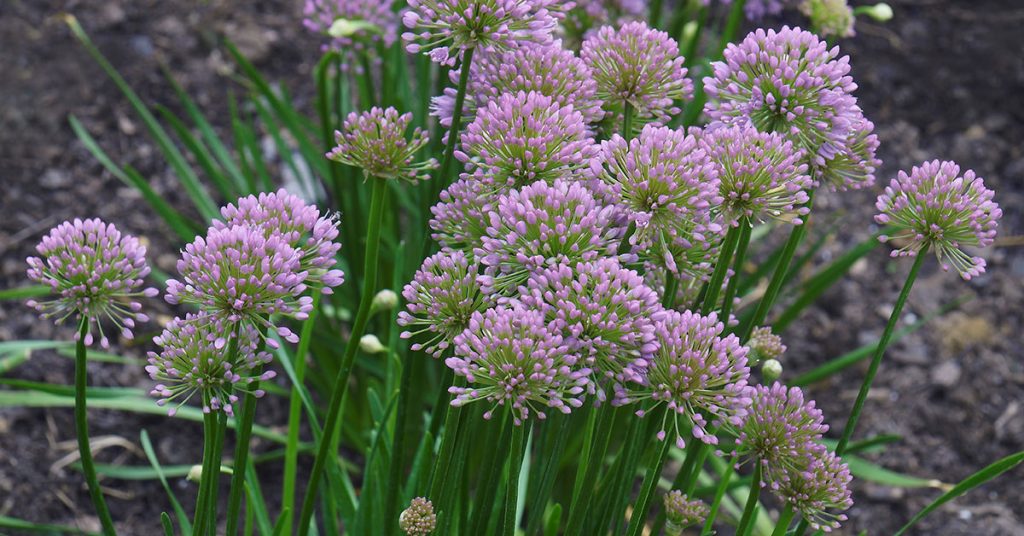
Don’t Let Them Bloom Too Long

Chive flowers are beautiful and absolutely adored by pollinators. Bees flock to those globe-shaped blooms, and the sight of a blooming chive patch is always a delight. But here’s the thing—if you leave the flowers on too long, your chive plant will put all its energy into seed production and slow down leaf growth. That’s great if you want to save seeds, but not ideal if you’re after bushy foliage.
I usually let the flowers bloom for a week or so to feed the pollinators, then snip them off before they start to dry and set seed. Removing the spent flowers helps redirect energy back into the roots and leafy growth. And if you do want to collect seeds, just leave a few blooms on one clump while trimming back the others to keep them productive.
Feed With a Light Hand

Chives aren’t heavy feeders, but they do appreciate a gentle dose of nutrients now and then—especially if you’re harvesting regularly. Too much nitrogen can make the plant leggy, while too little can lead to pale, sluggish growth. A light application of compost or diluted liquid fertilizer every month or two helps keep growth lush and strong.
I like to top-dress chive beds with compost in early spring, then water with a fish emulsion or seaweed-based fertilizer during peak growth months. In containers, where nutrients wash out more quickly, I feed more often using a balanced organic blend. Keeping the soil rich without overdoing it helps chives maintain that tight, vibrant shape we’re aiming for.
Start From Seed or Transplants Carefully
Chives are slow to start from seed, so patience is key. If you’re growing from seed, start indoors 6–8 weeks before the last frost or direct sow very early in the season. Keep the seedlings moist and warm until they’re sturdy enough to transplant. I find that starting with small transplants or divided clumps is a faster route to a full patch, especially if you’re eager for harvests this season.
Whether you’re sowing seeds or setting out transplants, spacing is important. Plant chives about 6–12 inches apart to give them room to spread. Don’t crowd them, or airflow suffers and clumps grow unevenly. Once they’re established, you can always tuck in a few more divisions to fill any gaps!
Mulch to Conserve Moisture and Prevent Weeds

A simple layer of mulch around your chives helps keep moisture levels steady and weeds at bay. Weeds are especially troublesome around perennial herbs because they steal nutrients and crowd the base, leading to reduced airflow and slower regrowth. Mulch also keeps the soil cooler, which helps chives stay productive longer into summer.
I like using shredded straw, chopped leaves, or even grass clippings (as long as they’re pesticide-free). Apply the mulch a few inches thick, but leave a little space around the base of the clump to avoid rot. This little buffer zone keeps stems dry and healthy, while the mulch does its job protecting the root zone.
Grow Them in Containers for Flexibility
Chives do beautifully in containers, which is great news if you’re short on garden space or want to keep herbs right outside the kitchen. Growing chives in pots allows you to move them around for better sun exposure, protect them from frost, or keep them isolated from aggressive garden neighbors.
Choose a container that’s at least 8–10 inches deep and wide, and use a well-draining potting mix. Keep the soil consistently moist, and be prepared to divide your container clump every year or so to keep it full and healthy. I love keeping potted chives near the front door—so easy to snip as you head inside, and the scent alone lifts my spirits!
Let Them Go Dormant in Winter

Chives are cold-hardy perennials and actually benefit from a dormancy period in colder zones. When winter arrives, the leaves die back naturally, and the plant rests underground until spring. Don’t worry—it hasn’t died! Let the leaves wither naturally, then cut them back to about an inch above soil level.
In very cold areas, a layer of mulch helps insulate the root zone. If you’re growing in containers, move the pots to a sheltered spot to protect them from freeze-thaw cycles. When spring comes, you’ll see fresh green shoots popping up—stronger and bushier than before. It’s always such a rewarding sight to see them bounce back after a long winter nap.