
Welcome to the world of pumpkin growing! If you’re looking for a unique and eye-catching addition to your garden, the Streaker pumpkin is the perfect choice. With its vibrant and striking appearance, this variety is sure to be a standout among your other plants. The Streaker pumpkin, also known as the “Cucurbita pepo,” is a medium-sized pumpkin that boasts a stunning combination of orange and green streaks on its skin.
Not only is it visually appealing, but it also offers a deliciously sweet and smooth flesh that is perfect for cooking and baking. In this article, we will guide you through the process of growing Streaker pumpkins, from selecting the right seeds to nurturing the plants and harvesting your bountiful crop. So, get ready to embark on a pumpkin-growing adventure and prepare to impress your friends and family with this unique and delicious variety!
What is a Streaker pumpkin?
The Streaker pumpkin is a unique and eye-catching variety known for its distinctive streaked or striped skin. It is a medium-sized pumpkin, typically weighing between 8 to 12 pounds. The skin color can vary from deep green to yellow, with vibrant orange streaks running across the surface. The flesh of the Streaker pumpkin is sweet, dense, and perfect for cooking and baking.
This variety is highly sought after for its ornamental appeal, making it a popular choice for fall decorations and pumpkin carving. Streaker pumpkins require full sun, well-drained soil, and regular watering to thrive. With proper care and attention, they can produce an abundant harvest of beautiful and delicious pumpkins.
What does a Streaker pumpkin taste like?
Streaker pumpkins have a unique and delightful flavor profile that sets them apart from other pumpkin varieties. These pumpkins are known for their sweet and nutty taste, making them a popular choice for both savory and sweet dishes.
The flesh of Streaker pumpkins is smooth, creamy, and tender, with a vibrant orange color. When cooked, it becomes soft and velvety, making it perfect for purees, soups, and pies. The flavor is rich and slightly sweet, with subtle hints of caramel and butterscotch. This sweetness is balanced by a mild earthiness, giving the pumpkin a well-rounded taste.
Streaker pumpkins also have a nutty undertone, reminiscent of roasted chestnuts or hazelnuts. This nuttiness adds depth and complexity to the flavor, making it a versatile ingredient in various recipes. It pairs exceptionally well with warm spices like cinnamon, nutmeg, and ginger, enhancing the overall taste experience.
Whether used in savory dishes like roasted pumpkin risotto or sweet treats like pumpkin bread or cheesecake, Streaker pumpkins bring a distinct and delicious flavor to any recipe. Their unique combination of sweetness, nuttiness, and earthiness makes them a favorite among pumpkin enthusiasts and a delightful addition to any culinary creation.
How to start Streaker pumpkin from seed
Starting Streaker Pumpkins: A Gardener’s Guide
Streaker pumpkins, also known as “Streaker of the Patch,” are a unique and eye-catching variety of pumpkin that can add a touch of whimsy to your garden. With their vibrant orange color and distinctive streaks, they are sure to be a standout in any pumpkin patch. Here is a step-by-step guide on how to successfully start and grow Streaker pumpkins:
- Streaker pumpkins require a sunny location with at least 6-8 hours of direct sunlight each day.
- Ensure the soil is well-draining and rich in organic matter. Amend the soil with compost or well-rotted manure before planting.
- Purchase high-quality Streaker pumpkin seeds from a reputable supplier or seed catalog.
- Look for seeds that are plump, firm, and free from any signs of damage or disease.
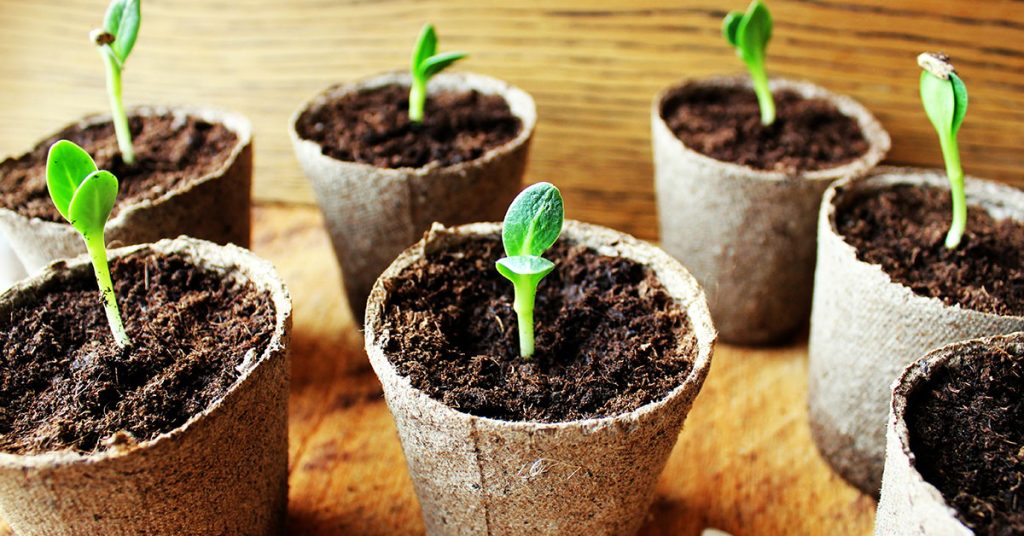
- Start Streaker pumpkin seeds indoors about 2-3 weeks before the last expected frost in your area.
- Fill seed trays or small pots with a seed-starting mix, which provides good drainage and aeration.
- Plant the seeds about 1 inch deep, placing 2-3 seeds per pot or cell.
- Keep the soil consistently moist but not waterlogged.
- Maintain a temperature of around 70-80°F (21-27°C) for optimal germination.
- Once the danger of frost has passed and seedlings have developed 2-3 true leaves, they are ready for transplanting.
- Harden off the seedlings by gradually exposing them to outdoor conditions over a period of 7-10 days.
- Choose a planting spot in the garden with enough space for the vines to spread. Streaker pumpkins require approximately 50-100 square feet per plant.
- Dig a hole slightly larger than the root ball of the seedling and gently place it in the hole.
- Backfill the hole with soil, firming it gently around the base of the plant.
- Water thoroughly after transplanting to help the seedling establish.
- Watering: Keep the soil consistently moist, especially during dry spells. Avoid overwatering, as it can lead to root rot.
- Mulching: Apply a layer of organic mulch around the base of the plants to help retain moisture, suppress weeds, and regulate soil temperature.
- Fertilizing: Streaker pumpkins are heavy feeders. Apply a balanced, slow-release fertilizer or compost around the base of the plants every 3-4 weeks.
- Pruning: To encourage better airflow and prevent diseases, remove any yellowing or diseased leaves. You can also prune excessive vine growth to redirect energy towards fruit production.
- Pollination: Streaker pumpkins require pollination to set fruit. Bees and other pollinators are essential for this process. Consider planting pollinator-friendly flowers nearby to attract them.
- Streaker pumpkins typically take around 90-110 days to mature, depending on the specific variety.
- Harvest the pumpkins when the skin has hardened and developed its characteristic streaks.
- Cut the stem with a sharp knife, leaving about 2-3 inches attached to the pumpkin.
- Handle the pumpkins carefully to avoid any damage or bruising.
By following these guidelines, you can successfully start and grow Streaker pumpkins in your garden. Enjoy the process and the vibrant beauty these unique pumpkins bring to your harvest!
When to plant Streaker pumpkin outdoors
The ideal time to plant Streaker pumpkins is in late spring or early summer, after the last frost has passed and the soil temperature has reached at least 60°F (15°C). This is typically around May or June in most regions. Planting at this time will ensure that the soil is warm enough for the seeds to germinate and the plants to establish properly.
Growing & care guide
Streaker pumpkins, also known as Cucurbita pepo ‘Streaker’, are a popular variety of pumpkin known for their unique and attractive streaked skin. To ensure healthy growth and a bountiful harvest of Streaker pumpkins, there are several best practices to keep in mind:
- Planting: Streaker pumpkins thrive in full sun, so choose a location in your garden that receives at least 6-8 hours of direct sunlight per day. The soil should be well-draining and rich in organic matter. Prepare the soil by loosening it with a garden fork or tiller and incorporating compost or well-rotted manure.
- Timing: Streaker pumpkins are warm-season crops, so it’s essential to plant them after the danger of frost has passed and the soil has warmed up. In most regions, this is typically in late spring or early summer. Check your local climate and planting zone to determine the best time for planting.
- Spacing: Streaker pumpkins require ample space to grow and spread. Plant the seeds or seedlings at least 3-5 feet apart in rows that are 6-8 feet apart. This spacing allows for proper air circulation and prevents overcrowding, which can lead to disease and poor fruit development.
- Watering: Pumpkins need consistent moisture, especially during their early growth stages. Water the plants deeply, providing about 1-2 inches of water per week. Avoid overhead watering, as wet foliage can promote fungal diseases. Instead, use a soaker hose or drip irrigation system to deliver water directly to the soil.
- Mulching: Apply a layer of organic mulch, such as straw or wood chips, around the base of the Streaker pumpkin plants. Mulching helps retain soil moisture, suppresses weed growth, and regulates soil temperature. It also prevents the pumpkins from coming into direct contact with the soil, reducing the risk of rot.
- Fertilizing: Pumpkins are heavy feeders and require regular fertilization to support their vigorous growth. Before planting, incorporate a balanced organic fertilizer into the soil. Once the plants have established, side-dress them with compost or a slow-release organic fertilizer every 3-4 weeks throughout the growing season.
- Pollination: Streaker pumpkins, like most pumpkins, require pollination for fruit set. Bees and other pollinators are crucial for this process. To attract pollinators, plant flowers nearby or use companion plants like marigolds or zinnias. If pollinator activity is limited, you can hand-pollinate the flowers by transferring pollen from the male flowers to the female flowers using a small brush or cotton swab.
- Pest and disease control: Streaker pumpkins are susceptible to various pests and diseases, including squash bugs, vine borers, powdery mildew, and downy mildew. Regularly inspect your plants for signs of damage or infestation, and take appropriate measures such as handpicking pests, using organic insecticides, or applying fungicides as needed. Proper spacing, good air circulation, and avoiding overhead watering can also help prevent disease issues.
- Harvesting: Streaker pumpkins are ready for harvest when their skin turns a deep orange color and the stem starts to dry and crack. Use a sharp knife or pruning shears to cut the pumpkins from the vine, leaving a few inches of stem attached. Handle them with care to avoid bruising or damaging the skin.
By following these best practices, you can ensure the successful growth and development of Streaker pumpkins in your garden. Enjoy the process and the rewarding experience of harvesting your own unique and beautiful pumpkins!
Harvesting guide
Streaker pumpkins, also known as “Streaker of the Patch,” are a popular variety known for their unique and vibrant streaked skin. Harvesting these pumpkins at the right time is crucial to ensure their flavor, texture, and overall quality. Here’s a guide on when and how to harvest Streaker pumpkins:
- Timing: Streaker pumpkins are typically ready for harvest around 90 to 110 days after planting the seeds. However, it’s essential to check for specific signs of maturity to determine the optimal harvest time.
- Skin color and texture: Streaker pumpkins have a distinct streaked skin pattern, with a combination of green, yellow, and orange hues. As the pumpkin matures, the streaks become more pronounced and vibrant. Additionally, the skin should feel hard and tough, indicating that the pumpkin is fully developed.
- Stem drying: Another important indicator of readiness for harvest is the drying of the stem. As the pumpkin matures, the stem will start to dry out and turn brown. This is a clear sign that the pumpkin is ready to be picked.
- Tapping test: To further confirm if the Streaker pumpkin is ripe, you can perform a tapping test. Gently tap the pumpkin’s skin with your knuckles. If it produces a hollow sound, it indicates that the pumpkin is mature and ready for harvest.
- Harvesting: To harvest a Streaker pumpkin, use a sharp knife or pruning shears to cut the stem about 2 to 3 inches above the pumpkin. Be careful not to damage the pumpkin or the stem, as any injuries can lead to rotting or spoilage.
- Handling and storage: After harvesting, handle the pumpkins with care to avoid any bruises or cuts. It’s best to leave a small portion of the stem intact, as this helps prolong the pumpkin’s shelf life. Store the Streaker pumpkins in a cool, dry, and well-ventilated area, such as a basement or garage, where the temperature is around 50 to 55°F (10 to 13°C). Properly stored pumpkins can last for several months.
Remember, it’s crucial to monitor your Streaker pumpkins regularly as they approach maturity to ensure you harvest them at the right time. By following these guidelines, you can enjoy the vibrant and delicious Streaker pumpkins you’ve grown in your garden.