
Welcome to the world of Durondeau pears, a delightful and versatile fruit that is sure to captivate any gardening enthusiast. Known for its exceptional flavor and distinctive shape, the Durondeau pear is a popular choice among home gardeners and commercial growers alike. With its rich history and unique characteristics, this pear variety offers a rewarding experience for those looking to cultivate their own orchard. In this comprehensive guide, we will explore the art of growing Durondeau pears, from selecting the right cultivar to nurturing the tree through each stage of its development.
Whether you are a seasoned gardener or a beginner with a green thumb, this article will equip you with the knowledge and techniques necessary to successfully grow and harvest these delectable fruits. So, let’s dive in and discover the secrets to cultivating Durondeau pears that will have your taste buds dancing with delight.
What are Durondeau Pears?
Durondeau pear is a popular variety of pear tree known for its excellent flavor and texture. It is a European pear variety that originated in Belgium. The fruit has a distinctive shape, with a round base that tapers towards the stem end. The skin is greenish-yellow, often with a reddish blush on the sun-exposed side. Durondeau pears are highly regarded for their sweet and juicy flesh, which has a smooth, buttery texture. The flavor is rich and aromatic, with a perfect balance of sweetness and acidity.
The fruit ripens in late summer or early fall, and when fully ripe, it develops a soft and melting consistency. This pear variety is also valued for its versatility in the kitchen. It can be enjoyed fresh, added to salads, or used in cooking and baking. Durondeau pears are particularly suitable for poaching, as they hold their shape well and retain their flavor. In terms of growing requirements, Durondeau pear trees are hardy and adaptable.
They thrive in full sun and well-drained soil, but can tolerate a range of soil types. They are self-fertile, meaning they do not require another pear tree for pollination. However, planting multiple trees can increase fruit production. Pruning is necessary to maintain a healthy shape and promote fruiting. Overall, Durondeau pears are a fantastic choice for pear enthusiasts looking for a delicious and versatile variety to grow in their gardens.
What do Durondeau Pears taste like?
The Durondeau pear is known for its exceptional flavor profile, making it a favorite among pear enthusiasts. It offers a unique combination of sweet and tart flavors, creating a delightful balance on the palate.
The taste of the Durondeau pear is often described as rich, aromatic, and complex. Its sweetness is not overpowering, but rather subtle and pleasant. The pear has a slightly tangy and zesty undertone, adding a refreshing element to its overall taste.
One of the distinctive characteristics of the Durondeau pear is its juiciness. When you take a bite, you’ll experience a burst of flavorful juice that enhances the overall eating experience. The texture of the fruit is smooth and buttery, with a tender flesh that melts in your mouth.
As the Durondeau pear ripens, its flavor intensifies, becoming even sweeter and more pronounced. This pear is often enjoyed fresh, as its flavor shines when eaten raw. However, it can also be used in various culinary applications, such as baking, poaching, or adding to salads and desserts.
Overall, the Durondeau pear offers a delightful combination of sweetness, tartness, and juiciness, making it a highly sought-after variety for those who appreciate the unique flavors of pears.
How to start Durondeau Pears from seeds
Durondeau pears are a popular variety known for their sweet and juicy flavor. If you’re interested in growing Durondeau pear trees, here is a step-by-step guide to help you get started:
- Climate and Soil Requirements:
- Durondeau pears thrive in temperate climates with cool winters and mild summers.
- They prefer well-draining soil with a pH level between 6.0 and 7.0.
- Ensure the planting location receives full sun for at least 6-8 hours a day.
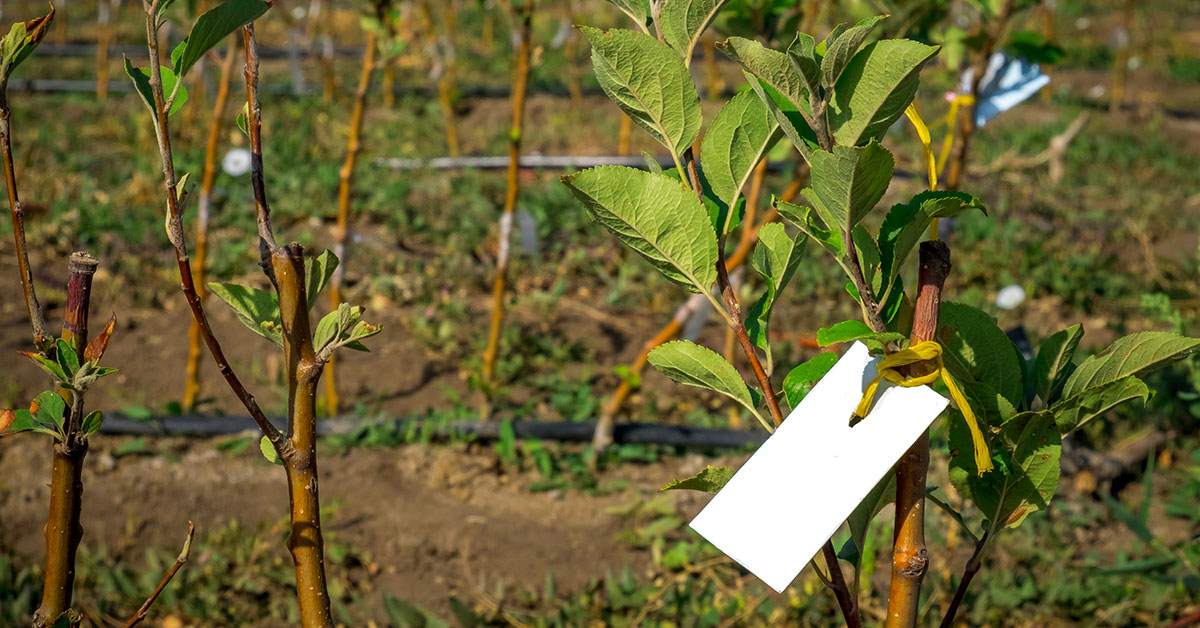
- Choosing the Right Tree:
- Purchase a Durondeau pear tree from a reputable nursery or garden center.
- Look for a healthy tree with a straight trunk and well-developed root system.
- Consider buying a grafted tree for better disease resistance and improved fruit quality.
- Planting:
- Dig a hole that is wider and deeper than the root ball of the tree.
- Place the tree in the hole, ensuring that the graft union (the swollen area where the scion and rootstock meet) is above the soil line.
- Backfill the hole with soil, gently firming it around the roots.
- Water the tree thoroughly after planting to settle the soil and eliminate air pockets.
- Pruning and Training:
- Prune the newly planted tree by removing any damaged or crossing branches.
- Select a central leader (main upright stem) and remove competing branches to create an open and balanced framework.
- Train the tree to a modified central leader system, allowing for good air circulation and sunlight penetration.
- Watering and Fertilizing:
- Water the tree deeply and regularly, especially during dry periods.
- Apply a layer of organic mulch around the base of the tree to conserve moisture and suppress weed growth.
- Fertilize the tree in early spring with a balanced fruit tree fertilizer according to the package instructions.
- Pest and Disease Management:
- Monitor the tree regularly for common pests like aphids, pear psylla, and codling moth.
- Use organic pest control methods or consult with a local agricultural extension office for appropriate treatments.
- Watch out for diseases such as fire blight, pear scab, and powdery mildew. Apply appropriate fungicides if necessary.
- Harvesting:
- Durondeau pears are typically ready for harvest in late summer or early fall.
- Check for ripeness by gently pressing the fruit near the stem. If it yields slightly, it is ready to be picked.
- Harvest the pears carefully, as they bruise easily. Twist and lift the fruit gently to detach it from the tree.
Remember that growing fruit trees requires patience and care. Regular maintenance, including pruning, watering, and pest management, will help ensure healthy and productive Durondeau pear trees.
When to plant Durondeau Pears outdoors
The ideal time to plant Durondeau pear trees is during the late winter or early spring, before the tree starts to bud and leaf out. This is typically between late February and early April, depending on your specific climate and location. Planting during this time allows the tree to establish its root system before the onset of summer heat.
Growing & care guide Durondeau Pears
Durondeau pear trees are a popular choice among gardeners due to their delicious fruit and attractive appearance. To ensure the health and productivity of your Durondeau pear tree, it is important to follow some best practices for caring for it. Here are some key tips:
- Planting: Choose a location that receives full sun exposure for at least 6-8 hours a day. The soil should be well-draining and rich in organic matter. Durondeau pear trees prefer slightly acidic to neutral soil with a pH range of 6.0-7.0. It is recommended to plant the tree in early spring or late fall when the soil is workable.
- Watering: Adequate watering is crucial, especially during the first few years of growth. Water the tree deeply once a week, providing enough moisture to reach the root zone. Avoid overwatering, as it can lead to root rot. Mulching around the base of the tree helps retain soil moisture and suppress weed growth.
- Pruning: Regular pruning is essential for maintaining the shape, size, and overall health of your Durondeau pear tree. Prune during late winter or early spring while the tree is still dormant. Remove any dead, damaged, or diseased branches. Thin out crowded areas to improve air circulation and sunlight penetration. Prune to create an open center or modified central leader shape, which allows for better fruit production.
- Fertilizing: Durondeau pear trees benefit from regular fertilization to ensure optimal growth and fruit production. Apply a balanced fertilizer, such as a 10-10-10 or 14-14-14, in early spring before new growth begins. Follow the manufacturer’s instructions for application rates. Avoid excessive nitrogen fertilization, as it can promote excessive vegetative growth at the expense of fruiting.
- Pest and Disease Control: Regular monitoring is crucial to detect and prevent pest and disease issues. Common pests that may affect Durondeau pear trees include aphids, pear psylla, and codling moth. Use appropriate insecticides or organic pest control methods to manage infestations. Diseases such as fire blight, pear scab, and powdery mildew can also affect pear trees. Apply appropriate fungicides and follow good cultural practices to minimize disease incidence.
- Harvesting: Durondeau pears are typically ready for harvest in late summer or early fall, depending on your location and climate. Check for ripeness by gently pressing the fruit near the stem. If it yields slightly, it is ready to be picked. Harvest pears carefully to avoid bruising or damaging the fruit. Store them in a cool, dry place to ripen fully before consumption.
By following these best practices for caring for your Durondeau pear tree, you can enjoy a healthy tree that produces abundant, delicious fruit for years to come. Remember to adapt these guidelines to your specific growing conditions and consult local gardening resources for additional advice.
Harvesting guide for Durondeau Pears
The Durondeau pear is a popular variety known for its excellent flavor and versatility in cooking. Harvesting Durondeau pears at the right time is crucial to ensure optimal taste and texture. Here are some guidelines to help you harvest Durondeau pears:
- Timing: Durondeau pears are typically ready for harvest in late summer or early fall, depending on your specific climate and growing conditions. The exact timing can vary, so it’s essential to monitor the fruit closely.
- Color: Durondeau pears change color as they ripen. When they are ready for harvest, the skin turns from green to a yellowish-green or golden hue. However, avoid waiting for the pears to become fully yellow, as they may become overripe and lose their firmness.
- Firmness: Gently press your thumb against the skin of the pear near the stem. If it yields slightly to pressure but remains firm, it is likely ready for harvest. Avoid picking pears that are too hard or too soft, as they may not have reached their peak flavor.
- Twist and lift: To harvest Durondeau pears, gently twist and lift them from the tree. Avoid pulling or tugging forcefully, as this can damage the fruit or the tree itself. If the pears don’t come off easily, they may need more time to ripen.
- Harvesting in stages: Durondeau pears do not all ripen simultaneously on the tree. Instead, they tend to ripen in stages. Harvest the pears that are ready, leaving the others to mature further. This allows you to enjoy a more extended harvest period.
- Storage: Once harvested, place the Durondeau pears in a cool, dark, and well-ventilated area. They can be stored at room temperature for a few days to ripen further. If you want to extend their shelf life, store them in the refrigerator, where they can last for up to several weeks.
Remember, the best way to determine the ideal harvest time for Durondeau pears is through observation and experience. Regularly check the color, firmness, and taste of the fruit to ensure you pick them at their peak flavor and quality.