
Welcome to the world of pumpkin growing, where we delve into the secrets of cultivating the magnificent Gold Medal pumpkin. With its vibrant orange hue, massive size, and impeccable shape, the Gold Medal pumpkin is a true champion in the world of giant pumpkins. Whether you are a seasoned gardener or a novice enthusiast, this article will guide you through the process of growing this remarkable variety.
From selecting the right seeds to nurturing the plants through every stage of growth, we will explore the techniques, tips, and tricks that will help you achieve a bountiful harvest of Gold Medal pumpkins. So, grab your gardening tools, put on your green thumb, and let’s embark on this exciting journey of growing the Gold Medal pumpkin.
What are Gold Medal Pumpkins?
Gold Medal pumpkin is a popular variety known for its large size and vibrant orange color. It is a hybrid pumpkin that typically weighs between 20 and 30 pounds, although it can sometimes reach up to 50 pounds under optimal growing conditions. The Gold Medal pumpkin has a round to slightly flattened shape, making it ideal for carving or using as a decorative centerpiece. Its thick, smooth skin is perfect for painting or etching designs. The flesh of the Gold Medal pumpkin is sweet, dense, and flavorful, making it great for baking pies, making soups, or roasting. This variety is known for its vigorous growth and high yield, making it a favorite among pumpkin growers and enthusiasts.
What do Gold Medal pumpkin taste like?
Gold Medal pumpkins have a rich and sweet flavor profile. They are known for their smooth and creamy texture, making them perfect for baking and cooking. The flesh of Gold Medal pumpkins is dense and vibrant orange in color, which adds to their visual appeal. When cooked, they develop a nutty and slightly caramelized taste, with hints of honey and butterscotch. The flavor is often described as being more intense and complex compared to other pumpkin varieties. Whether used in pies, soups, or other culinary creations, Gold Medal pumpkins bring a delightful sweetness and depth of flavor that is highly sought after by pumpkin enthusiasts.
How to start Gold Medal Pumpkins from Seeds
Growing Gold Medal pumpkins can be a rewarding and exciting experience. These pumpkins are known for their large size, vibrant orange color, and delicious flavor. Here is a step-by-step guide to help you successfully start your own Gold Medal pumpkin plants:
- Selecting the Seeds: Choose high-quality Gold Medal pumpkin seeds from a reputable supplier or garden center. Look for seeds that are fresh, disease-free, and specifically labeled as Gold Medal variety.
- Timing: Gold Medal pumpkins require a long growing season, typically around 100-120 days. Start your seeds indoors about 2-4 weeks before the last frost date in your area. This will give them a head start and ensure they have enough time to mature before the end of the growing season.
- Preparing the Soil: Gold Medal pumpkins prefer well-draining, fertile soil. Choose a sunny spot in your garden with rich, loamy soil. Before planting, amend the soil with organic matter such as compost or well-rotted manure to improve its fertility and drainage.
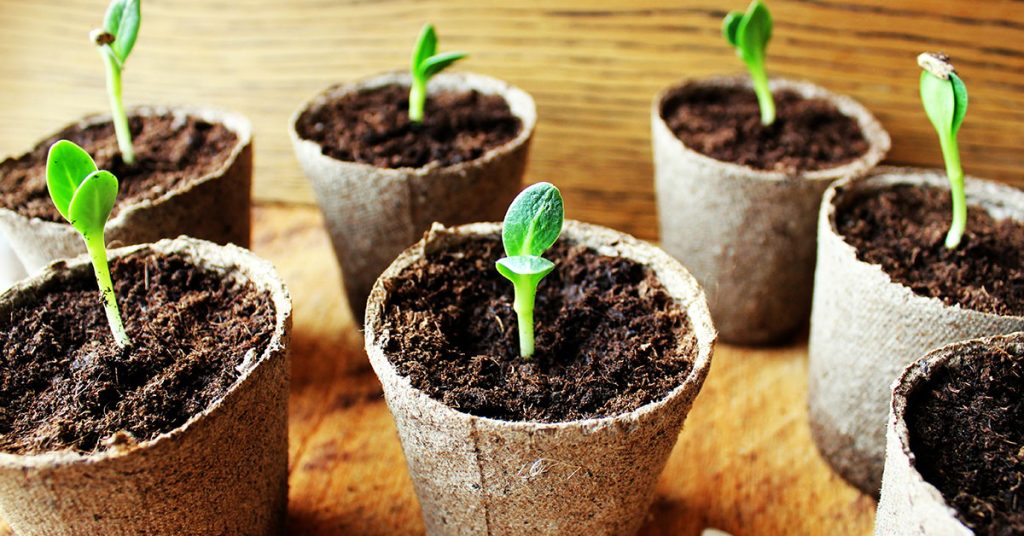
- Planting the Seeds: Fill small seed trays or pots with seed-starting mix. Plant the Gold Medal pumpkin seeds about 1 inch deep, placing one seed per pot. Water the soil gently to ensure it is moist but not waterlogged.
- Providing Optimal Conditions: Place the seed trays in a warm location, ideally around 70-85°F (21-29°C). You can use a heating mat to maintain a consistent temperature if necessary. Ensure the seeds receive plenty of light, either by placing them near a sunny window or using fluorescent grow lights.
- Watering and Care: Keep the soil consistently moist but not overly wet. Water the seedlings gently, avoiding excessive watering that can lead to damping off disease. As the seedlings grow, thin them out by removing weaker ones, leaving only the strongest plant in each pot.
- Transplanting: Once all chances of frost have passed and the seedlings have developed a few sets of true leaves, they are ready to be transplanted outdoors. Choose a location with full sun exposure and enough space for the large vines to spread.
- Hardening Off: Before transplanting, gradually acclimate the seedlings to outdoor conditions. Start by placing them outside in a sheltered area for a few hours each day, gradually increasing the time over a week. This process, known as hardening off, helps the plants adjust to the outdoor environment.
- Planting Outdoors: Dig a hole large enough to accommodate the root ball of each seedling. Space the plants about 6-8 feet apart to allow for their sprawling growth. Gently remove the seedlings from their pots, being careful not to damage the roots, and place them in the holes. Backfill with soil and firm it gently around the plants.
- Watering and Mulching: Water the transplanted seedlings thoroughly and regularly, ensuring the soil stays consistently moist. Applying a layer of organic mulch, such as straw or wood chips, around the plants will help retain moisture, suppress weeds, and maintain a more even soil temperature.
- Fertilizing: Gold Medal pumpkins are heavy feeders. Apply a balanced organic fertilizer or compost around the plants every few weeks to provide them with the necessary nutrients. Follow the package instructions for the appropriate dosage.
- Pest and Disease Control: Monitor your pumpkin plants regularly for pests like aphids, squash bugs, or powdery mildew. Use organic pest control methods, such as handpicking insects or applying neem oil, to keep them under control. Proper spacing, good air circulation, and avoiding overhead watering can help prevent diseases.
- Pollination: Gold Medal pumpkins require pollination to produce fruit. Bees and other pollinators are essential for this process. To attract them, plant flowers nearby or use a pollinator-friendly garden design. If pollination seems limited, you can hand-pollinate the flowers by transferring pollen from the male flowers to the female flowers using a small brush or cotton swab.
- Supporting the Vines: As the pumpkin vines grow, they may need support to prevent the heavy fruit from touching the ground and rotting. Use trellises, fences, or straw bales to provide support for the vines and elevate the developing pumpkins.
- Harvesting: Gold Medal pumpkins are ready for harvest when they have reached their full size and have a deep orange color. The stem should be dry and brown. Cut the pumpkins from the vine, leaving a few inches of stem attached. Handle them carefully to avoid any damage.
By following these steps, you can successfully start and grow your own Gold Medal pumpkins. Enjoy the process and look forward to a bountiful harvest of these impressive and delicious pumpkins!
When to plant Gold Medal Pumpkins outdoors
The ideal time to plant Gold Medal pumpkins is in late spring or early summer, when the soil temperature has reached around 65°F (18°C) and there is no longer a risk of frost. This is typically around 2-3 weeks after the last frost date in your area. Planting at the right time ensures that the soil is warm enough for the seeds to germinate and the plants to establish well.
Growing & care guide
Caring for Gold Medal pumpkins requires attention to several key aspects, including soil preparation, watering, fertilizing, pest control, and proper harvesting. Here are some best practices to ensure successful growth and a bountiful harvest:
- Choose a sunny location with well-draining soil. Pumpkins prefer a slightly acidic soil pH between 6.0 and 6.8.
- Before planting, amend the soil with organic matter such as compost or well-rotted manure to improve its fertility, moisture retention, and drainage.
- Remove any weeds or grass from the planting area, as they can compete with the pumpkin plants for nutrients and water.
- Sow Gold Medal pumpkin seeds directly in the garden after the danger of frost has passed and the soil temperature has reached at least 60°F (15°C).
- Plant the seeds about 1 inch deep and 2-3 feet apart in rows or hills. If planting in hills, space them 6-8 feet apart.
- Ensure each plant has enough space to spread its vines and receive adequate sunlight.
- Provide consistent moisture to the pumpkin plants, especially during dry periods. Aim for about 1-2 inches of water per week, either through rainfall or irrigation.
- Water deeply at the base of the plants, avoiding wetting the foliage to minimize the risk of diseases.
- Mulching around the plants with straw or wood chips can help retain soil moisture and suppress weed growth.
- Apply a balanced, slow-release fertilizer or compost at the time of planting to provide essential nutrients.
- As the plants grow, side-dress them with nitrogen-rich fertilizer every 3-4 weeks to promote healthy foliage and fruit development.
- Avoid excessive nitrogen fertilization, as it can result in excessive vine growth at the expense of fruit production.
- Monitor the plants regularly for common pumpkin pests such as squash bugs, cucumber beetles, and vine borers.
- Use organic pest control methods like handpicking pests, applying insecticidal soap or neem oil, or introducing beneficial insects like ladybugs or lacewings.
- Proper crop rotation and removing plant debris at the end of the season can help prevent pest and disease buildup.
- Gold Medal pumpkins are ready for harvest when their rinds have hardened and turned a deep golden color.
- Cut the stem with a sharp knife or pruners, leaving a few inches attached to the pumpkin to prevent rotting.
- Handle the pumpkins carefully to avoid bruising or damaging the skin, as this can shorten their storage life.
By following these best practices, you can ensure that your Gold Medal pumpkins thrive and produce beautiful, award-worthy fruits. Happy gardening!
Harvesting guide
The Gold Medal pumpkin is a popular variety known for its large size and vibrant orange color. To ensure a successful harvest, it’s important to know when and how to harvest these pumpkins.
Timing is crucial when it comes to harvesting Gold Medal pumpkins. They typically take around 100 to 120 days to reach maturity from the time of planting. However, it’s best to rely on visual cues rather than a specific number of days. Here are a few signs to look for when determining if your Gold Medal pumpkins are ready to be harvested:
- Color: The pumpkin should have a deep, rich orange color all over its surface. If there are any green patches remaining, it’s an indication that the pumpkin is not fully ripe.
- Hardness: Gently press your fingernail against the pumpkin’s skin. If it leaves a mark or indentation, the pumpkin is not yet mature. A ripe Gold Medal pumpkin should have a hard, firm skin.
- Stem: Examine the stem where it attaches to the pumpkin. If it has turned brown and is starting to dry out, it’s a good sign that the pumpkin is ready for harvest. If the stem is still green and pliable, the pumpkin needs more time to mature.
Once you’ve determined that your Gold Medal pumpkins are ready to be harvested, follow these steps:
- Use a sharp knife or pruning shears to cut the stem, leaving about 3 to 4 inches attached to the pumpkin. Avoid pulling or twisting the pumpkin off the vine, as this can damage the fruit or the plant.
- Handle the pumpkins with care to avoid any bruising or injury. They are quite heavy, so it’s advisable to use both hands or have someone assist you while lifting them.
- After harvesting, it’s important to cure the pumpkins to extend their shelf life. Place them in a warm, dry area with good air circulation for about 10 to 14 days. This process helps harden the skin and heal any minor cuts or scratches.
- Once cured, store the Gold Medal pumpkins in a cool, dry place with temperatures around 50 to 55°F (10 to 13°C). Make sure to keep them away from direct sunlight and moisture, as these conditions can cause rotting.
By following these guidelines, you can ensure a successful harvest of your Gold Medal pumpkins. Enjoy the fruits of your labor and use them for delicious recipes or festive decorations!