
Welcome to the world of growing pumpkins, where we will dive into the fascinating realm of Oz pumpkins. If you’re looking to add a touch of magic to your garden, the Oz pumpkin is the perfect choice. Known for its vibrant orange color, impressive size, and delicious flavor, this variety is a favorite among gardeners and pumpkin enthusiasts alike.
In this article, we will explore the ins and outs of growing Oz pumpkins, from selecting the right seeds to nurturing the plants throughout the growing season. Whether you’re a seasoned gardener or a beginner with a green thumb, get ready to embark on a pumpkin-growing adventure that will leave you with bountiful harvests and a sense of accomplishment. Let’s get started on this exciting journey of cultivating the magnificent Oz pumpkin!
What are Oz pumpkins?
The Oz pumpkin, also known as the Australian Blue pumpkin, is a popular variety of pumpkin known for its unique appearance and delicious flavor. It is a medium to large-sized pumpkin with a round to slightly flattened shape. The skin of the Oz pumpkin is deep blue-gray in color, often with light ribbing or markings. The flesh is bright orange, dense, and sweet, making it perfect for both savory and sweet dishes.
Oz pumpkins are known for their excellent storage capabilities, allowing them to be enjoyed for an extended period after harvest. They typically weigh between 10 to 20 pounds (4.5 to 9 kilograms), although some can grow even larger under optimal growing conditions. When it comes to growing Oz pumpkins, they thrive in warm climates with a long growing season. They require full sun exposure and well-drained soil rich in organic matter. Planting should be done after the last frost date, and the soil should be prepared by adding compost or aged manure to improve fertility.
These pumpkins are versatile in the kitchen and can be used in a variety of recipes, including soups, pies, bread, and roasted dishes. Overall, Oz pumpkins are a fantastic choice for gardeners looking to grow a unique and flavorful pumpkin variety that can be enjoyed throughout the year.
What do Oz pumpkins taste like?
Oz pumpkin, also known as Australian pumpkin, has a unique flavor profile that sets it apart from other pumpkin varieties. It is known for its sweet and nutty taste, with a hint of earthiness. The flesh of the Oz pumpkin is dense and creamy, making it perfect for baking, roasting, or pureeing.
When cooked, Oz pumpkin develops a rich, caramelized flavor that enhances its natural sweetness. It has a slightly buttery undertone, which adds depth to dishes. The nutty notes in Oz pumpkin make it a great choice for incorporating into both sweet and savory recipes.
In terms of sweetness, Oz pumpkin is moderately sweet compared to other pumpkin varieties. It strikes a balance between sweetness and earthiness, making it versatile for various culinary applications. Its natural sweetness pairs well with warm spices like cinnamon, nutmeg, and cloves, making it a popular choice for pumpkin pies, breads, and desserts.
Overall, the flavor of Oz pumpkin is distinct and enjoyable, making it a favorite among pumpkin enthusiasts. Its unique combination of sweetness, nuttiness, and earthiness adds depth and complexity to a wide range of dishes, making it a delightful ingredient to work with in the kitchen.
How to start Oz pumpkin seeds
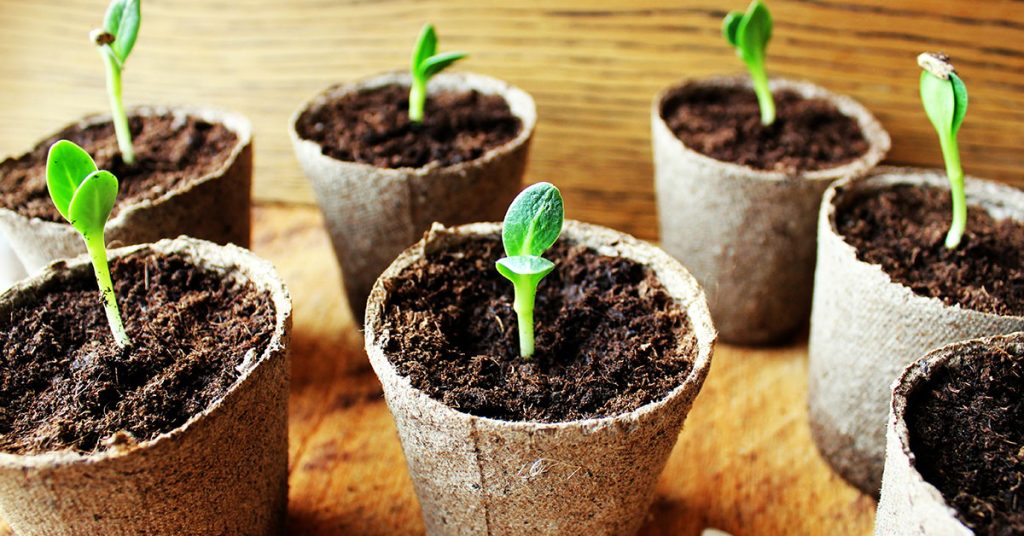
Starting Oz pumpkins can be a rewarding and enjoyable experience. These pumpkins are known for their large size, vibrant orange color, and delicious flavor. Here is a step-by-step guide to help you successfully grow Oz pumpkins:
- Selecting Seeds: Start by choosing high-quality Oz pumpkin seeds from a reputable supplier or garden center. Look for seeds that are specifically labeled as Oz pumpkins to ensure you get the right variety.
- Timing: Oz pumpkins are warm-season crops, so it’s important to plant them after the danger of frost has passed and the soil temperature has warmed up to around 60°F (15°C). In most regions, this is usually in late spring or early summer.
- Soil Preparation: Oz pumpkins prefer well-draining soil that is rich in organic matter. Prepare the soil by removing any weeds or debris and loosening it with a garden fork or tiller. Incorporate compost or well-rotted manure to improve fertility and moisture retention.
- Planting: Create mounds or raised beds to plant your Oz pumpkin seeds. Each mound should be about 3-4 feet in diameter and 6-8 inches high. Space the mounds at least 6-8 feet apart to allow the vines to spread. Plant 3-4 seeds per mound, about 1 inch deep, and cover them with soil.
- Watering: Keep the soil evenly moist but not waterlogged. Water the plants deeply once or twice a week, providing about 1-2 inches of water per week. Avoid overhead watering, as it can promote diseases. Consider using a drip irrigation system or soaker hoses to deliver water directly to the roots.
- Sunlight: Oz pumpkins require full sun to thrive. Ensure they receive at least 6-8 hours of direct sunlight daily. Choose a location in your garden that gets ample sunlight throughout the day.
- Fertilization: Apply a balanced, slow-release fertilizer when planting your Oz pumpkin seeds. Additionally, side-dress the plants with compost or a nitrogen-rich fertilizer every 3-4 weeks during the growing season. This will provide the necessary nutrients for healthy growth and fruit development.
- Mulching: Apply a layer of organic mulch, such as straw or wood chips, around the base of the plants. Mulching helps conserve moisture, suppress weeds, and regulate soil temperature.
- Support and Pruning: As the Oz pumpkin vines start to grow, provide support for the heavy fruits. You can use trellises, cages, or stakes to keep the vines off the ground. Prune the vines regularly to control their growth and improve air circulation, which reduces the risk of diseases.
- Pest and Disease Control: Keep an eye out for common pumpkin pests like aphids, squash bugs, and cucumber beetles. Use organic pest control methods such as handpicking, insecticidal soaps, or neem oil to manage infestations. Fungal diseases like powdery mildew can be prevented by spacing the plants adequately and ensuring good air circulation.
- Harvesting: Oz pumpkins are ready for harvest when their skin turns a deep, uniform orange color and the stems start to dry out. Use a sharp knife or pruning shears to cut the pumpkins from the vine, leaving a few inches of stem attached. Handle them carefully to avoid any damage.
By following these guidelines, you can grow healthy and abundant Oz pumpkins in your garden. Enjoy the process and the delicious rewards of your efforts!
When to plant Oz pumpkins outdoors
The ideal time to plant Oz pumpkins is in late spring or early summer, when the soil temperature has warmed up to around 70°F (21°C). This typically occurs when the danger of frost has passed and the weather is consistently warm. In most regions, this would be around May or June.
It’s important to note that Oz pumpkins require a long growing season, typically around 90 to 100 days from planting to harvest. Therefore, it’s crucial to consider the average first frost date in your area and ensure that you have enough time for the pumpkins to mature before the cold weather sets in.
Additionally, Oz pumpkins prefer full sun, so choose a location in your garden that receives at least 6-8 hours of direct sunlight per day. The soil should be well-draining and rich in organic matter. Prior to planting, you can amend the soil with compost or well-rotted manure to improve its fertility.
By planting Oz pumpkins at the right time and providing them with optimal growing conditions, you can maximize your chances of a successful harvest.
Growing & care guide
Caring for Oz pumpkins requires a combination of proper planting, watering, fertilizing, and pest control techniques. Here are some best practices to ensure successful growth and a bountiful harvest:
- Planting: Choose a sunny location with well-draining soil for your Oz pumpkin. The soil should be rich in organic matter, so amend it with compost or well-rotted manure before planting. Sow the seeds directly into the ground once the soil temperature reaches around 65°F (18°C). Plant the seeds about 1 inch deep and 3-4 feet apart, as Oz pumpkins need ample space to spread.
- Watering: Oz pumpkins require consistent moisture throughout their growing season. Water deeply, providing about 1-2 inches of water per week. Avoid overwatering, as it can lead to root rot. Mulching around the plants can help retain moisture and prevent weed growth.
- Fertilizing: Pumpkins are heavy feeders and benefit from regular fertilization. Before planting, incorporate a balanced organic fertilizer into the soil. Once the plants start to develop, side-dress them with compost or a nitrogen-rich fertilizer every 3-4 weeks. This will provide the necessary nutrients for healthy growth and fruit development.
- Pollination: Oz pumpkins have both male and female flowers. Bees and other pollinators play a crucial role in transferring pollen from the male flowers to the female flowers. To ensure successful pollination, avoid using pesticides that may harm pollinators. If you notice a lack of bees in your garden, you can manually transfer pollen using a small brush or cotton swab.
- Pest and Disease Control: Common pests that may affect Oz pumpkins include squash bugs, cucumber beetles, and powdery mildew. Regularly inspect your plants for signs of infestation or disease. Handpick and remove any pests you find, and consider using organic insecticides if the problem persists. To prevent powdery mildew, ensure good air circulation around the plants and avoid overhead watering.
- Pruning and Training: Oz pumpkins are vigorous growers, and their vines can spread extensively. To save space and encourage better airflow, you can gently train the vines to grow in a specific direction or trellis them. Pruning the vines can also redirect energy towards fruit production. However, be cautious not to remove too many leaves, as they provide shade and protect the developing pumpkins from sunburn.
- Harvesting: Oz pumpkins are ready for harvest when their skin turns a deep, consistent orange color and the stem starts to dry out. Cut the pumpkins from the vine, leaving a few inches of stem attached. Handle them carefully to avoid any damage. Once harvested, cure the pumpkins in a warm, dry area for about two weeks to enhance their flavor and extend their storage life.
By following these best practices, you can ensure healthy growth and a successful harvest of delicious Oz pumpkins. Happy gardening!
Harvesting guide
The Oz pumpkin, also known as the Australian Blue pumpkin, is a popular variety known for its vibrant blue-green skin and sweet, flavorful flesh. Harvesting Oz pumpkins at the right time is crucial to ensure they reach their full potential in terms of taste and storage life. Here’s a guide on when and how to harvest Oz pumpkins:
- Timing: Oz pumpkins typically take around 90-120 days to mature from the time of planting. The exact timing can vary depending on growing conditions and climate. It’s important to monitor the progress of your pumpkins and keep track of the planting date to estimate when they might be ready for harvest.
- Color and skin hardness: When the Oz pumpkin is fully mature, its skin will turn from blue-green to a deeper shade of blue-gray. The skin will also become hard and tough, resisting punctures from your fingernail. This is a good indicator that the pumpkin is ready for harvest.
- Vine and stem condition: Before harvesting, examine the vine and stem attached to the pumpkin. The vine should start to dry out and turn brown, indicating that the plant has stopped producing nutrients for the pumpkin. The stem should also be dry and woody, rather than green and flexible. A dried-out stem is a sign that the pumpkin has detached itself from the vine and is ready to be harvested.
- Size and weight: Oz pumpkins can vary in size, but they are typically medium to large in size, weighing anywhere from 10 to 30 pounds (4.5 to 13.6 kg). However, size alone is not a reliable indicator of maturity. It’s essential to consider the other factors mentioned above to determine if the pumpkin is truly ready for harvest.
- Harvesting technique: To harvest an Oz pumpkin, use a sharp knife or pruning shears to cut the stem about 2-3 inches (5-7.5 cm) above the pumpkin. Be careful not to damage the pumpkin or the stem, as any wounds can lead to rot during storage. Leave a portion of the stem attached to the pumpkin, as this helps prolong its shelf life.
- Curing and storage: After harvesting, it’s beneficial to cure the Oz pumpkins for a week or two. This involves placing them in a warm, dry area with good air circulation, such as a sunny porch or a well-ventilated room. Curing helps harden the skin and enhances the flavor and storage life of the pumpkin.
Once cured, store the Oz pumpkins in a cool, dry place with temperatures between 50-55°F (10-13°C). Properly stored pumpkins can last for several months, allowing you to enjoy them well into the winter season.
By following these guidelines, you can ensure that your Oz pumpkins are harvested at the right time and stored properly for maximum flavor and longevity.