
Welcome to the world of pumpkin growing! If you’re looking for a unique and vibrant addition to your garden, the Orangita pumpkin is an excellent choice. With its striking orange color and deliciously sweet flavor, this variety is sure to be a standout in your harvest.
In this article, we will delve into the art of growing Orangita pumpkins, from selecting the right seeds to nurturing the plants through each stage of growth. Whether you’re a seasoned gardener or a beginner, this guide will equip you with the knowledge and tips you need to successfully cultivate these beautiful and tasty pumpkins. So, let’s roll up our sleeves and get ready to embark on a pumpkin-growing adventure like no other!
What are Orangita pumpkins?
Orangita pumpkin is a unique and relatively new variety of pumpkin known for its vibrant orange color and compact size. It is a hybrid variety, created by crossing different pumpkin varieties to achieve its distinctive characteristics. The Orangita pumpkin typically weighs around 2-4 pounds (0.9-1.8 kg) and has a round to slightly flattened shape. One of the key features of the Orangita pumpkin is its smooth, glossy skin, which is easy to carve or decorate.
The flesh of the Orangita pumpkin is dense, sweet, and flavorful, making it ideal for cooking and baking purposes. It is often used in recipes for pies, soups, and other pumpkin-based dishes. In terms of growth, the Orangita pumpkin is a compact vine variety, making it suitable for small gardens or containers. It requires full sun exposure and well-draining soil with a pH level between 6.0 and 7.5. Regular watering is essential, ensuring the soil remains consistently moist but not waterlogged.
The Orangita pumpkin typically takes around 90-100 days to reach maturity from the time of planting. It is important to provide adequate space for each plant, as they require approximately 3-4 feet (0.9-1.2 meters) of spacing between each vine. Regular fertilization with a balanced organic fertilizer can help promote healthy growth and maximize yield. Harvesting the Orangita pumpkin is relatively straightforward. Once the fruit has reached its full size and the skin has hardened, it can be carefully cut from the vine, leaving a short stem attached.
The pumpkins can then be stored in a cool, dry place for several weeks, allowing them to fully ripen and develop their flavors. Overall, the Orangita pumpkin is a delightful variety that combines visual appeal with excellent taste. Its compact size and ease of cultivation make it a popular choice for both experienced gardeners and beginners alike.
What do Orangita pumpkins taste like?
Orangita pumpkin, also known as Cucurbita moschata, is a unique variety that offers a delightful flavor profile. Its taste can be described as sweet, nutty, and slightly earthy. The flesh of the Orangita pumpkin is smooth and creamy, making it perfect for both savory and sweet dishes.
When cooked, Orangita pumpkin develops a rich, caramelized flavor that enhances its natural sweetness. The sweetness is not overpowering but rather subtle and pleasant, making it a versatile ingredient in various recipes. The nutty undertones add depth to the overall flavor, providing a delightful contrast to the natural sweetness.
The Orangita pumpkin’s flavor is often compared to butternut squash, as they belong to the same species. However, Orangita pumpkin has a distinct taste that sets it apart. Its flavor is often described as more complex and robust, with a hint of muskiness that adds an intriguing element to dishes.
Due to its delicious flavor profile, Orangita pumpkin is commonly used in a wide range of culinary creations. It can be roasted, pureed, or used in soups, stews, pies, and even desserts. The natural sweetness of the Orangita pumpkin pairs well with warm spices like cinnamon, nutmeg, and ginger, making it an excellent choice for autumn-inspired recipes.
Overall, the Orangita pumpkin offers a delightful combination of sweetness, nuttiness, and earthiness. Its unique flavor profile makes it a popular choice among pumpkin enthusiasts and a versatile ingredient in the kitchen.
How to start Orangita pumpkin seeds
Here’s a step-by-step guide on starting Orangita pumpkins:
- Selecting Seeds: Start by choosing high-quality Orangita pumpkin seeds. Look for seeds from reputable suppliers or nurseries. Make sure the seeds are fresh and have not expired.
- Timing: Orangita pumpkins are warm-season crops, so it’s important to plant them after the danger of frost has passed and the soil temperature has reached at least 60°F (15°C). In most regions, this is around late spring or early summer.
- Soil Preparation: Choose a sunny location in your garden with well-draining soil. Orangita pumpkins prefer fertile soil with a pH level between 6.0 and 7.5. Before planting, amend the soil with organic matter like compost or well-rotted manure to improve its fertility and drainage.
- Planting: Create small mounds or hills in the soil, spaced about 4-6 feet apart. Each mound should be around 2-3 feet in diameter. Plant 2-3 seeds per mound, about 1 inch deep. Space the seeds evenly within the mound.
- Watering: After planting, water the seeds thoroughly to ensure good soil moisture. Keep the soil consistently moist but not waterlogged throughout the growing season. Avoid overhead watering to prevent the spread of diseases.
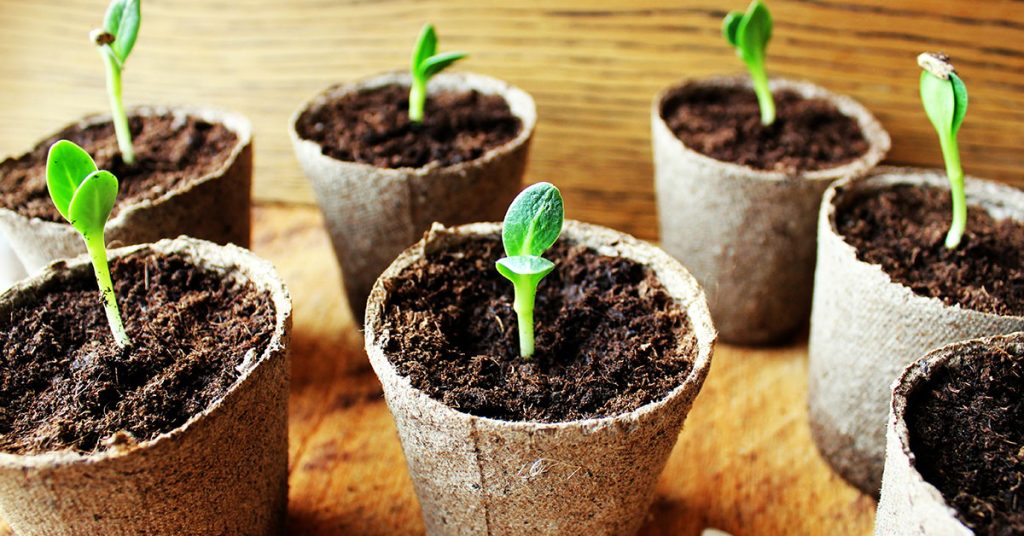
- Thinning: Once the seedlings emerge and grow their first true leaves, thin them out to one strong plant per mound. Choose the healthiest and most vigorous seedling and remove the others by cutting them at the soil level. This will give the remaining plant enough space to grow and produce a healthy pumpkin.
- Fertilizing: Orangita pumpkins are heavy feeders. Apply a balanced, slow-release fertilizer or compost around the base of the plants when they start to develop true leaves. Follow the package instructions for proper application rates. Additionally, you can side-dress the plants with compost or organic fertilizer every few weeks to provide a continuous supply of nutrients.
- Mulching: Apply a layer of organic mulch, such as straw or wood chips, around the base of the plants. Mulching helps retain soil moisture, suppresses weed growth, and regulates soil temperature.
- Pollination: Orangita pumpkins require pollination to set fruit. Bees and other pollinators are crucial for this process. To attract pollinators, plant flowers nearby or consider placing bee-friendly plants in your garden.
- Pest and Disease Control: Monitor your plants regularly for pests like aphids, squash bugs, or powdery mildew. Use organic pest control methods if necessary, such as handpicking insects or applying insecticidal soap. Proper spacing, good air circulation, and avoiding overhead watering can help prevent diseases.
- Harvesting: Orangita pumpkins are typically ready for harvest around 90-100 days after planting. The pumpkins should have a deep orange color, firm skin, and a hard stem. Use a sharp knife or pruners to cut the pumpkins from the vine, leaving a few inches of stem attached.
By following these steps, you should be able to successfully start and grow Orangita pumpkins in your garden. Enjoy the process and the bountiful harvest!
When to plant Orangita pumpkins outdoors
The ideal time to plant Orangita pumpkins is in late spring or early summer, when the soil temperature has warmed up to around 70°F (21°C) and all danger of frost has passed. This typically occurs when the average daily temperature consistently reaches around 60°F (15°C). Planting too early when the soil is still cold can lead to poor germination and slow growth.
It’s important to note that the specific planting time may vary depending on your location and climate. It is recommended to check with your local agricultural extension office or consult a gardening guide specific to your region for more accurate planting dates.
Growing & care guide
Orangita pumpkins, also known as Orange Hokkaido or Red Kuri squash, are a popular variety of winter squash that are known for their vibrant orange color and sweet, nutty flavor. To ensure successful growth and a bountiful harvest of Orangita pumpkins, here are some best practices for caring for them:
- Planting: Orangita pumpkins thrive in well-draining soil with a pH level between 6.0 and 7.5. Choose a sunny location in your garden that receives at least 6-8 hours of direct sunlight each day. It is best to sow the seeds directly into the ground after the last frost date in your area. Plant the seeds about 1 inch deep and 2-3 feet apart, allowing enough space for the vines to spread.
- Watering: Adequate watering is crucial for the healthy growth of Orangita pumpkins. Water the plants deeply, providing about 1 inch of water per week. However, be cautious not to overwater, as this can lead to root rot. It is recommended to water the plants at the base, avoiding wetting the leaves to prevent the development of fungal diseases.
- Fertilizing: Orangita pumpkins benefit from regular fertilization to ensure optimal growth. Before planting, incorporate well-rotted compost or aged manure into the soil to improve its fertility. Once the plants start to develop, you can apply a balanced organic fertilizer every 3-4 weeks. Avoid using high-nitrogen fertilizers, as they can promote excessive foliage growth at the expense of fruit development.
- Mulching: Applying a layer of organic mulch around the base of the plants helps to conserve moisture, suppress weed growth, and maintain a more consistent soil temperature. Use straw, wood chips, or dried leaves as mulch, ensuring that it is not too thick to prevent the pumpkins from rotting.
- Pruning and Training: Orangita pumpkin vines can become quite long and sprawling. To save space and promote better air circulation, you can gently train the vines to grow in a specific direction or trellis them. Additionally, pruning the vines can help redirect the plant’s energy towards fruit production. Trim off any excessive side shoots or suckers, but be careful not to remove too many leaves, as they provide shade and protection for the developing pumpkins.
- Pest and Disease Control: Orangita pumpkins are generally resistant to many common pests and diseases. However, it is still important to monitor your plants regularly for any signs of trouble. Keep an eye out for pests like aphids, squash bugs, and cucumber beetles. If necessary, use organic insecticides or insecticidal soaps to control infestations. Fungal diseases like powdery mildew can be prevented by ensuring good air circulation and avoiding overhead watering.
- Harvesting: Orangita pumpkins are typically ready for harvest around 90-100 days after planting. The pumpkins should have a deep orange color and a hard rind. Use a sharp knife or pruning shears to cut the fruit from the vine, leaving a few inches of stem attached. Handle the pumpkins with care to avoid any damage that could lead to rotting during storage.
By following these best practices, you can enjoy a successful and rewarding harvest of Orangita pumpkins. Remember to always adjust your care routine based on your specific growing conditions and consult local gardening resources for region-specific advice.
Harvesting guide
Orangita pumpkins are a popular variety known for their small size, vibrant orange color, and sweet flavor. Here’s a guide on when and how to harvest Orangita pumpkins:
- Timing: Orangita pumpkins are typically ready for harvest around 85-100 days after planting the seeds. However, it’s important to check the specific instructions on the seed packet or consult with the supplier for accurate information regarding your specific growing conditions.
- Color and skin hardness: One of the easiest ways to determine if an Orangita pumpkin is ready for harvest is by observing its color. When fully mature, the pumpkin should have a deep, uniform orange color. Additionally, the skin should be hard and resist puncture when gently pressed with your fingernail.
- Vine and stem: Another indicator of readiness is the condition of the vine and stem. As the pumpkin ripens, the vine will start to wither and dry out. Additionally, the stem connecting the pumpkin to the vine should be dry and brown. If the vine and stem are still green and healthy, it’s best to wait a little longer before harvesting.
- Size and shape: Orangita pumpkins are typically small, weighing around 2-4 pounds (0.9-1.8 kg). However, the exact size may vary depending on growing conditions. Harvest the pumpkins when they have reached their mature size and have a round, symmetrical shape.
- Harvesting technique: To harvest an Orangita pumpkin, use a sharp knife or pruning shears to cut the stem about 2-3 inches (5-7.5 cm) above the pumpkin. Be careful not to damage the pumpkin or the stem, as any wounds can increase the risk of rotting during storage.
- Post-harvest care: After harvesting, gently wipe off any dirt or debris from the pumpkin’s surface. Avoid washing the pumpkin with water, as excess moisture can promote rotting. Allow the pumpkin to cure in a warm, dry, and well-ventilated area for about 10-14 days. This process helps the pumpkin’s skin harden and enhances its flavor and storage life.
- Storage: Once cured, store your Orangita pumpkins in a cool, dry place with good air circulation. Ideal storage conditions include temperatures between 50-55°F (10-13°C) and humidity levels around 50-70%. Properly cured and stored Orangita pumpkins can last for several months.
Remember, every pumpkin plant and growing environment is unique, so it’s essential to monitor the specific cues mentioned above to determine the optimal time for harvesting your Orangita pumpkins.