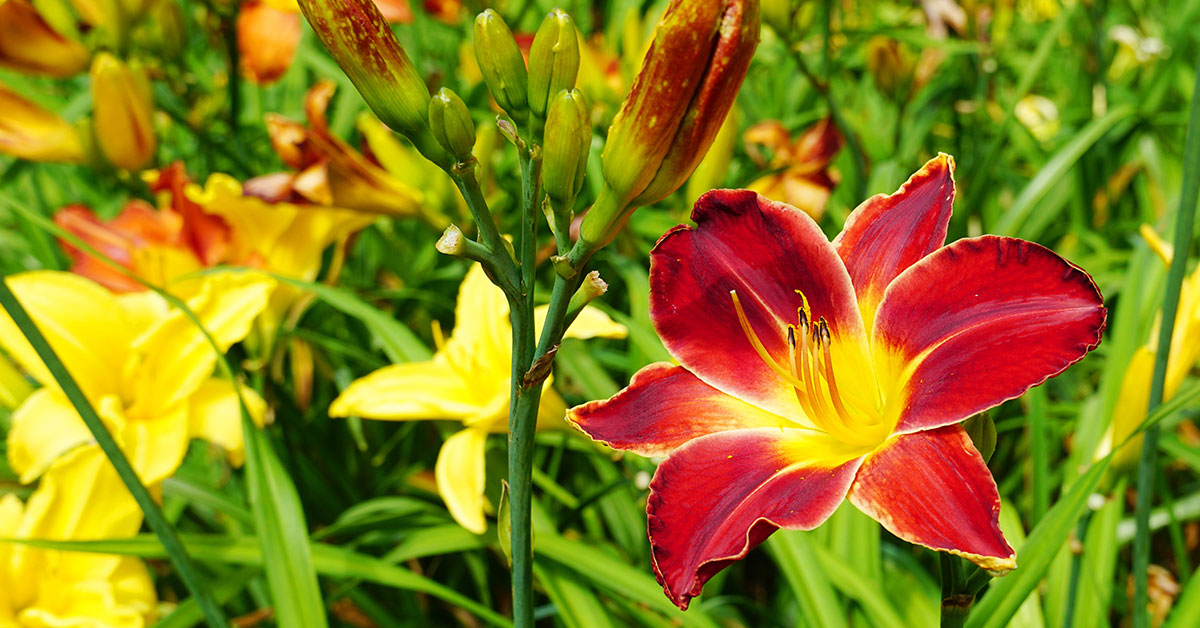

Daylilies, with their vibrant blooms and hardy nature, are a popular choice for gardeners looking to add a splash of color to their landscapes. However, to ensure that these stunning flowers continue to thrive and produce an abundance of blooms, it is essential to practice proper maintenance techniques. One such technique is deadheading, a simple yet effective process of removing spent flowers.
Deadheading daylilies not only enhances their overall appearance but also promotes continuous blooming throughout the growing season. In this article, we will delve into the art of how to deadhead daylilies, exploring the benefits, methods, and timing to help you achieve a flourishing and visually appealing daylily garden.
Whether you are a seasoned gardener or a beginner, mastering the art of deadheading daylilies will undoubtedly elevate your gardening skills and bring forth a bountiful display of these magnificent flowers.
Should you deadhead daylilies?
Deadheading daylilies is a common practice among gardeners and can have several benefits. However, whether or not to deadhead daylilies depends on your specific goals and preferences. Deadheading refers to the removal of spent flowers or flower stalks from a plant. When it comes to daylilies, deadheading can encourage the plant to produce more blooms, extend the flowering period, and improve the overall appearance of the plant. Here are some points to consider when deciding whether or not to deadhead daylilies:
- Continuous blooming: Daylilies are known for their ability to produce multiple blooms on a single stalk. Deadheading spent flowers can stimulate the plant to produce more flower buds, resulting in a longer blooming period. If you want your daylilies to have a continuous display of flowers, deadheading is recommended.
- Aesthetics: Removing spent blooms can enhance the visual appeal of your daylilies. By deadheading, you prevent the plant from diverting energy into seed production, allowing it to redirect resources towards producing new flowers. This can result in a neater and more attractive appearance.
- Seed production: If you are interested in collecting daylily seeds for propagation or sharing with other gardeners, it is best to avoid deadheading. Allowing the spent flowers to remain on the plant will enable the development of seed pods. However, keep in mind that daylilies grown from seeds may not necessarily resemble the parent plant, as daylilies are known for their hybridization and genetic variations.
- Time and effort: Deadheading daylilies can be a time-consuming task, especially if you have a large number of plants. If you have limited time or prefer a more low-maintenance approach, you can choose to skip deadheading. Daylilies will still bloom without deadheading, but the flowering period may be slightly shorter.
In summary, deadheading daylilies can promote continuous blooming, enhance the plant’s appearance, and prevent seed production. If you prioritize these factors and have the time and inclination to deadhead, it is recommended. However, if you prefer a more natural look, want to collect seeds, or have limited time for maintenance, deadheading can be skipped without significant negative effects on the plant’s health or performance.
When to deadhead daylilies
Deadheading daylilies is an important practice to maintain the health and appearance of the plants. The timing for deadheading daylilies depends on the specific variety and the desired outcome. Here are some guidelines to help you determine the best timing for deadheading daylilies:
- Regular Deadheading: Daylilies produce multiple flowers on each scape (flower stalk), and deadheading spent blooms regularly helps promote continuous blooming. As soon as a flower fades and starts to wither, it should be removed. This can be done by simply pinching or cutting off the faded flower at the base of the scape. Regular deadheading throughout the blooming season will encourage the plant to produce more flowers.
- Complete Deadheading: If you want to prevent the plant from setting seed and redirect its energy towards vegetative growth, you can opt for complete deadheading. This is typically done after the main blooming period is over. Once the last flower on a scape has faded, you can cut the entire scape down to the base of the plant. Complete deadheading is often done in late summer or early fall.
- Seed Collection: If you are interested in collecting seeds from your daylilies, you should avoid deadheading until the seed pods have fully matured. The seed pods develop after the flowers fade, and they will turn brown and split open when the seeds are ready for collection. This usually occurs several weeks after the flowers have bloomed. Once the seed pods have split, you can collect the seeds for propagation.
- Reblooming Varieties: Some daylily varieties are known as rebloomers, meaning they produce multiple flushes of flowers throughout the growing season. For these varieties, deadheading is essential to encourage reblooming. As soon as the initial flush of flowers has faded, deadhead the spent blooms to promote the development of new scapes and flowers.
In general, daylilies benefit from regular deadheading to maintain their appearance and encourage continuous blooming. However, the specific timing for deadheading can vary depending on the variety and your goals for the plant. By observing the plant closely and understanding its growth habits, you can determine the best timing for deadheading your daylilies.
How to deadhead daylilies
Deadheading daylilies is an essential task to promote continuous blooming and maintain the overall health and appearance of the plant. Here is a detailed, step-by-step guide on how to deadhead daylilies:
- Timing: The best time to deadhead daylilies is after the flowers have faded and started to wither. This is usually a few days after the bloom has reached its peak.
- Gather your tools: Before you begin, gather a pair of clean and sharp pruning shears or scissors, a bucket or bag for collecting the spent blooms, and gloves if desired.
- Locate spent blooms: Examine the daylily plant and identify the flowers that have finished blooming. Look for faded, wilted, or discolored flowers. These are the ones you will be removing.
- Positioning: Position yourself near the daylily plant, making sure you have a clear view of the blooms you want to deadhead.
- Cut the stem: Using your pruning shears or scissors, locate the stem just below the spent flower. Make a clean, angled cut about 1 inch above the base of the plant. This will prevent any stubs from sticking out and promote healthy regrowth.
- Collect the spent blooms: As you deadhead each flower, collect the spent blooms in your bucket or bag. This will help keep your garden tidy and prevent the spread of diseases.
- Continue deadheading: Move around the plant, repeating the process of locating spent blooms and cutting them off. Deadhead all the faded flowers until you have removed all the spent blooms from the daylily plant.
- Dispose of the spent blooms: Once you have finished deadheading, dispose of the collected spent blooms. You can add them to your compost pile if you have one, or discard them in your green waste bin.
- Clean up: After deadheading, take a moment to clean up any fallen petals or debris around the base of the daylily plant. This will help prevent pests and diseases from taking hold.
- Water and fertilize: After deadheading, give your daylilies a thorough watering to ensure they stay hydrated. Consider applying a balanced fertilizer to provide them with the necessary nutrients for healthy growth and future blooms.
- Monitor for new blooms: Keep an eye on your daylilies for new blooms to appear. Regular deadheading will encourage the plant to produce more flowers throughout the blooming season.
By following these steps, you can effectively deadhead your daylilies and enjoy a prolonged blooming period with a neat and healthy-looking plant.
Aftercare
After deadheading daylilies, it is important to follow some care guidelines to ensure the health and vitality of the plants. Here are the detailed steps to follow:
- Timing: Deadheading daylilies should be done after the flowers have finished blooming and the petals have wilted and fallen off. This is typically in late summer or early fall.
- Tools: You will need a pair of sharp, clean pruning shears or scissors for deadheading. Make sure to sanitize the tools before and after use to prevent the spread of diseases.
- Deadheading Technique: Locate the spent flower stalks that have finished blooming. Follow the stalk down to the base of the plant and cut it off just above the foliage. Make the cut at a 45-degree angle to promote water runoff and prevent rot.
- Removing Foliage: If the foliage of your daylilies is looking yellow or brown, you can also trim it back to tidy up the plant. Cut the leaves back to about 6 inches above the ground, leaving some foliage to continue photosynthesis and provide energy to the plant.
- Clean Up: Collect all the dead flowers and foliage that you have removed and dispose of them properly. This helps prevent the spread of diseases and pests.
- Watering: After deadheading, give your daylilies a thorough watering to help them recover from the stress of pruning. Water deeply at the base of the plants, ensuring the soil is evenly moist.
- Fertilizing: To encourage new growth and future blooms, you can apply a balanced slow-release fertilizer or a water-soluble fertilizer according to the package instructions. This will provide the necessary nutrients for healthy foliage and flower production.
- Mulching: Apply a layer of organic mulch around the base of the daylilies to help retain moisture, suppress weed growth, and regulate soil temperature. Keep the mulch a few inches away from the crown of the plant to prevent rot.
- Regular Maintenance: Throughout the growing season, monitor your daylilies for any signs of pests or diseases. Remove any damaged or diseased foliage promptly and take appropriate action to control any issues that arise.
By following these care guidelines after deadheading daylilies, you can promote healthier plants, encourage reblooming, and maintain the overall beauty of your garden.