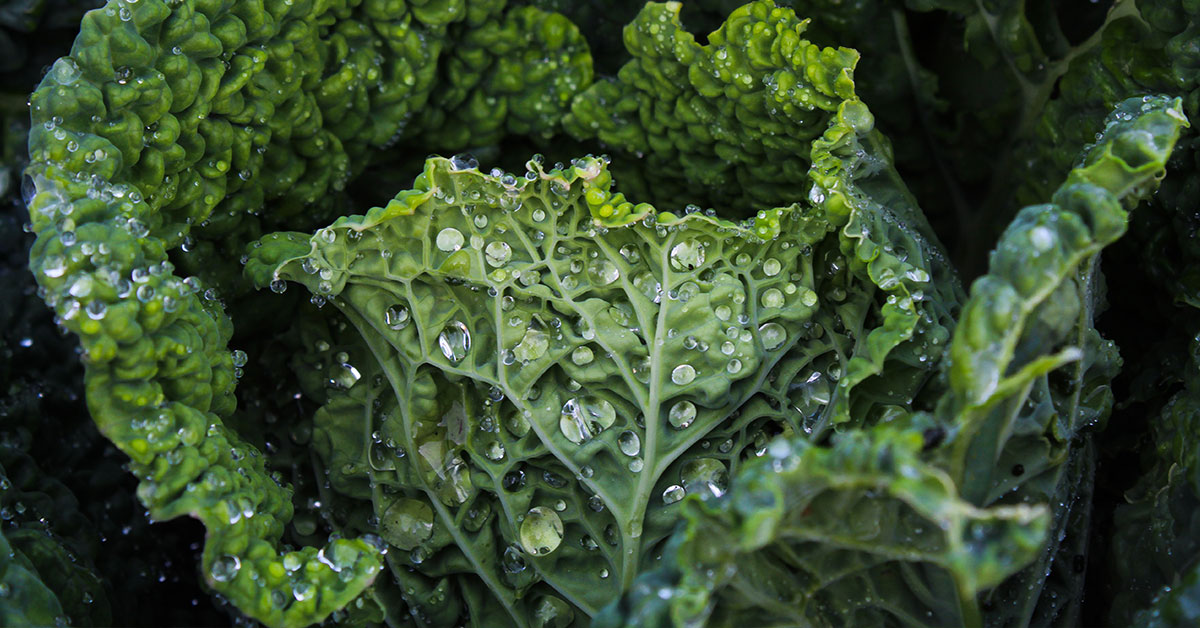

Premier Kale is a versatile and nutrient-rich vegetable that has become increasingly popular among gardeners and health-conscious individuals alike. Known for its vibrant green leaves and numerous health benefits, Premier Kale is a powerhouse of nutrients, packed with vitamins, minerals, and antioxidants.
Whether you are looking to improve your overall health, add a pop of color to your garden, or simply enjoy the delicious taste of fresh homegrown produce, Premier Kale is a fantastic addition to any garden. So, let’s dive in and explore the ins and outs of growing and caring for Premier Kale, and discover all the reasons why this leafy green should be a staple in your garden.
What is a Premier Kale?
Premier Kale is a variety of kale, scientifically known as Brassica oleracea var. acephala. It is highly regarded among gardeners and kale enthusiasts for its exceptional taste, nutritional value, and overall growth characteristics. Premier Kale plants typically reach a height of about 18-24 inches, with dark green, curly leaves that form a tight rosette shape. These leaves are deeply textured and have a slightly ruffled appearance, adding an attractive aesthetic to any garden. One of the standout features of Premier Kale is its flavor.
This variety has a rich, earthy taste with a hint of sweetness, making it a popular choice for salads, stir-fries, soups, and smoothies. Its robust flavor profile pairs well with a variety of ingredients, allowing for versatile culinary uses. In terms of nutritional value, Premier Kale is a powerhouse. It is packed with essential vitamins and minerals, including vitamins A, C, and K, as well as calcium, potassium, and iron. Additionally, kale is known for its high fiber content and antioxidant properties, making it a highly nutritious addition to any diet.
Premier Kale is a relatively easy plant to grow, making it suitable for both beginner and experienced gardeners. It thrives in full sun to partial shade, with well-draining, fertile soil. Regular watering is essential to keep the soil consistently moist, but not waterlogged. This variety is also quite cold-tolerant, making it a reliable choice for fall and winter gardens. When it comes to harvesting Premier Kale, you can start picking the outer leaves once they reach a desirable size, typically around 8-10 inches long.
Regular harvesting promotes continuous growth and ensures a fresh supply of tender leaves throughout the season. Overall, Premier Kale is an excellent choice for gardeners looking to cultivate a nutritious and flavorful leafy green. Its vibrant appearance, robust taste, and numerous health benefits make it a popular addition to vegetable gardens and an essential ingredient in a variety of dishes.
What does Premier Kale taste like?
Premier Kale, also known as Lacinato or Tuscan kale, is a popular variety of kale with a unique taste profile. Its flavor can be described as earthy, slightly bitter, and slightly sweet. It has a robust and hearty taste that is more pronounced than other kale varieties.
When you take a bite of Premier Kale, you may notice a subtle nuttiness along with a hint of peppery undertones. The bitterness is not overpowering but adds a pleasant complexity to the overall taste. The sweetness in Premier Kale is mild and helps balance out the earthy and bitter notes.
Compared to other leafy greens, Premier Kale has a more substantial texture, making it perfect for hearty salads, sautés, or even as a base for smoothies. Its taste is versatile enough to complement a wide range of dishes, from soups and stews to stir-fries and pasta.
Overall, Premier Kale offers a rich and satisfying flavor experience that is both nutritious and delicious.
How to start from seed
Starting Premier Kale from seeds involves a few simple steps. Here’s a step-by-step guide to help you through the process:
- Choose the right time: Premier Kale is a cool-season crop, so it’s best to sow the seeds in early spring or late summer. The soil temperature should be around 45 to 75°F (7 to 24°C) for optimal germination.
- Prepare the soil: Kale prefers well-draining soil rich in organic matter. Clear the area of any weeds or debris and loosen the soil with a garden fork or tiller. Amend the soil with compost or aged manure to improve its fertility and structure.
- Sow the seeds: Create furrows in the prepared soil, about ¼ to ½ inch (0.6 to 1.3 cm) deep. Space the furrows around 12 to 18 inches (30 to 45 cm) apart. Sprinkle the Premier Kale seeds along the furrows, aiming for a spacing of about 1 inch (2.5 cm) between each seed.
- Cover and water: Gently cover the seeds with a thin layer of soil or compost. Lightly water the area to ensure the soil is moist but not waterlogged. Continue to keep the soil consistently moist until germination occurs, usually within 7 to 14 days.
- Thin the seedlings: When the seedlings have grown a few inches tall and have developed their first true leaves, thin them out to provide enough space for each plant to grow. Remove the weakest or overcrowded seedlings, leaving a spacing of about 8 to 12 inches (20 to 30 cm) between each plant.
- Provide proper care: Kale plants require adequate sunlight, ideally 6 to 8 hours of direct sunlight per day. Water the plants regularly, aiming for about 1 inch (2.5 cm) of water per week. Mulching around the plants can help conserve moisture and suppress weed growth.
- Fertilize as needed: If the soil lacks nutrients, you can incorporate a balanced fertilizer or organic amendments into the soil before planting. Additionally, you can apply a side dressing of compost or a slow-release fertilizer during the growing season to provide the plants with a nutrient boost.
- Monitor for pests and diseases: Keep an eye out for common kale pests like aphids, cabbage worms, and flea beetles. Use organic pest control methods or insecticidal soaps if necessary. Also, watch for signs of diseases such as powdery mildew or black rot, and take appropriate measures to prevent or treat them.
- Harvesting: Premier Kale usually reaches maturity in about 55 to 65 days after transplanting. You can start harvesting the outer leaves when they are around 8 to 10 inches (20 to 25 cm) long. Harvesting the outer leaves promotes continuous growth, allowing the inner leaves to develop.
By following these steps, you can successfully start your Premier Kale from seeds and enjoy a bountiful harvest of nutritious and delicious kale leaves.
Planting and growing Premier Kale
Planting and growing Premier Kale involves several steps, which I will outline below:
- Select a suitable location: Premier Kale thrives in full sun but can tolerate partial shade. Choose a spot in your garden that receives at least 6-8 hours of direct sunlight per day. Ensure the soil is well-draining and rich in organic matter.
- Prepare the soil: Before planting, prepare the soil by removing any weeds, rocks, or debris. Loosen the soil with a garden fork or tiller, and incorporate compost or well-rotted manure to improve fertility and drainage.
- Sow the seeds: Premier Kale can be grown from seeds or transplants. If starting from seeds, plant them directly into the prepared soil. Sow the seeds about 1/4 to 1/2 inch deep, spacing them 12-18 inches apart. Cover the seeds with soil and lightly tamp it down.
- Watering: After planting, water the soil thoroughly but gently. Keep the soil consistently moist throughout the growing season, especially during dry spells. Avoid overwatering, as it can lead to root rot or other diseases.
- Fertilization: Kale plants benefit from regular fertilization. Apply a balanced, slow-release fertilizer or organic compost around the plants every 4-6 weeks. Follow the package instructions for application rates.
- Mulching: Apply a layer of organic mulch, such as straw or wood chips, around the base of the plants. Mulching helps conserve moisture, suppresses weed growth, and regulates soil temperature.
- Maintenance: Keep an eye out for pests like aphids, cabbage worms, or slugs. If necessary, use organic pest control methods like handpicking, spraying with soapy water, or applying neem oil. Remove any damaged or yellowing leaves to promote healthy growth.
- Harvesting: Premier Kale is typically ready for harvest 55-70 days after planting, depending on the desired size. Harvest the outer leaves by cutting them at the base, leaving the central bud intact for continued growth. Regular harvesting encourages new leaf growth and prolongs the harvest season.
Following these steps will help you successfully plant and grow Premier Kale in your garden.
When to harvest
The best time to harvest Premier Kale is when the leaves are firm and mature, but still tender and vibrant in color. Generally, you can start harvesting the outer leaves when they reach about 8-10 inches in length. However, if you prefer smaller leaves, you can start harvesting them earlier. It’s important to avoid waiting too long to harvest, as the leaves can become tough and bitter. Regular harvesting, by picking a few leaves at a time, will also encourage new growth and prolong the harvest period.