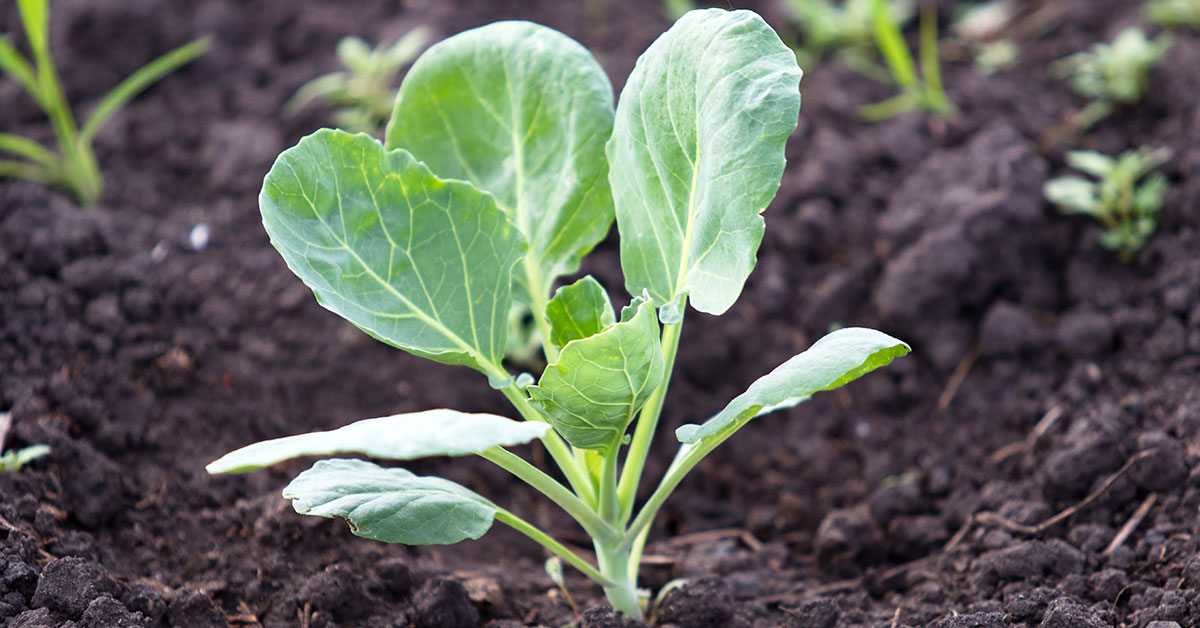

The Cronus Brussels Sprout is renowned for its exceptional taste and compact growth habit, the Cronus Brussels Sprout is a favorite among gardeners of all skill levels. With its ability to thrive in cooler climates and produce an abundance of delicious sprouts, this heirloom variety is sure to impress even the most discerning of palates.
In this article, we will delve into the fascinating world of the Cronus Brussels Sprout, exploring its history, cultivation techniques, and tips for a successful harvest. So grab your gardening tools and let’s get started on this green adventure!
What is a Cronus Brussels Sprout?
The Cronus Brussels Sprout is a popular variety of Brussels sprouts that gardeners often choose to grow in their vegetable gardens. It is known for its robust and vigorous growth, producing an abundant harvest of small, tightly packed sprouts. The plant itself is tall and erect, reaching a height of about 24-36 inches (60-90 cm). It has a sturdy stem that can support the weight of the sprouts without the need for additional staking.
The leaves are dark green and deeply lobed, providing a lush backdrop to the developing sprouts. The sprouts of the Cronus Brussels Sprout are typically small and round, measuring about 1-1.5 inches (2.5-3.8 cm) in diameter. They form along the length of the stem, beginning at the base and working their way up towards the top. As they mature, the sprouts become firmer and more flavorful.
One of the advantages of growing Cronus Brussels Sprout is its ability to withstand colder temperatures, making it a suitable choice for fall and winter gardening. It has a good resistance to frost, allowing the plant to continue producing sprouts even in chilly conditions. When cultivating Cronus Brussels Sprout, it is important to provide them with a well-draining soil enriched with organic matter. They thrive in full sun but can tolerate partial shade. Regular watering and occasional feeding with a balanced fertilizer will promote healthy growth and optimal sprout development.
Harvesting the sprouts is typically done from the bottom of the stem upwards, as they mature at different rates. Simply twist or cut off the sprouts when they reach the desired size, leaving the upper part of the plant to continue producing. The harvested Brussels sprouts can be enjoyed fresh, roasted, steamed, or used in a variety of delicious recipes. Overall, the Cronus Brussels Sprout is a dependable and productive variety that will reward gardeners with a bountiful crop of tasty sprouts, making it a great addition to any vegetable garden.
What does Cronus Brussels Sprout taste like?
The taste of a Cronus Brussels sprout can be described as mildly sweet and nutty, with a hint of bitterness. The flavor is more delicate and milder compared to other varieties of Brussels sprouts. When cooked, Cronus Brussels sprouts develop a rich, buttery taste and a tender texture. The sweetness of the sprouts balances out the slight bitterness, resulting in a delicious and well-rounded flavor. Overall, Cronus Brussels sprouts offer a delightful culinary experience for those who appreciate the unique taste of this vegetable.
How to start from seed
Starting a Cronus Brussels Sprout plant from seed is a relatively straightforward process. Here’s a step-by-step guide to get you started:
- Gather your supplies: You will need Cronus Brussels Sprout seeds, seed-starting trays or pots, a seed-starting mix or a well-draining soil mix, a spray bottle or watering can, and a clear plastic dome or plastic wrap.
- Start indoors: Brussels sprouts are typically started indoors about 6-8 weeks before the last frost date in your area. Fill your seed-starting trays or pots with a seed-starting mix, leaving a small gap at the top.
- Sow the seeds: Plant 2-3 seeds per cell or pot, about ¼ inch deep. Gently cover the seeds with the soil mix and lightly pat it down.
- Moisten the soil: Using a spray bottle or watering can with a fine spray, moisten the soil thoroughly. Avoid overwatering, as Brussels sprout seeds can rot if the soil is too wet.
- Provide warmth and moisture: Place the trays or pots in a warm location, preferably around 65-75°F (18-24°C). You can create a mini greenhouse effect by covering the trays with a clear plastic dome or plastic wrap to retain moisture.
- Ensure proper lighting: Brussels sprouts need sufficient light to germinate and grow. Place the trays near a sunny windowsill or use fluorescent lights to provide 12-16 hours of light per day.
- Maintain moisture levels: Check the soil regularly and mist it with water as needed to keep it consistently moist but not waterlogged. Avoid letting the soil dry out completely.
- Thin out seedlings: Once the seedlings emerge and develop their first set of true leaves, it’s time to thin them out. Choose the strongest and healthiest seedling in each cell or pot and carefully remove the others by snipping them at the soil level. This ensures that the remaining seedling has enough space to grow.
- Harden off the seedlings: About a week before transplanting the seedlings outdoors, gradually expose them to outdoor conditions. Start by placing them outside for a few hours in a sheltered spot, gradually increasing the duration and exposure to direct sunlight over a week.
- Transplanting: When the last frost date has passed and the seedlings are approximately 6-8 weeks old and have developed a strong root system, they are ready to be transplanted into the garden. Choose a sunny location with well-draining soil.
- Spacing and planting: Dig holes that are slightly larger than the root ball of each seedling. Space the Brussels sprout plants about 24-36 inches apart to allow enough room for growth. Gently place the seedlings in the holes, backfill with soil, and firm it around the base of each plant.
- Care and maintenance: Water the transplanted seedlings thoroughly after planting and keep the soil consistently moist throughout the growing season. Apply a layer of organic mulch around the plants to help retain moisture and suppress weeds. As the plants grow, provide them with support, such as stakes or cages, to prevent them from toppling over.
Remember to monitor your Brussels sprout plants for pests and diseases, and provide them with adequate nutrition through regular fertilization. With proper care and attention, you’ll soon enjoy a bountiful harvest of Cronus Brussels Sprouts.
Planting and growing Cronus Brussels Sprout
To plant and grow Cronus Brussels sprouts, follow these steps:
- Choose the right time: Cronus Brussels sprouts are typically grown as a fall crop. Start the seeds indoors about 8-10 weeks before the last expected frost date in your area. Transplant the seedlings outdoors when they are around 4-6 weeks old.
- Prepare the soil: Brussels sprouts prefer fertile, well-draining soil with a pH between 6.0 and 7.5. Amend the soil with organic matter, such as compost, to improve its texture and nutrient content. Remove any weeds or debris from the planting area.
- Sow the seeds: Fill seed trays or pots with a seed starting mix. Plant the seeds about ¼ to ½ inch deep, and lightly cover them with soil. Water gently to keep the soil evenly moist.
- Provide proper lighting: Place the seed trays in a sunny location or under grow lights. Brussels sprouts require full sun for at least 6-8 hours a day. If using grow lights, keep them about 4-6 inches above the seedlings and adjust the height as they grow.
- Maintain ideal temperature: Brussels sprouts thrive in cooler temperatures. Keep the seedlings at around 60-70°F (15-21°C) during the day and slightly cooler at night. Avoid exposing them to frost or extreme heat.
- Transplant the seedlings: When the seedlings have developed a few sets of true leaves and are about 4-6 weeks old, they are ready to be transplanted. Choose a location in the garden that receives full sun and has enough space for the mature plants, as they can grow up to 2-3 feet tall.
- Space the plants: Dig holes in the garden that are slightly larger than the root ball of the seedlings. Space the plants about 18-24 inches apart to allow enough room for growth and air circulation.
- Planting depth: When transplanting, make sure to bury the stem of the seedlings up to the first set of leaves. This promotes a strong root system and helps the plants anchor firmly in the soil.
- Watering and mulching: Water the seedlings immediately after transplanting and keep the soil consistently moist. Apply a layer of organic mulch, such as straw or wood chips, around the plants to help retain moisture, suppress weeds, and regulate soil temperature.
- Fertilizing: Brussels sprouts are heavy feeders. Apply a balanced fertilizer, such as a 10-10-10 or 14-14-14 blend, every 3-4 weeks throughout the growing season to provide essential nutrients. Follow the package instructions for application rates.
- Pest and disease control: Monitor your plants regularly for common pests like aphids, cabbage loopers, or cabbage worms. Use organic pest control methods or insecticidal soaps if needed. Also, protect your plants from fungal diseases by ensuring good air circulation, avoiding overhead watering, and removing any diseased leaves.
- Harvesting: Brussels sprouts are typically ready for harvest about 90-100 days after transplanting. Start picking the sprouts from the bottom of the stalk when they reach 1-1.5 inches in diameter. Harvest them by twisting or cutting them off with a sharp knife. Leave the top of the stalk intact to encourage the growth of smaller sprouts.
By following these steps, you can successfully plant and grow Cronus Brussels sprouts in your garden. Happy gardening!
When to harvest
The best time to harvest Cronus Brussels sprouts is usually when they have reached their full size and have a firm texture. This typically occurs around 90-100 days after transplanting in the garden. The sprouts should be about 1-1.5 inches in diameter and have a tight, compact structure. It’s important to note that the flavor of Brussels sprouts can improve after a light frost, so some gardeners prefer to wait until after the first frost to harvest for a sweeter taste.