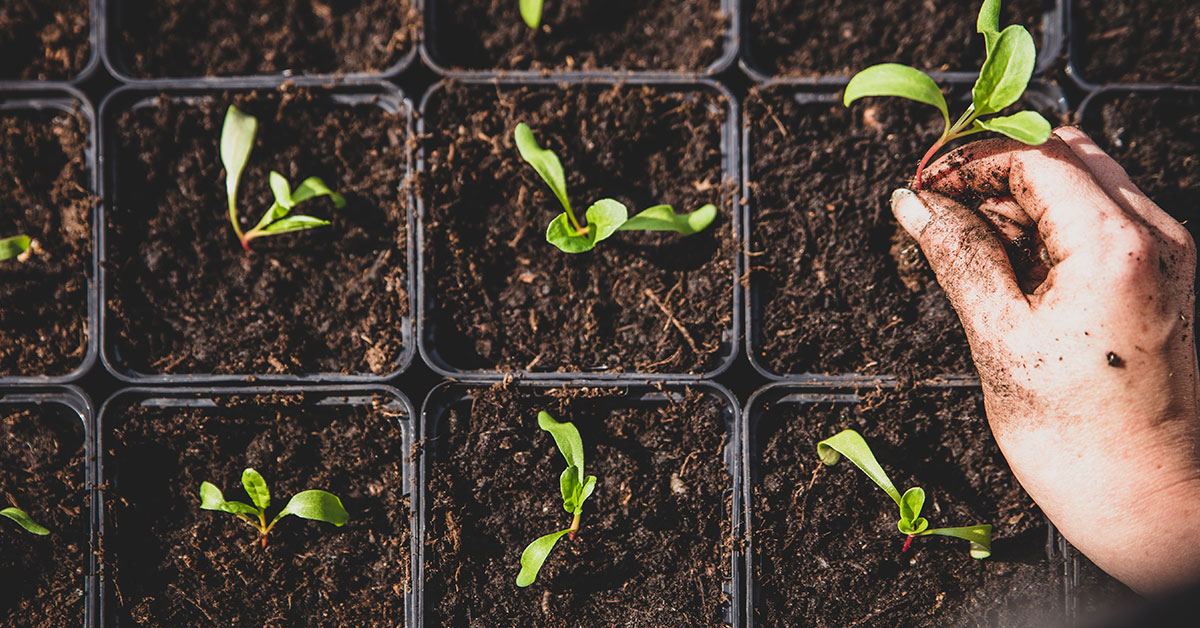

Canary Yellow Chard is a vibrant and versatile leafy green that is sure to add a pop of color and flavor to your garden and kitchen. Known for its stunning canary yellow stalks and deep green glossy leaves, this unique variety of Swiss chard is a favorite among gardeners and cooks alike.
Whether you are a seasoned gardener looking to try something new or a beginner seeking an easy-to-grow vegetable, Canary Yellow Chard is the perfect choice. In this article, we will explore the various characteristics, cultivation tips, and culinary uses of this delightful and nutritious plant. So, grab your gardening gloves and let’s dive into the sunny world of Canary Yellow Chard!
What is a Canary Yellow Chard?
Canary Yellow Chard, also known as Bright Lights Chard, is a vibrant and visually striking variety of Swiss chard. This particular cultivar is highly prized for its beautiful, multicolored stems that come in shades of yellow, orange, pink, and red. The leaves of Canary Yellow Chard are large, glossy, and deep green in color, providing a wonderful contrast to the bright stems.
The plant itself can reach a height of about 2 feet, making it an attractive addition to any garden or landscape. One of the standout features of Canary Yellow Chard is its versatility in the kitchen. Both the leaves and stems are edible, and they offer a slightly sweet and earthy flavor. The leaves can be used raw in salads or cooked as a nutritious and delicious side dish. The stems, when cooked, become tender and flavorful, making them a popular ingredient in stir-fries, soups, and stews.
From a gardening perspective, Canary Yellow Chard is relatively easy to grow. It thrives in well-drained soil and requires full sun or partial shade. It is a cool-season crop, meaning it prefers temperatures between 50 to 75 degrees Fahrenheit (10 to 24 degrees Celsius). This plant can be grown from seeds or seedlings, and regular watering and occasional fertilization will help promote healthy growth.
This variety of chard is not only visually appealing but also highly nutritious. It is packed with vitamins A, C, and K, as well as minerals like calcium, iron, and potassium. It is also a good source of dietary fiber, making it a beneficial addition to a balanced diet. Overall, Canary Yellow Chard is a fantastic choice for gardeners looking to add a pop of color to their vegetable garden while enjoying a versatile and nutritious leafy green.
What does Canary Yellow Chard taste like?
Canary Yellow Chard, also known as Bright Lights Chard, is a vibrant and visually appealing variety of Swiss chard. When it comes to taste, Canary Yellow Chard offers a unique flavor profile that is both delicious and distinct.
The taste of Canary Yellow Chard can be described as earthy and slightly bitter, with a hint of sweetness. It has a mild and delicate flavor compared to other leafy greens, making it more palatable for those who are not huge fans of strong bitter tastes.
The leaves of the Canary Yellow Chard are tender and have a crisp texture, which adds a refreshing element to its taste. When cooked, the bitterness becomes milder, and the sweetness becomes more pronounced, resulting in a balanced and enjoyable flavor.
Overall, the taste of Canary Yellow Chard is a delightful combination of earthiness, slight bitterness, and subtle sweetness. It is versatile enough to be used in various culinary preparations, such as sautéing, steaming, or adding to salads and soups.
How to start from seed
Starting canary yellow chard from seeds is a relatively simple process. Here’s a step-by-step guide to help you get started:
- Selecting the seeds: Look for canary yellow chard seeds at your local garden center or purchase them online. Make sure to choose high-quality, fresh seeds from a reputable source.
- Choosing the right time: Chard is a cool-season crop that prefers cooler temperatures for germination and growth. It is best to start chard seeds indoors about 2-4 weeks before the last expected frost date in your area. Alternatively, you can sow the seeds directly in the garden once the soil has warmed up and there is no risk of frost.
- Preparing the containers: Fill small pots or seed trays with a good quality, well-draining seed starting mix. Moisten the mix slightly before planting the seeds.
- Planting the seeds: Sow the chard seeds about 1/2 inch deep into the soil, spacing them approximately 2 inches apart. You can plant multiple seeds per pot or cell and thin them later to the strongest seedling. Cover the seeds with a thin layer of soil and gently press it down.
- Providing the ideal conditions: Place the containers in a warm location with indirect sunlight. Chard seeds need a consistent temperature of around 60-70°F (15-21°C) for successful germination. Use a plastic cover or a clear plastic bag to create a mini greenhouse effect and maintain humidity around the seeds.
- Watering and maintaining moisture: Keep the soil consistently moist but not waterlogged. Check the moisture level regularly and water gently using a spray bottle or a watering can with a fine spout. Avoid overwatering, as it may lead to fungal diseases.
- Germination and thinning: Chard seeds usually germinate within 7-14 days. Once the seedlings have emerged and developed their first set of true leaves, you can thin them out to provide sufficient space for growth. Remove the weaker seedlings, leaving the strongest one per pot or cell.
- Transplanting or hardening off: When the danger of frost has passed and the seedlings have grown to a size of about 3-4 inches, you can transplant them into the garden. Harden off the seedlings gradually by exposing them to outdoor conditions for a few hours each day, increasing the time gradually over a week.
- Planting in the garden: Choose a sunny or partially shaded spot in your garden with well-draining soil. Prepare the soil by adding organic matter such as compost or well-rotted manure. Dig a hole slightly larger than the root ball of the seedling, gently remove it from the container, and place it in the hole. Backfill with soil, firm it gently around the plant, and water thoroughly.
- Care and maintenance: Keep the newly transplanted chard well-watered until it establishes a strong root system. Mulching around the plants can help conserve moisture and suppress weed growth. Regularly water the plants during dry spells and provide adequate fertilizer as per the instructions on the package.
With proper care and attention, your canary yellow chard plants should thrive and produce beautiful, vibrant leaves that can be harvested for culinary use. Enjoy the process and the bountiful harvest!
Planting and growing Canary Yellow Chard
To plant and grow Canary Yellow Chard, follow these steps:
- Choose the right time: Canary Yellow Chard is a cool-season crop. It’s best to plant it in early spring or late summer for a fall harvest. Check your local climate and planting zone to determine the best time for planting.
- Select a suitable location: Canary Yellow Chard prefers full sun but can tolerate partial shade. Choose a location with well-drained soil that has been enriched with organic matter, such as compost.
- Prepare the soil: Before planting, loosen the soil to a depth of about 8-10 inches and remove any weeds or debris. Incorporate compost or well-rotted manure into the soil to improve fertility and drainage.
- Sow the seeds: Dig small trenches about 1/2 inch deep in the prepared soil, spacing them around 12 inches apart. Sow the seeds thinly, around 1 inch apart, and cover them with a thin layer of soil. Water gently to ensure good soil contact.
- Provide adequate water: Keep the soil evenly moist during germination and throughout the growing season. Water deeply when the top inch of soil feels dry. Avoid overwatering as it can lead to root rot.
- Thin the seedlings: Once the seedlings are about 2 inches tall, thin them to give each plant enough space to grow. Thin to a spacing of 6-8 inches between plants.
- Mulch and weed control: Apply a layer of mulch around the plants to conserve moisture, suppress weed growth, and regulate soil temperature. Regularly remove any weeds that compete with the chard for nutrients and water.
- Fertilize: Chard is a heavy feeder, so it benefits from regular feeding. Apply a balanced organic fertilizer according to the package instructions or use a slow-release granular fertilizer at planting time.
- Harvesting: Canary Yellow Chard leaves can be harvested when they reach about 6-8 inches in length. You can either cut the outer leaves individually or harvest the entire plant by cutting it about 1-2 inches above the soil level. Regular harvesting promotes continuous growth.
- Pests and diseases: Watch out for common pests like aphids, slugs, and leaf miners. Use organic insecticides or handpick the pests if necessary. Monitor for any signs of diseases, such as leaf spot or powdery mildew, and take appropriate measures if detected.
By following these steps, you should be able to successfully plant and grow Canary Yellow Chard in your garden. Enjoy the vibrant yellow leaves and delicious taste!
When to harvest
The best time to harvest Canary Yellow Chard is when the leaves are young and tender, typically around 6 to 8 weeks after planting. This variety of chard is known for its vibrant yellow stems and veins, which are best harvested when they are still crisp and not woody. You can start harvesting the outer leaves when they reach about 6 inches in length, leaving the inner leaves to continue growing. Regular harvesting encourages new growth and ensures a continuous supply throughout the growing season.