
With its luminous and sunny yellow leaves, Bright Yellow Chard not only adds a dazzling splash of color to any garden but also serves as a powerhouse of essential nutrients. In this article, we will delve into the captivating beauty and abundant benefits of Bright Yellow Chard.
From its tender and flavorful leaves to its crunchy stalks, this variety of chard offers a delightful culinary experience. Whether you are a seasoned gardener or a beginner looking to explore new greens, join me as we explore the unique characteristics, cultivation techniques, and delectable recipes that make Bright Yellow Chard an indispensable addition to any garden and kitchen.
What is a Bright Yellow Chard?
Bright Yellow Chard, also known as Yellow Swiss Chard or Golden Chard, is a vibrant and eye-catching variety of chard, a leafy green vegetable that is a member of the beet family. It is characterized by its beautiful golden-yellow colored stems and veins, which contrast beautifully with its deep green, glossy leaves. The leaves of Bright Yellow Chard are large, tender, and slightly crinkled, similar to spinach or kale. They have a mild and slightly earthy flavor, making them versatile and enjoyable to eat. The stems are thick and fleshy, with a crisp texture and a slightly sweet taste.
This variety of chard is not only visually appealing but also highly nutritious. It is packed with essential vitamins and minerals, including vitamins A, C, and K, as well as folate, potassium, and magnesium. It is also a good source of dietary fiber and antioxidants. When it comes to culinary uses, Bright Yellow Chard can be prepared and cooked in various ways. The leaves can be used raw in salads, added to soups and stews, or sautéed as a side dish. The stems, which take a little longer to cook, can be chopped and added to stir-fries, roasted, or pickled.
Bright Yellow Chard is relatively easy to grow and is a great addition to any garden. It prefers well-drained soil and full sun but can tolerate partial shade. Regular watering and occasional fertilization will help it thrive. It is a cool-season crop and can be sown in early spring or late summer for a fall harvest. Whether you are looking to add some color to your garden or want to experiment with a new and nutritious vegetable, Bright Yellow Chard is an excellent choice. Its vibrant appearance, mild flavor, and health benefits make it a delightful addition to any dish or garden.
What does Bright Yellow Chard taste like?
Bright Yellow Chard, also known as Swiss Chard, has a unique and delightful taste that sets it apart from other leafy greens. The taste can be described as earthy, slightly bitter, and mildly sweet. It has a similar flavor profile to spinach or beet greens, but with its own distinctive twist.
When cooked, the bright yellow stalks become tender and have a slightly crisp texture, similar to celery. The leaves wilt and become softer, with a smooth and velvety mouthfeel. The combination of the stalks and leaves creates a pleasant contrast in both texture and flavor.
The earthy undertones of Bright Yellow Chard give it a rich and robust taste, reminiscent of minerals and fresh soil. The bitterness is subtle, adding depth to the overall flavor profile without overpowering it. The mild sweetness adds a touch of brightness and balances out the earthiness and bitterness, making it a well-rounded and enjoyable taste.
Overall, the taste of Bright Yellow Chard is a harmonious blend of earthy, bitter, and sweet flavors, resulting in a delicious and satisfying green vegetable that can be enjoyed in a variety of dishes.
How to start from seed
To start growing bright yellow chard, here’s a step-by-step process you can follow:
- Choose the right time: Chard is a cool-season crop, so it’s best to start planting it in early spring or late summer/early fall, depending on your climate. Make sure the soil temperature is above 50°F (10°C) before planting.
- Prepare the soil: Chard prefers well-draining soil rich in organic matter. Clear the planting area of any weeds or debris and loosen the soil with a garden fork or tiller. Add compost or well-rotted manure to improve the soil’s fertility and structure.
- Select a suitable location: Choose a spot in your garden that receives at least 6-8 hours of sunlight each day. Chard can tolerate partial shade, but it may not produce as vibrant yellow leaves in lower light conditions.
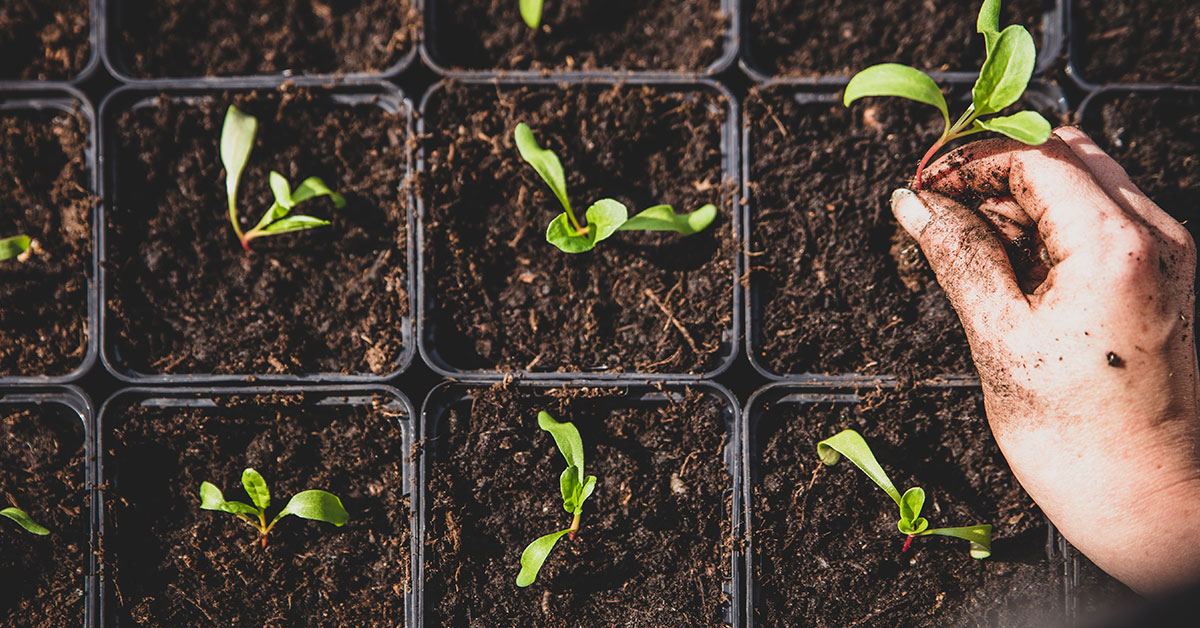
- Sow the seeds: Chard can be directly sown into the garden or started indoors and transplanted later. If you choose to start indoors, sow the seeds 4-6 weeks before the last expected frost date. Otherwise, sow directly into the garden bed, spacing the seeds about 1 inch (2.5 cm) apart and covering them with a thin layer of soil.
- Watering: Keep the soil consistently moist but not waterlogged. Water the seeds gently after planting and continue to provide regular watering throughout the growing season. Avoid overhead watering to prevent leaf diseases; instead, use a soaker hose or drip irrigation system.
- Thinning: Once the seedlings emerge and grow a couple of inches tall, thin them out to provide sufficient space for each plant to grow. Thin the seedlings to about 4-6 inches (10-15 cm) apart, allowing the healthiest plants to thrive.
- Fertilizing: Chard benefits from regular fertilization to promote healthy growth and vibrant-colored leaves. Apply a balanced, slow-release organic fertilizer or incorporate compost into the soil before planting. You can also side-dress the plants with compost or a nitrogen-rich fertilizer a few weeks after planting.
- Mulching: Apply a layer of organic mulch, such as straw or shredded leaves, around the plants to conserve moisture, suppress weed growth, and maintain even soil temperatures. Mulching also helps to keep the leaves clean and prevent soil splashing onto them.
- Harvesting: Chard leaves can be harvested when they reach the desired size, usually around 6-8 inches (15-20 cm) long. You can either cut individual outer leaves or harvest the entire plant by cutting it off at the soil level. Regular harvesting promotes continuous leaf production.
By following these steps, you should be able to successfully start growing bright yellow chard in your garden. Enjoy the process and the vibrant colors it adds to your harvest!
Planting and growing Bright Yellow Chard
To plant and grow bright yellow chard, follow these steps:
- Choose the right time: Chard is a cool-season crop, so it’s best to plant it in early spring or late summer. Make sure the soil temperature is above 40°F (4°C) before planting.
- Select a suitable location: Chard needs at least 6 hours of direct sunlight daily. Choose a spot in your garden with well-draining soil that is rich in organic matter. If your soil is heavy clay, add compost or organic matter to improve drainage.
- Prepare the soil: Clear the area of any weeds or debris. Loosen the soil using a garden fork or tiller, breaking up any large clumps. Incorporate compost or well-rotted manure into the soil to enrich it with nutrients.
- Sow the seeds: Chard can be directly sown into the ground or started indoors and transplanted. If starting indoors, sow the seeds in biodegradable pots about 4-6 weeks before the last frost date. Plant the seeds 1/2 inch deep and 2-3 inches apart. If sowing directly in the ground, plant the seeds 1/2 inch deep and 4-6 inches apart in rows spaced about 12-18 inches apart.
- Water properly: Keep the soil consistently moist but not waterlogged. Water deeply once or twice a week, providing about 1 inch of water each time. Avoid overhead watering to prevent disease.
- Thin the seedlings: If you’ve sown the seeds densely, thin the seedlings when they are about 2 inches tall. Space them 6-8 inches apart to allow enough room for growth.
- Mulch the soil: Apply a layer of organic mulch around the plants to suppress weeds, conserve moisture, and regulate soil temperature.
- Fertilize: Chard is a heavy feeder. Apply a balanced organic fertilizer or compost tea every 3-4 weeks to provide a consistent supply of nutrients.
- Harvesting: Bright yellow chard is usually ready for harvest 50-60 days after sowing. Harvest the outer leaves by cutting them at the base, leaving the inner leaves to continue growing. Regular harvesting encourages more leaf production.
- Pests and diseases: Watch out for common pests like aphids, slugs, and leaf miners. Use organic pest control methods or insecticidal soap if necessary. Avoid overhead watering to reduce the risk of fungal diseases.
By following these steps, you should successfully plant and grow bright yellow chard in your garden. Enjoy the vibrant and nutritious foliage!
When to harvest
The best time to harvest Bright Yellow Chard is when the leaves are young and tender. Typically, this occurs around 30-60 days after planting, depending on the specific variety and growing conditions. You can start harvesting individual outer leaves when they reach about 6-8 inches in length. Be sure to use a sharp knife or scissors to cut the leaves at the base, leaving the crown intact so that the plant can continue to produce new growth. Regularly harvesting the outer leaves will encourage the plant to keep producing throughout the growing season.