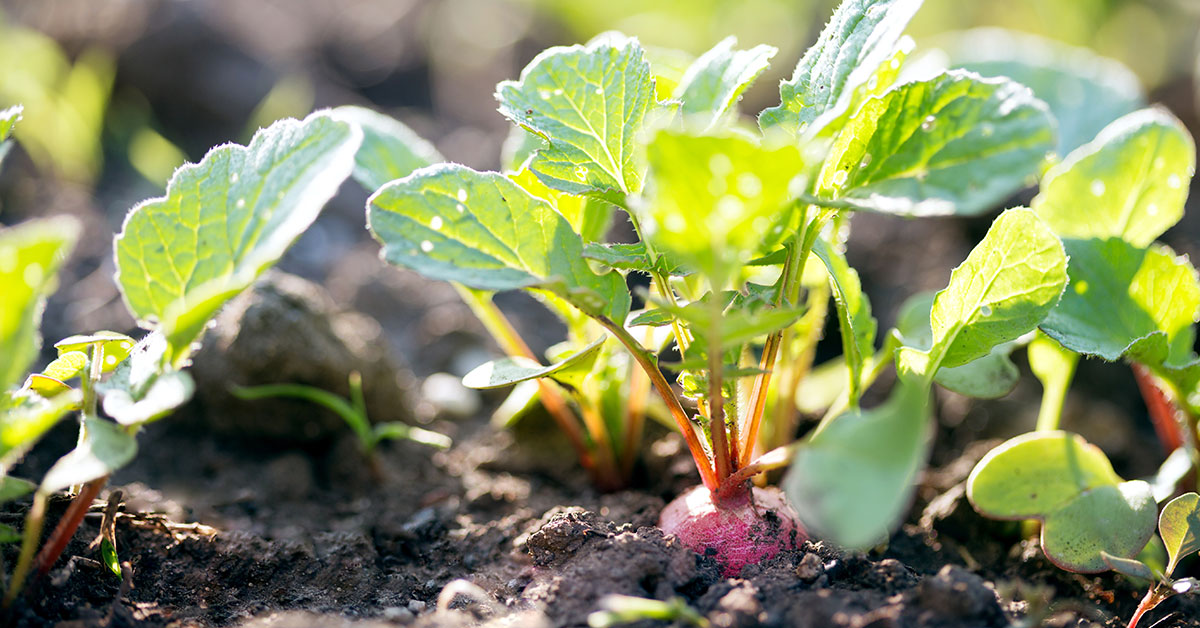

The Easter Egg Radish is Bursting with color and flavor, these petite root vegetables are a true delight for both the eyes and the taste buds.
From sowing the seeds to harvesting the crisp, crunchy radishes, we’ll guide you through each step with handy tips and tricks that will ensure a bountiful harvest.
What is an Easter Egg Radish?
The origin of the Easter Egg Radish can be traced back to various radish cultivars that were bred for their different colors and flavors. These varieties were eventually combined to create the Easter Egg Blend, which gained popularity for its diverse hues and festive appearance.
Easter Egg Radishes are small to medium-sized root vegetables that typically grow to about 1-2 inches in diameter. What sets them apart is their range of colors, resembling, as the name suggests, Easter eggs. Some common varieties include Cherry Belle (red), White Icicle (white), Purple Plum (purple), and Pink Punch (pink).
They have a crisp and crunchy texture, similar to other radish varieties. They offer a mildly spicy and peppery flavor that is not too overpowering, making them an excellent addition to salads, sandwiches, or even garnish.
Like most radishes, they are low in calories and high in nutrients. They are a good source of vitamin C, potassium, and fiber. Additionally, radishes are known for their high water content, which can help with hydration.
Easter Egg Radishes are incredibly versatile in the kitchen. Their vibrant colors can instantly elevate any dish, whether it’s a salad, a vegetable platter, or a simple garnish for sandwiches or tacos. They can be enjoyed raw, pickled, roasted, or even sautéed, adding a fresh and flavorful element to your meals.
What does an Easter Egg Radish taste like?
One of the most remarkable aspects of the Easter Egg Radish is its mild and crisp flavor. Unlike other radish varieties that can sometimes be spicy or peppery, these radishes have a more subtle taste. They are known for their refreshing and slightly sweet flavor profile, making them a perfect addition to spring and summer dishes.
The texture of Easter Egg Radishes is crunchy and firm, providing a satisfying bite. This makes them an ideal ingredient for salads, slaws, and even pickling. Their crispness adds a delightful element to your dishes and complements other ingredients beautifully.
When it comes to color, the Easter Egg Radish truly lives up to its name. These radishes come in an array of vibrant hues, ranging from red and pink to purple and white. Each color variation has a slightly different flavor, but they all share the same refreshing quality. The combination of these colorful radishes can add a visually stunning element to your meals, making them a hit at any gathering or dinner party.
The versatility of Easter Egg Radishes allows you to experiment with different cooking methods and flavor combinations. You can enjoy them raw, thinly sliced in salads or as a crunchy topping for tacos and sandwiches. If you prefer a milder taste, you can roast or sauté them, which will bring out their natural sweetness and reduce their sharpness.
Incorporating Easter Egg Radishes into your recipes not only adds a burst of color but also a unique and delightful flavor. Whether you’re a fan of radishes or looking to try something new, these vibrant root vegetables are sure to impress your taste buds. So, why not give them a try this Easter season and experience their mild and crisp goodness for yourself?
How to start from seed
Easter Egg Radish is a popular and colorful variety of radish that adds a vibrant touch to any garden or salad. If you’re interested in growing these delightful vegetables in your own backyard, these instructions will guide you through the process of starting Easter Egg Radish from seed.
- Choosing the Right Seeds:
Before you begin, make sure to select high-quality Easter Egg Radish seeds from a reputable seed supplier or a local nursery. Look for seeds that are fresh and have a high germination rate. - Preparing the Soil:
Easter Egg Radishes prefer loose, well-draining soil that is rich in organic matter. Start by preparing the planting area by removing any weeds or debris. Loosen the soil using a garden fork or a tiller to a depth of about 6-8 inches. Incorporate organic compost or well-rotted manure to enhance the soil’s fertility. - Planting the Seeds:
Once the soil is prepared, it’s time to sow the Easter Egg Radish seeds. Create shallow rows or furrows about half an inch deep using a garden trowel or your finger. Space the rows about 6 inches apart to allow enough room for the radishes to grow. Place the seeds about 1 inch apart within the rows. It’s a good idea to sow the seeds slightly thicker than desired, as radishes have a high germination rate, and you can thin them out later to give each plant more space.
- Watering and Care:
After sowing the seeds, gently cover them with soil and water the area thoroughly. Keep the soil consistently moist throughout the germination process, which usually takes around 4-7 days. Avoid overwatering, as it can lead to rotting or fungal diseases. Once the seedlings emerge, thin them out to ensure proper spacing. Ideally, each radish should have about 2-3 inches of space to grow. Use scissors or garden shears to cut the weaker seedlings at the soil level, rather than pulling them out, to avoid disturbing the roots of the remaining plants.
- Providing Adequate Sunlight:
Easter Egg Radishes thrive in full sun, so make sure to choose a location in your garden that receives at least 6-8 hours of direct sunlight each day. If you’re planting them in containers, place them in a sunny spot on your patio or balcony. - Fertilizing:
Radishes don’t require heavy feeding, but a balanced fertilizer or compost can be applied once the seedlings have established their first set of true leaves. Follow the instructions on the fertilizer package or use compost to enrich the soil.
How to grow this vegetable in your garden
The first step in successfully growing Easter Egg Radish is selecting the right location for your garden. These radishes thrive in full sun, so look for a spot that receives at least 6-8 hours of direct sunlight each day. Ensure that the soil is well-drained and fertile. If you have heavy clay soil, consider amending it with organic matter, such as compost, to improve drainage and nutrient content.
Preparing the Soil:
Preparing the soil is crucial for the healthy growth of Easter Egg Radish. Start by removing any weeds or grass from the designated area. Loosen the soil using a garden fork or tiller, breaking up any large clumps. If the soil is compacted, add some organic matter to improve its structure and drainage. A well-prepared soil will ensure that the radish roots can grow properly and produce healthy, flavorful radishes.
Planting Easter Egg Radish:
Easter Egg Radish can be directly sown into the garden as soon as the soil can be worked in early spring. Make shallow furrows in the soil about half an inch deep and 2-3 inches apart. Place the radish seeds in the furrows, leaving about 1 inch of space between each seed. Additionally, gently cover the seeds with soil and lightly tamp it down.
Watering and Care:
Keeping the soil consistently moist is essential for the successful growth of Easter Egg Radish. Water the plants regularly, making sure not to let the soil dry out completely. However, be cautious not to overwater, as excessive moisture can lead to rot and stunted growth. Mulching around the radishes can help retain moisture and suppress weed growth.
Harvesting Easter Egg Radish:
Easter Egg Radish matures relatively quickly, usually within 25-30 days after sowing. You can start harvesting the radishes when they reach a desirable size. Use a small garden fork or your hands to gently loosen the soil around the radish, being careful not to damage the roots. Lift the radish out of the ground, and if you’re satisfied with its size, wash it thoroughly before enjoying its crisp and peppery flavor.
Troubleshooting Common Issues:
While growing Easter Egg Radish is generally trouble-free, there are a few common issues to be aware of. Radishes can be prone to pests like flea beetles and root maggots. Consider using organic pest control methods, such as row covers or companion planting with repellent plants like marigolds. Additionally, keep an eye out for signs of disease, such as fungal infections or root rot. Proper crop rotation and maintaining good air circulation can help prevent these problems.