

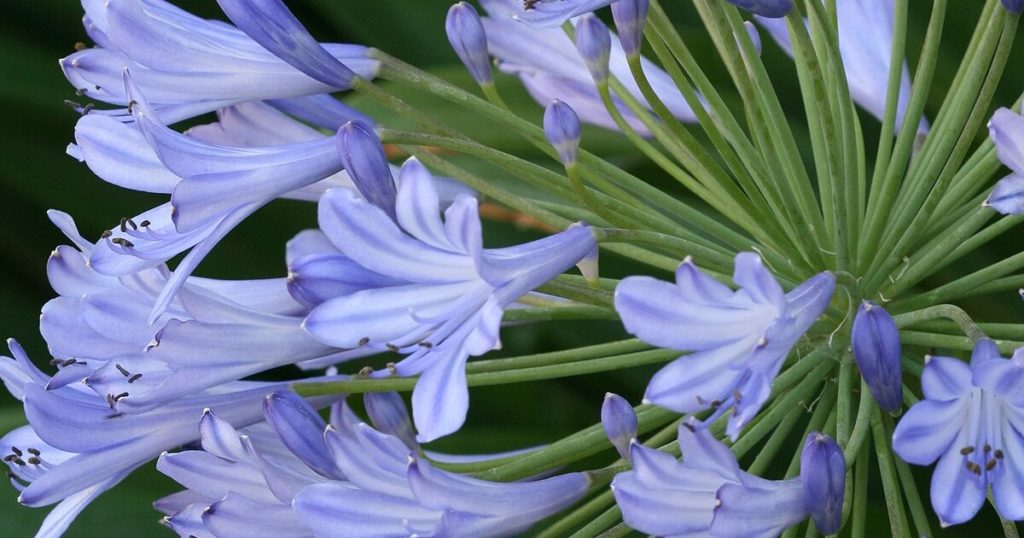
One of my favorite plants to grow in the garden has to be lilies (Lilium spp.)—their graceful trumpet-shaped flowers and sweet fragrance make them real showstoppers! Native to temperate regions of the Northern Hemisphere, lilies hail from places as diverse as East Asia, Europe, and North America. Watching them sway in a breeze while tiny bees nestle around the base is pure gardening bliss. Yet, I know all too well how disheartening it can be when your prized lilies start to falter. You might be thinking, “Why are my lily leaves turning yellow? Have I got bulb rot? What’s up with these strange spots?” Trust me, I’ve been there—many seasons ago, I lost a whole patch of lilies because I didn’t notice the early warning signs.
In this article, I’m excited to share nine key indicators that your lilies are struggling to thrive. From subtle leaf discoloration to relentless pests like the dreaded lily beetle, these signals can help you catch problems before they become catastrophic. Whether you’re a seasoned gardener or a first-timer who’s just planted your first Oriental lilies, recognizing these signs early can make all the difference. So grab a cuppa (and perhaps your gardening gloves!), because we’re about to dive into the world of lily care, diagnose those troubling symptoms, and get your plants back on the path to blooming glory!
Brown or Scorched Leaf Tips

Seeing the tips of your lily leaves turn brown can be alarming—nothing dampens excitement faster than crisp, dying foliage! Brown tips often signal scorching, which can result from too much direct afternoon sun or from fertilizer salts building up in the soil. Lilies are native to forest edges in Europe and Asia, where they receive bright morning light but are shielded from harsh midday rays by canopy trees. If your lilies are planted in full sun without any protection, those intense rays can literally “fry” the delicate leaf tissues, causing brown, crispy tips.
Another common cause of scorched tips is salt accumulation if you’ve been fertilizing heavily or using hard water. Excess salts draw moisture out of the leaves, leading to tip burn. I remember watering my Tiger lilies (Lilium lancifolium, native to the Himalayan foothills) with mineral-rich tap water one summer—by mid-July, the leaf margins looked like they’d been left too close to a campfire! To remedy this, I started using rainwater collected in a barrel and switched to a balanced, slow-release fertilizer designed for bulbs. After trimming away the scorched tips, new growth was smooth and lush again. If you catch brown leaf tips early and adjust light and watering practices, your lilies can rally and resume healthy growth!
Wilting Despite Adequate Water
When you find your lilies wilting even after a thorough watering, it’s enough to make any gardener’s heart sink. Wilting in well-watered plants often points toward root or bulb issues—perhaps the roots are damaged, or the bulbs are beginning to rot. Lilies originated in well-drained woodlands and mountain meadows, so they dislike sitting in soggy soil for extended periods. If water pools around bulb necks, the roots can suffocate, leading to wilting despite moist soil. I once overwatered my Easter lilies (Lilium longiflorum, native to Japan) during an unseasonably cool spring, and they began to droop severely even though the soil felt damp. That’s when I realized I needed better drainage and amended the bed with coarse sand and gravel.
Sometimes, wilting results from pests like the lily borer (Lilioceris lilii), whose grubs feed on the bulb and roots, causing sudden droopiness. If you wiggle a stem gently and feel soft resistance at the base—almost like the bulb has become spongy—check for tunnels or holes in the bulb itself. Removing any affected bulbs and treating the soil with beneficial nematodes can halt borer damage. When I tackled a borer infestation, I was careful to replant lilies in fresh, well-draining soil, and my plants bounced back within weeks, standing tall once more. If your lilies are wilting despite proper watering, dig gently around a suspect bulb to check root health—it’s often the quickest way to pinpoint the problem!
Curling or Distorted Leaves

Finding curling or twisted leaves on your lilies is an early red flag that something’s amiss—whether it’s pests, viral infection, or environmental stress. Lilies in their native habitats (such as the woodlands of North America or the mountains of Asia) evolved in balanced ecosystems where temperatures, humidity, and pollinator pressure remained consistent. In a garden setting, abrupt changes—like fluctuating temperatures or transplant shock—can cause leaves to curl as the plant struggles to maintain its water balance. I remember transplanting a batch of Asiatic lilies (native to Eastern Asia) into a north-facing bed; the sudden cooler nights made their new shoots curl around as if they were reaching for warmer air.
Pests such as aphids or thrips can also cause distorted leaves: these tiny insects suck sap from tender growth, leading to puckered, twisted foliage. If you peek under curling leaves, you might spot clusters of aphids—shiny, pear-shaped insects that tend to congregate near new buds. I once found a hidden colony of aphids on a cluster of Madonna lilies (formerly Lilium candidum, native to the Balkans), and by the time I cleaned them off, the leaves were so deformed that we lost half the buds for that season. Treating early with a mild, rose-friendly insecticidal soap and regularly inspecting for returning pests helped my lilies’ leaves unfurl normally in subsequent years. When you notice curling, check both environmental factors and possible pest activity to sort out the cause quickly!
Spots or Lesions on Leaves

Brown, black, or yellow spots on lily leaves can signal fungal or bacterial leaf spot diseases—definitely not the kind of decoration most gardeners desire! Many lily species are native to moist, temperate regions where fungal spores thrive; in your garden, heavy rainfall or overhead watering can exacerbate this problem, especially if crowded foliage prevents airflow. I’ve seen speckled patches start at the leaf tip and spread inward; left unchecked, these spots can coalesce, causing entire leaf panels to yellow and die. Early-season rains on my Stargazer lilies (hybrids derived from Lilium auratum and Lilium speciosum of Japan) created perfect conditions for Botrytis blight, and within days, my once-pristine leaves looked as though they’d been peppered with ink.
Additionally, bacterial infections can lead to angular water-soaked lesions along leaf veins. If you notice a greasy sheen near the spots, a bacterial culprit is likely at work. In their native habitats, lilies often grow with enough spacing to avoid continuous moisture on leaves. In my garden, I solved recurrent leaf spot by spacing bulbs farther apart—about 12 to 18 inches, depending on the variety—so air could circulate between plants. I also switched to watering at the base of the plant with a soaker hose rather than sprinklers. When disease first appears, snip out affected leaves (sterilize your shears between cuts!) and consider a preventive fungicide labeled for ornamental bulbs. Generally, if you address spotted leaves quickly, you save the rest of the plant from serious decline—and give those healthy flowers room to shine!
Lack of Flower Buds or Poor Bloom
There’s nothing more disappointing than anticipating a stunning display of lily blooms only to find a handful of scraggly, stunted flower stalks—or worse, no buds at all! Lilies require adequate sunlight—at least six hours of direct sun daily—to develop sturdy flower buds. Native lilies from North America’s open meadows, for instance, evolved under full-sun conditions, and planting them in deep shade can cause them to focus on foliage rather than flowering. I once tucked a stand of Tiger lilies (Lilium lancifolium, native to East Asia) behind a dense spruce tree; come bloom time, I had tall, leafy stalks with barely a bud in sight. Moving them to a sunnier spot the next season upped the bud count dramatically!
But lack of buds can also stem from nutrient imbalances. Lilies need phosphorus, in particular, to set robust flower buds. If you’ve been using a high-nitrogen fertilizer—aimed at boosting foliage—you might inadvertently be starving your lilies of phosphorus. I learned this after my Easter lilies (Lilium longiflorum, native to the Ryukyu Islands) produced lush green leaves but only two tiny flowers apiece. A soil test revealed low phosphorus levels, so I added a bone meal supplement in early spring. By mid-June, my lilies were unfurling multiple large, fragrant blooms, attracting hummingbirds and butterflies in droves! If your lilies are leafy but bud-poor, check both light exposure and nutrient levels to unlock better flowering next season.
Yellowing Lower Leaves and Foliage Discoloration
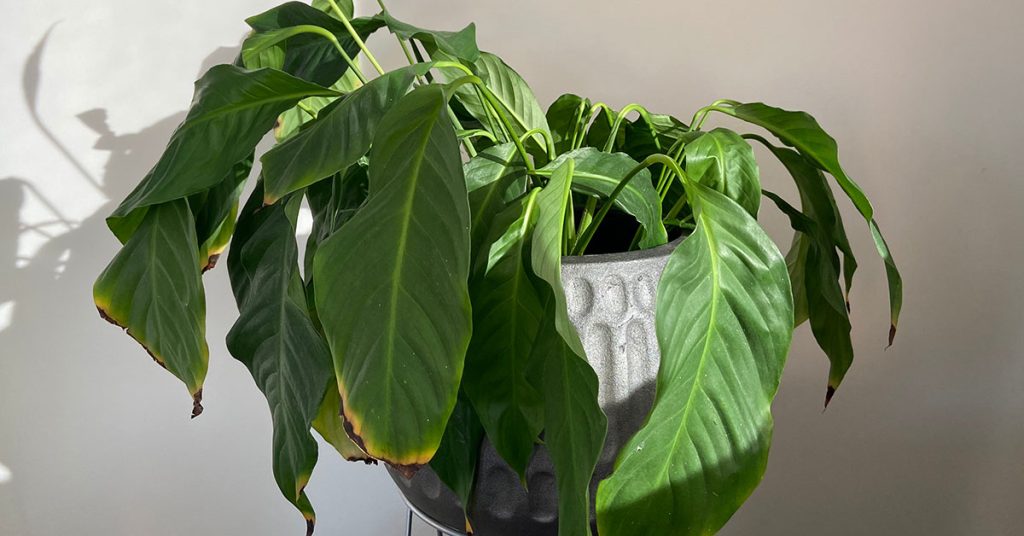
Spotting yellow leaves at the base of your lilies can be quite alarming—often, it suggests nutrient deficiencies or a developing disease. In their native range—spanning from European woodlands (Lilium martagon) to North American alpine meadows (Lilium pardalinum)—lilies grow in humus-rich soils that provide balanced nutrients. If your lilies are turning yellow, it could mean the soil is too acidic or too alkaline, interfering with nutrient uptake. I observed my Asiatic lilies (origins in Eastern Asia) developing pale yellow lower leaves one season, and a soil pH test revealed it was around 8.2—too alkaline! Amending with elemental sulfur to gently lower the pH brought the soil back to a healthy 6.8, and the foliage greened up within weeks.
Yellowing can also result from early-stage bulb rot. When the base of the bulb starts to decay—often due to waterlogged soil or excessive spring rain—nutrient transport to the leaves is disrupted, causing them to yellow and wilt. I remember heavy spring rains from a particularly wet April saturating my well-drained bed, turning it into a soggy mess. By late May, half my bulbs—like the Turk’s cap lilies (Lilium superbum, native to eastern North America)—showed yellowing leaves. Lifting and inspecting the bulbs, I found some softening at the base. After discarding the rotted specimens and replanting in raised beds with fresh, well-draining compost, my remaining lilies perked up. If you catch yellowing early and test both soil and bulbs, you can often correct the issue before it spreads!
Stunted Growth and Leggy Stems
When lilies fail to reach their expected height—especially varieties that should tower well above knee-high—you may be dealing with stunted growth or spindly, leggy stems. In their wild habitats—such as mountainous regions for Lilium columbianum in the Pacific Northwest—lilies evolved to push through compacted forest soils, developing strong, upright stems. If your garden soil is overly compacted or low in organic matter, the plants may struggle to anchor deeply, resulting in thin, weak stems that easily flop over under the weight of buds. I discovered this when my Madonna lilies (Lilium philadelphicum, originally from the Balkans) barely crept above a foot tall; after loosening the compacted loam and amending with rich compost, new shoots grew vigorously, standing a full two feet tall by midsummer.
Leggy growth can also signal insufficient light. Most lilies—whether the stately Orienpet hybrids (crosses between Oriental and Trumpet lilies) or the petite Martagon types—need bright, filtered sun to develop strong stems. In heavy shade, they stretch toward the light, producing elongated stems with sparse internodes that can’t support large flower heads. I once planted a row of lilies along the south side of my garage, thinking they’d get morning and afternoon sun. To my surprise, a large evergreen cast deep shade for most of the day. My stems stretched awkwardly, and many buds drooped before opening. Relocating them to a brighter border not only corrected the legginess but also led to fuller, sturdier growth that attracted more bees!
Pests: Aphids, Slugs, and Lily Beetles Present

Nothing breaks my heart quite like discovering bright-green aphids clustered on tender lily buds or spotting the unmistakable metallic-red lily beetles (Lilioceris lilii) devouring leaves. Aphids, often originating from temperate regions worldwide, are drawn to lily moisture and can cause leaves to curl, yellow, or become sticky with honeydew. In their native habitats—whether a woodland edge in Europe or a North American mountain slope—lilies benefit from a balanced predator-prey relationship that keeps aphid populations in check. In your garden, however, you may need to intervene by spraying aphids off with a gentle stream of water or introducing ladybugs that prey on these sap-suckers.
Slugs and snails, too, can wreak havoc on seedlings and emerging shoots, especially in damp conditions after rain. Their slimy trails and ragged feeding holes are telltale signs. I’ve had newly sprouted buds of Asiatic lilies (native to Eastern Asia) decimated overnight by slugs hiding under mulch. Using copper barriers around the bulb bed and handpicking under cover of dusk helped eliminate most of the problem. And then, of course, there’s the dreaded red lily beetle—those bright-red insects are native to Europe but have spread to North America, where they can quickly strip lily foliage. I learned to inspect for larvae (small, slug-like grubs covered in a black, sticky secretion) on my Tiger lilies; removing them by hand and applying neem oil early in the season drastically reduced damage. If you catch pests early and employ integrated pest management—like encouraging parasitic wasps—you’ll keep your lilies munch-proof and thriving!
Soft or Mushy Bulbs (Bulb Rot)

Finding your lily bulbs soft, waterlogged, or emitting a foul odor is gardener’s nightmare—bulb rot can quickly spread from one plant to the next. Lilies in the wild—like the North American native Wood Lily (Lilium philadelphicum)—often grow in soil that’s moist yet well-draining, so their bulbs stay firm and healthy through seasonal rains. In garden beds, however, poor drainage or heavy clay can cause water to pool around bulbs, leading fungal pathogens (such as Pythium or Fusarium) to invade and rot the interior. I once planted a batch of Stargazer lily bulbs in a low-lying depression; after a single week of torrential downpours, their bulbs were squishy and discolored—unsalvageable.
If you notice wilting foliage or yellowing leaves tracing back to a single bulb, gently dig it up and inspect the base. A healthy bulb should be firm to the touch; any softness or slimy sections indicate rot. Removing affected bulbs swiftly prevents neighboring bulbs from succumbing. To remedy the situation, I salvaged surviving bulbs by replanting them in pots filled with fresh, gritty, well-draining mix—equal parts coarse sand, pine bark fines, and compost. I also elevated the planting area slightly and applied a layer of gravel beneath each bulb to encourage water to drain away. With these adjustments, the bulbs began producing crisp, healthy scales and sent out vigorous shoots the following spring!