
There’s nothing quite like the satisfaction of harvesting your own garlic—those pungent, flavorful bulbs elevate every dish from sauces to sautés! Native to the mountainous regions of Central Asia, Allium sativum has traveled the world on the strength of its culinary and medicinal uses. While garlic isn’t considered invasive when grown responsibly, I know how disappointing it feels to baby your crop all winter only to uncover tiny, misshapen cloves at harvest.
That’s why I’m excited to share twelve common mistakes to avoid when growing garlic, so you can enjoy plump, robust bulbs every time. From soil pH and spacing to mulch and mulch timing, each tip dives into garlic’s natural preferences, how to welcome pollinators and beneficial insects (for example, those early spring mason bees that adore the tiny allium blooms), and how to steer clear of pitfalls that can stunt growth or invite disease. Let’s dig in and ensure you’re set for a garlic-growing triumph!
Neglecting Proper Soil Preparation

Good garlic starts with well-amended, loose soil. Planting cloves in compacted clay or poor-quality garden dirt can lead to small, underdeveloped bulbs. I always work in generous amounts of aged compost and a handful of coarse sand or perlite to mimic the rich mountain soils where garlic evolved!
Proper soil structure not only encourages healthy root and bulb formation but also fosters a thriving community of earthworms and beneficial microbes. Those critters break down organic matter and improve nutrient availability, setting the stage for full, robust garlic heads.
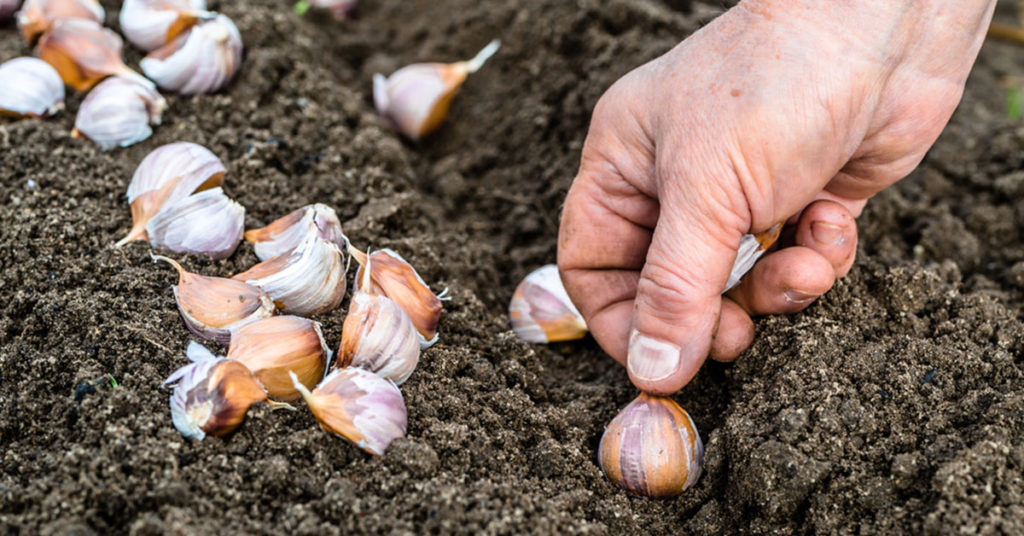
Planting Supermarket Garlic Bulbs
While it’s tempting to grab a jar of garlic from your local store, supermarket bulbs are often treated to prevent sprouting and aren’t adapted to local climates. I made that mistake once and ended up with zero emergence! Instead, source certified seed garlic from a reputable nursery or local grower to guarantee viability and variety performance.
Seed garlic is selected for strong, true-to-type growth and resistance to common diseases. By choosing the right planting stock, you set your crop up for success and avoid introducing unwanted pests or pathogens into your garden.
Ignoring Soil pH and Nutrient Balance
Garlic prefers slightly acidic to neutral soil, with a pH around 6.0–7.0. Planting in soil that’s too acidic or alkaline can lock out essential nutrients like phosphorus and potassium—key players for bulb development. A simple soil test in fall lets you adjust pH with lime or sulfur as needed.
Balanced fertility is just as critical. Too much nitrogen pushes lush foliage at the expense of bulb size, while insufficient potassium can lead to poor bulb formation. I use a balanced application of compost and a low-nitrogen fertilizer at planting, then side-dress with compost in early spring for steady nourishment.
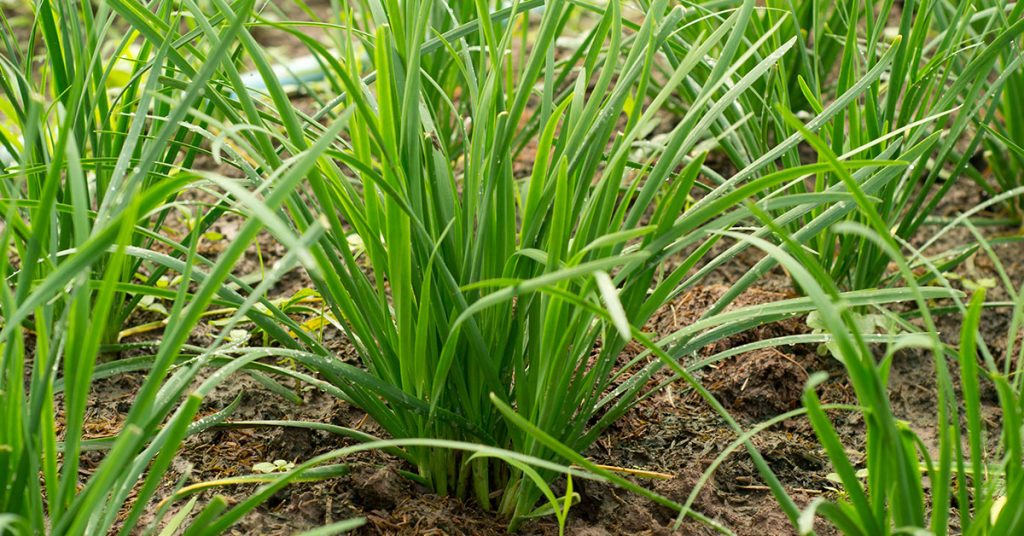
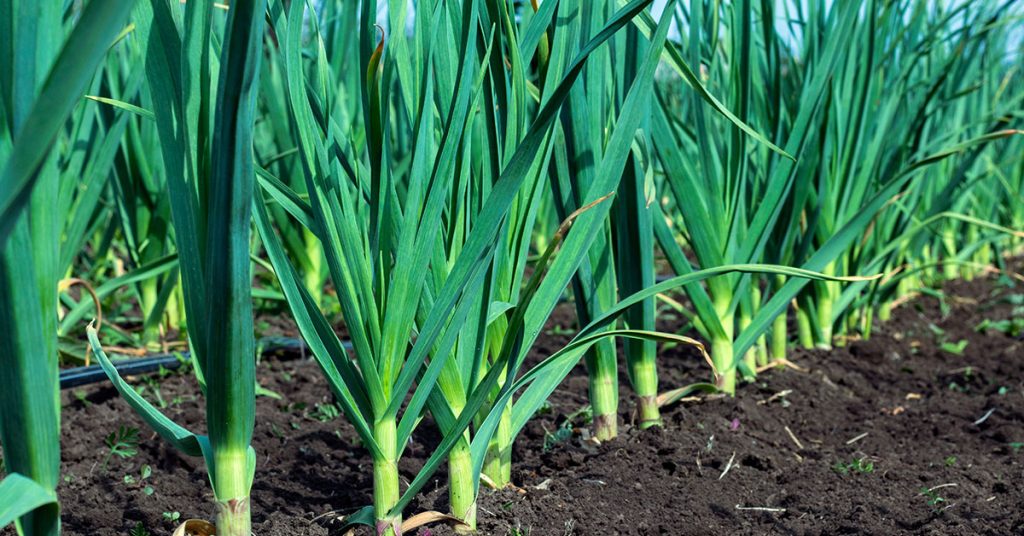
Failing To Space Cloves Adequately
Crowding cloves too closely—say, planting them only 2 inches apart—results in competition for nutrients and wildly variable bulb sizes. My beds once produced a mishmash of tiny and oversized heads because I squeezed them in to save space! Aim for 4–6 inches between cloves and 12–18 inches between rows for optimal airflow and room to multiply.
Proper spacing not only enhances bulb size but also reduces disease risk by improving air circulation. It also gives ground-nesting bees and other beneficial insects easier access to springtime garlic scape blooms—a delightful garden sight!
Skipping Mulch or Applying It Too Late

A good layer of mulch—straw, shredded leaves, or pine needles—insulates garlic through cold winters and conserves moisture in spring. Planting without mulch leaves cloves vulnerable to temperature swings, and applying it too late invites weed competition. I cover beds immediately after planting and replenish mulch in late fall for best results!
Mulch also offers habitat for ground beetles, spiders, and other predators that help control slugs and aphids. A well-mulched garlic bed is a mini-ecosystem, balancing soil temperature, moisture, and pest management all in one go.
Overwatering or Underwatering
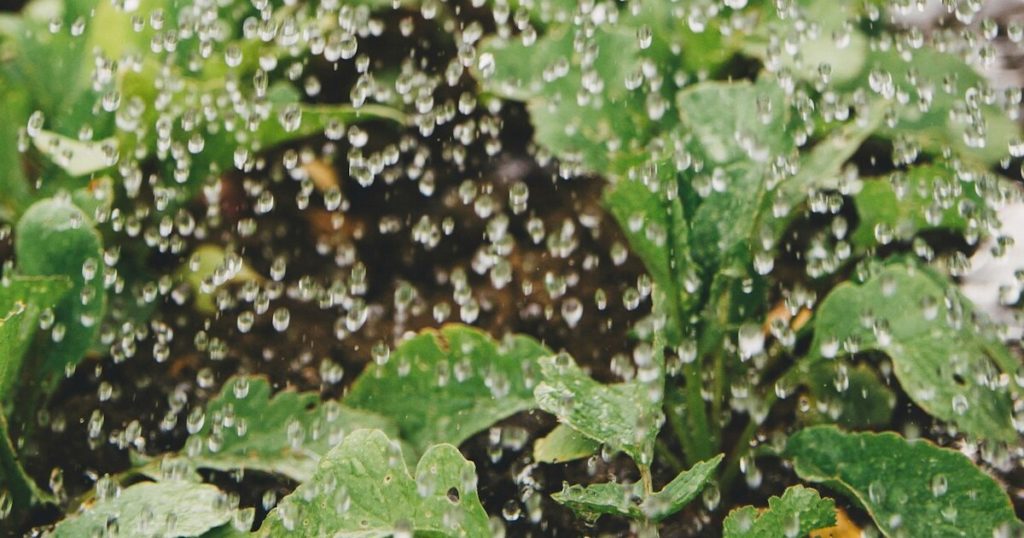
While garlic needs consistent moisture during bulb formation, overly soggy soil invites rot, and drought stress leads to small, shriveled heads. I water deeply but infrequently—about once a week in spring—allowing the top inch of soil to dry between waterings. This encourages roots to dive deep, anchoring bulbs and supporting even development.
As summer heat peaks, I taper off watering to let foliage brown naturally before harvest. That dying-back phase signals the bulb that it’s time to mature and store nutrients, giving you those firm, flavorful cloves you crave.
Planting at the Wrong Time

Timing is everything with garlic. Plant too early and cloves may sprout before winter, only to freeze and rot. Plant too late and they won’t establish enough roots for a strong spring push. In most regions, mid-to-late fall—about four to six weeks before the ground freezes—is ideal.
This window gives cloves just enough time to root without producing tall shoots. Those roots anchor the plant and gather nutrients over winter, while keeping shoots safely underground until spring arrives.
Neglecting Crop Rotation

Repeatedly planting garlic (and other alliums) in the same spot invites a buildup of soil-borne diseases like white rot and nematodes. I rotate my garlic beds to a new area every three to four years, interplanting with legumes or brassicas in between to break pest and disease cycles.
Crop rotation also helps balance soil nutrients and structure. Your future garlic patches will thank you with healthier, more vigorous growth and fewer headaches come harvest time!
Forgetting to Remove Garlic Scapes
Hardneck garlic produces curly scapes in late spring. Leaving these flower stalks in place diverts energy from bulb development into seed production. I cut scapes as soon as they curl, using them up in pesto or stir-fries—bonus flavor treat!
Removing scapes focuses the plant’s energy on beefing up cloves, resulting in larger, denser bulbs. Plus, scape removal opens the canopy, improving airflow and reducing mildew risk.
Harvesting Too Early or Too Late
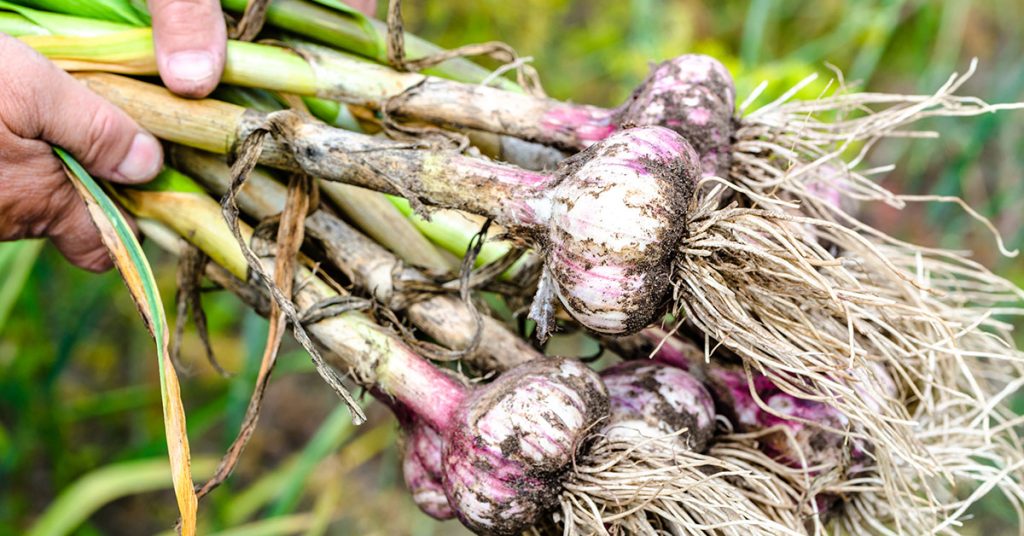
Pull garlic too soon and cloves remain small; wait too long and the outer wrappers deteriorate, making storage tricky. I watch for 50–70% of leaves to brown and wither before harvest, then test one bulb to ensure wrappers are tight. Timing harvest precisely preserves both size and longevity!
After lifting bulbs, I cure them in a warm, airy spot out of direct sun for two to three weeks. Proper curing locks in flavor and extends shelf life, so you can enjoy your homegrown garlic long after the growing season ends.
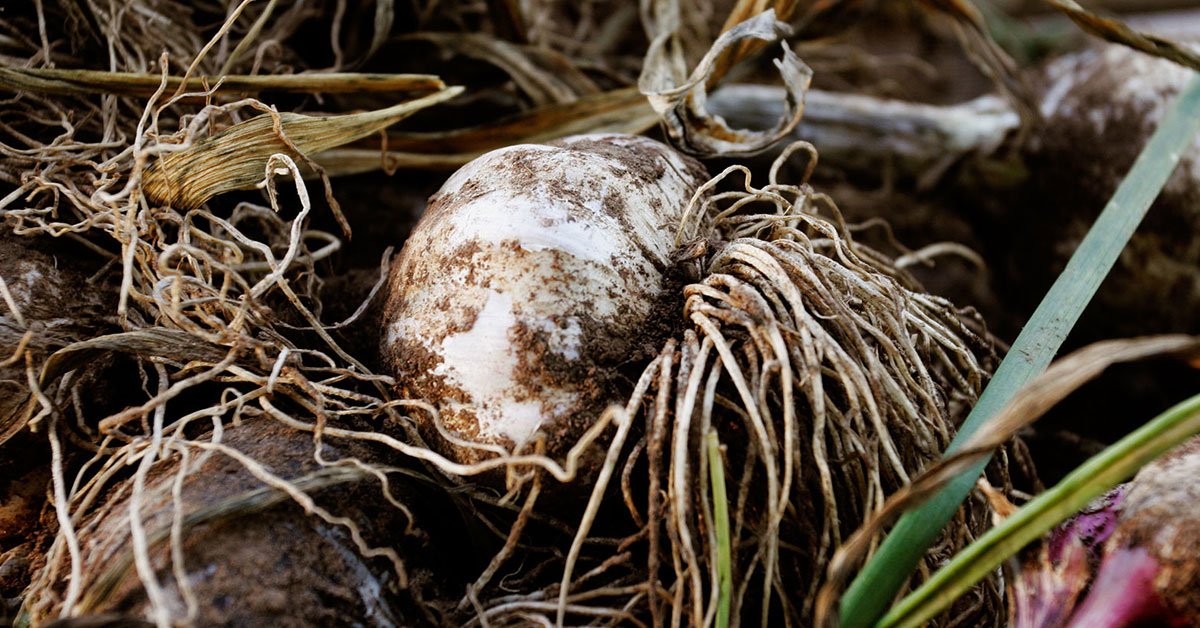
Ignoring Pest and Disease Signs
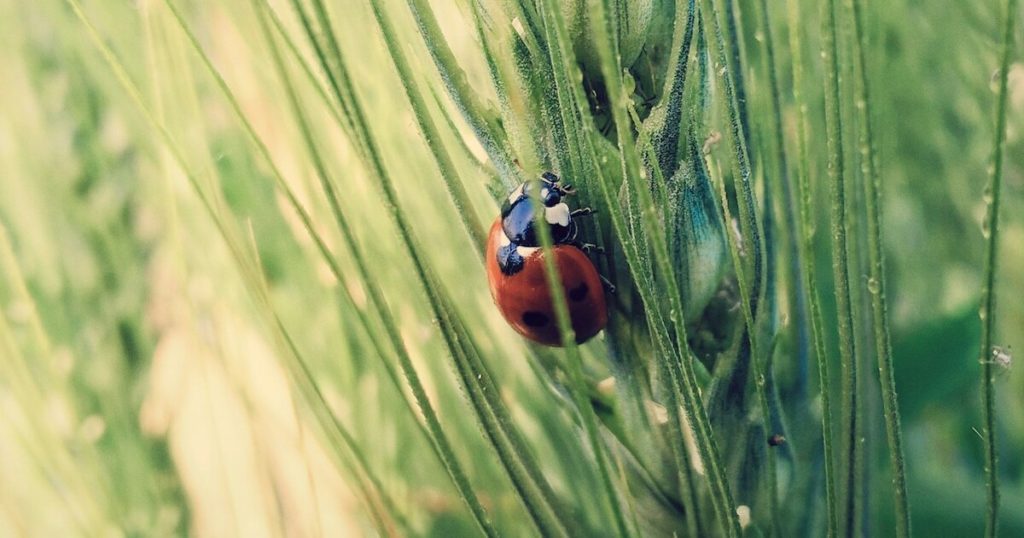
Early detection of pests like onion thrips or diseases such as downy mildew can save an entire garlic crop. I inspect foliage weekly, looking for silvery streaks, stunted growth, or yellow patches. Removing affected leaves and improving air circulation often halts spread before it’s too late.
Encouraging ladybugs, lacewings, and predatory mites by planting companion flowers nearby gives you natural pest control. A vigilant eye and a thriving beneficial insect community keep your garlic beds healthy and productive all season.