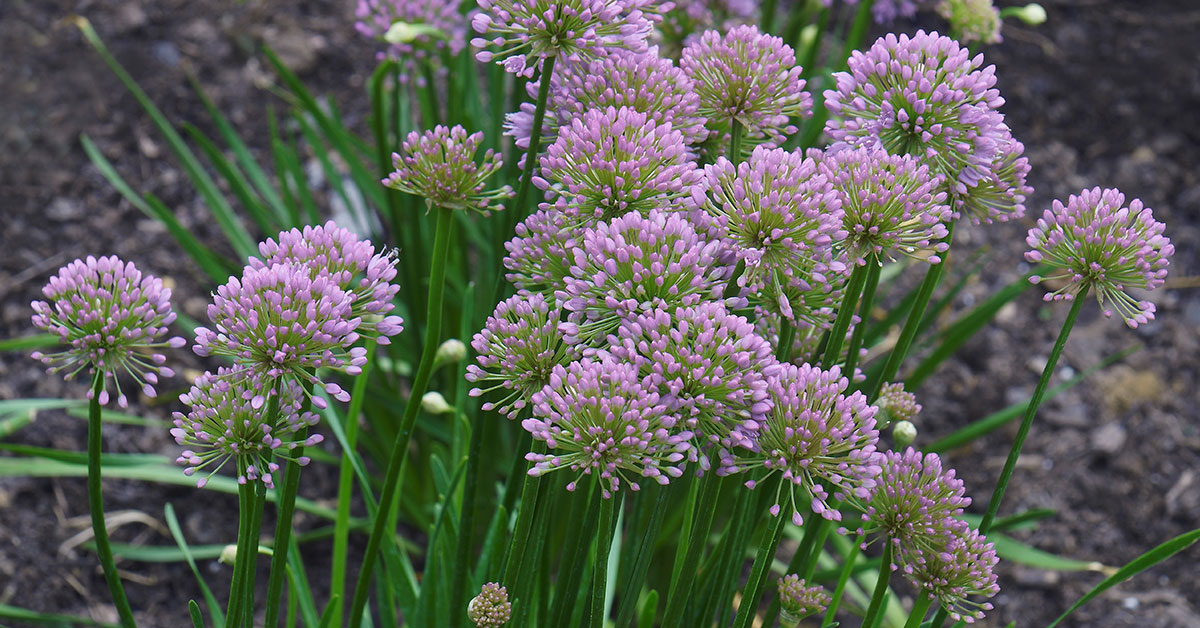

Starting a patch of chives (Allium schoenoprasum) is such a thrill—those slender, tubular leaves and their lavender blooms are a delight in the herb garden! Native to Europe and parts of Asia, chives have naturalized in many temperate areas, but they’re not considered invasive in most home gardens. Their flowers attract bees, hoverflies, and butterflies, making chives an excellent companion for veggies and ornamentals alike. Yet even this hardy perennial can sulk if you stumble on a few common pitfalls.
I’ve been there—reaching for a handful of fresh chives only to find them pale, sparse, or droopy. It’s a bummer when a little mistake robs you of those oniony snips you crave in soups, salads, and omelets! Let’s explore 11 errors that can hold your chives back and how to sidestep them, so you can enjoy a lush, productive patch all season long.
Ignoring Soil pH and Nutrient Balance

Chives prefer a slightly acidic to neutral soil (pH 6.0–7.0). If the pH veers too far toward alkalinity or acidity, nutrient uptake can be compromised, leading to yellowing leaves or stunted growth. I once overlooked a slowly acidifying soil in my raised beds, and those chives struggled to develop their characteristic deep green hue.
A simple soil test can save a lot of heartache! Amending with garden lime or sulfur to tweak pH, plus adding a balanced organic fertilizer if deficiencies show up, will keep your chives thriving. Remember: these alliums are frugal feeders, so avoid heavy-handed applications—just enough to maintain that sweet spot for nutrient availability!
Planting at the Wrong Time

Chives are cool-season lovers, happiest when temperatures hover between 55°F and 75°F. Planting too early in frozen ground can delay establishment, while setting out new seedlings during scorching midsummer heat can stress young bulbs. I learned that planting in late spring, after the last hard frost, gives chives the best chance to settle in and multiply.
If you miss that window, wait for autumn’s milder days—chives planted in early fall often establish strong roots ahead of winter and burst forth vibrantly in spring! In their native range, they naturally sprout as soon as snow melts, so mimicking that cycle helps prevent shock and encourages steady growth.
Neglecting Proper Drainage
Chives despise soggy feet! Poor drainage invites rot and fungal problems, leading to yellow, mushy stems at the soil line. I once planted mine in a low spot that held water, and within weeks the patch looked dreadful. Shifting them into well-draining raised beds revived my beloved garlic chives in no time!
To remedy heavy clay or compacted soil, work in generous amounts of compost, aged bark, or coarse sand. If you’re growing in containers, choose a pot with drainage holes and a freely draining mix. Healthy roots mean vibrant foliage and more flowers for pollinators to enjoy!
Harvesting Too Aggressively
Snipping off handfuls of chives without restraint can weaken the plant’s energy reserves. A good rule is to never remove more than one-third of the foliage at once—otherwise, you risk slowing regrowth and reducing blooms later on. One season, I went overboard with harvesting for a big party, and it took weeks for the patch to bounce back!
Instead, harvest in small snips throughout the season, allowing time for recovery. Regular light harvests actually encourage denser clumps and more frequent flowering. Your chive patch will thank you by rewarding every dish you season!
Letting Blooms Go to Seed

While those mauve pom-poms are a feast for bees and butterflies, allowing them to set seed diverts energy away from foliage production. If you prefer robust leaf growth, pinch off spent flowers as soon as petals fade. I still marvel at the pollinator parade, but I’ve learned that a quick deadheading keeps chives focused on leaf development.
Deadheading also prevents self-seeding in areas where chives aren’t wanted. Although not typically invasive, self-sown seedlings can pop up in unexpected nooks. Controlling seed heads keeps your garden tidy and ensures clumps stay vigorous!
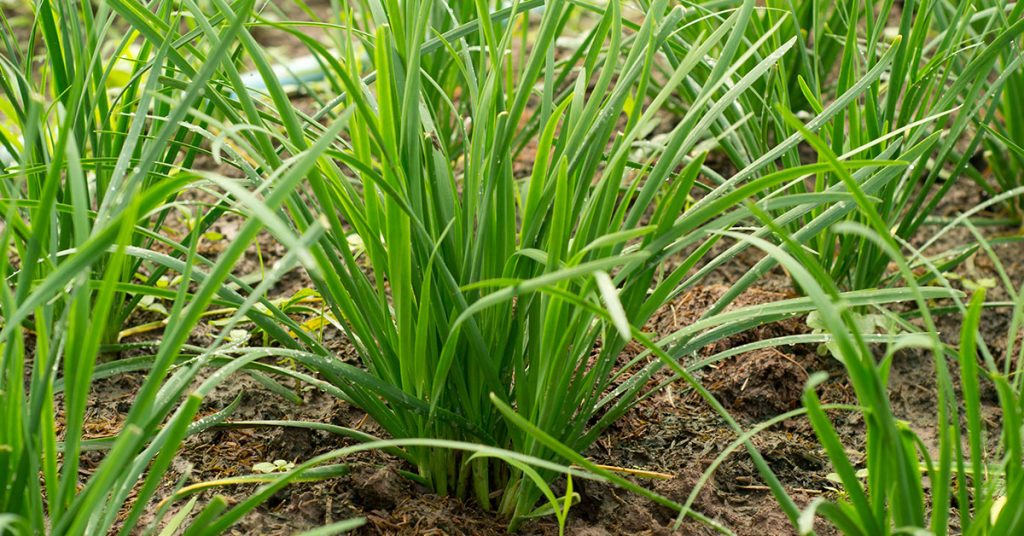
Overcrowding Seedlings

It’s tempting to sow thickly, but chive seedlings need room to mature. Crowding leads to competition for light, water, and nutrients, resulting in spindly, weak stems. I recall planting crowded rows that barely produced any usable harvest until I thinned them out dramatically.
Aim for spacing of about 8–12 inches between clumps. This gives each plant air circulation to reduce disease risk and room for bulbs to expand underground. Thinner stands of robust chives are much more productive than dense, struggling masses!
Failing to Divide Overcrowded Clumps

Every two to three years, chives benefit from division to prevent overcrowding. Dense clumps can become woody in the center, producing shorter, thinner leaves. I once ignored a mottled patch, and the inner growth dwindled to nothing until I split and replanted the bulbs!
Early spring or fall is the perfect time to lift, divide, and replant. Simply separate the bulbs into smaller clusters and reposition them with fresh soil amendments. Division rejuvenates your patch and can be a fun way to share chives with fellow gardeners!
Skipping Regular Watering in Containers

Potted chives look charming on patios, but they dry out faster than in-ground beds. Dehydrated chives develop brown tips and reduced flavor intensity. After a hot week away, I returned to crispy, forlorn stems in my balcony container—lesson learned!
Check containers daily in warm weather and water whenever the top inch of soil feels dry. Mulching the surface with straw or fine bark helps retain moisture. Plump, turgid leaves not only taste better but also stay more resilient against stress!
Over-Fertilizing the Soil

Chives don’t need heavy feeding—too much nitrogen sends them into floppy, tender growth that’s prone to bending or rot. I once was overzealous with a high-nitrogen feed, and my chives collapsed under their own lushness!
A light application of compost in early spring usually suffices. If you see pale or slow growth later, a gentle side-dressing with balanced organic fertilizer will revive them without overwhelming the bulbs or the environment.
Ignoring Pest and Disease Signs

Chives are generally sturdy, but aphids, thrips, and downy mildew can wreak havoc if left unchecked. Those tiny insects love the tender new shoots, and fungal spores spread quickly in humid, crowded conditions. I felt a surge of relief when ladybugs showed up in my garden to battle aphids—nature’s little heroes!
Scout your patch weekly, looking under leaves and at soil level. A strong blast of water detaches many pests, or you can introduce beneficials like lacewings. Prune and dispose of any diseased foliage immediately to protect the rest of your crop.
Planting in Deep Shade

Chives need at least six hours of sun to develop their pungent flavor and sturdy growth. In heavy shade, stems can stretch thin, and bloom production dwindles. I once tucked them under a dense shrub, and they sulked until I relocated them to a sunnier spot.
If your garden has limited sun, plant alongside heat-tolerant companions that won’t compete for light, or use reflective surfaces to brighten up the area. When chives bask in ample light, they reward you with rich color, robust taste, and a parade of pollinators!