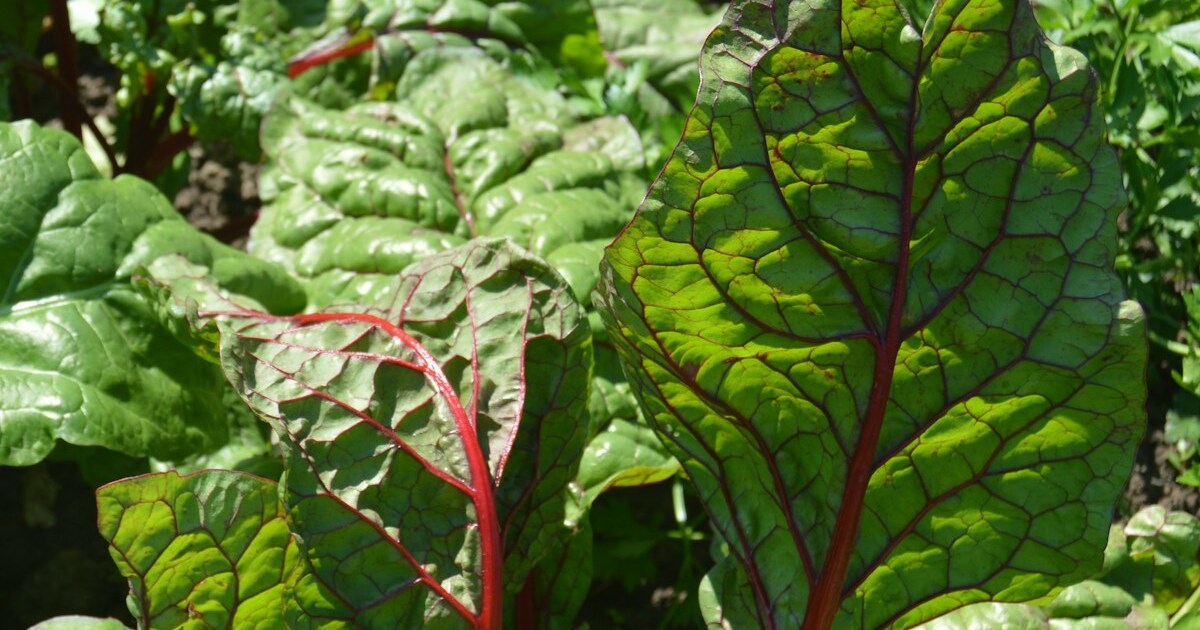

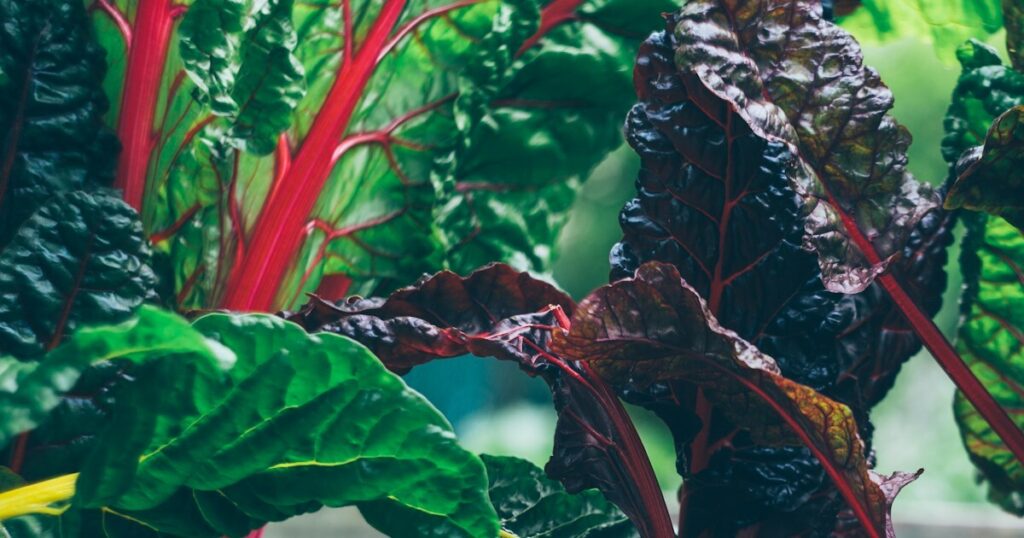
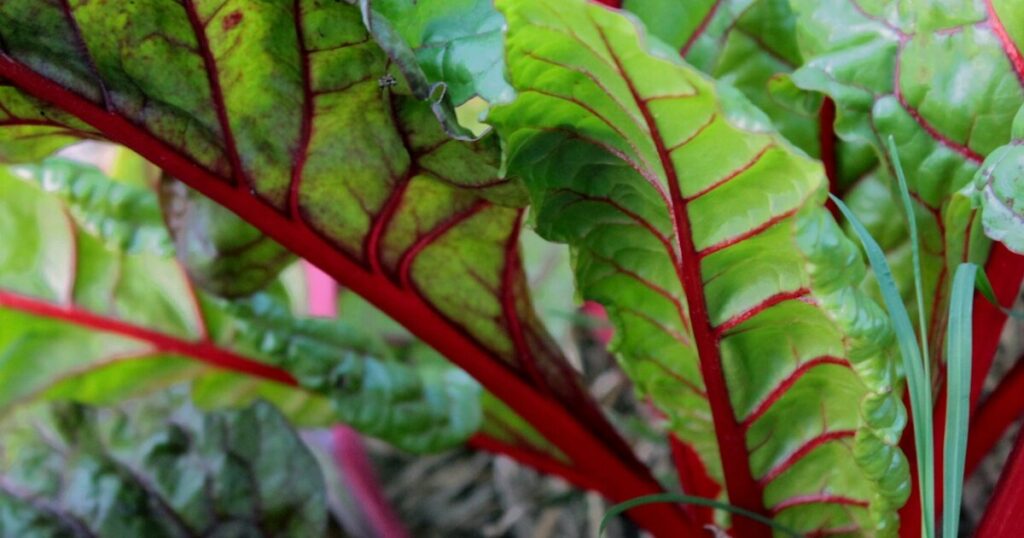
Chard’s bold, colorful stems and glossy, crinkled leaves are a joy to behold—and a treat to harvest! Native to the Mediterranean, Swiss chard (Beta vulgaris subsp. vulgaris) has been cultivated since Roman times, and it thrives in both cool springs and mild autumns. I know how frustrating it can be when your chard patch produces only puny leaves or stalls out entirely. Whether you’re aiming for the striking hues of ‘Bright Lights’ or the massive fronds of ‘Fordhook Giant,’ these ten randomized tips will help you coax out colossal chard growth and a steady stream of edible greens.
Growing giant chard isn’t just a matter of planting seeds and praying for the best—it involves thoughtful seed selection, soil preparation, watering strategies, pest management, and even season-extension techniques. Though chard isn’t invasive, its prolific self-seeding can surprise you if you let seedheads form unchecked. We’ll cover everything from thinning seedlings to attracting beneficial insects and overwintering, so you can savor those big, nutritious leaves from spring into frost! Let’s dive in with enthusiasm and empathy for the inevitable garden hiccups along the way.
Thin Seedlings and Space Properly

Overcrowding is the quickest way to stunt chard’s growth—when seedlings jostle for light and nutrients, none of them can reach their full potential. I always thin my patch once true leaves appear, spacing standard varieties 8–10 inches apart and giants like ‘Fordhook’ up to 12 inches. Proper spacing promotes air circulation, reducing the risk of fungal diseases.
Those thinned seedlings aren’t waste—they make delicious microgreens! Simply snip them at soil level and toss them into salads. By giving each plant room to form a broad basal rosette, you encourage those massive leaves we all crave, while keeping your garden free of competition stress.
Protect from Pests and Diseases
It’s such a bummer when flea beetles pepper your chard or leaf miners carve silvery trails through the flesh! Weekly inspections—especially on leaf undersides—let you spot early damage. A gentle spray of insecticidal soap or neem oil usually sends pests packing without harming beneficials like ladybugs and lacewings.
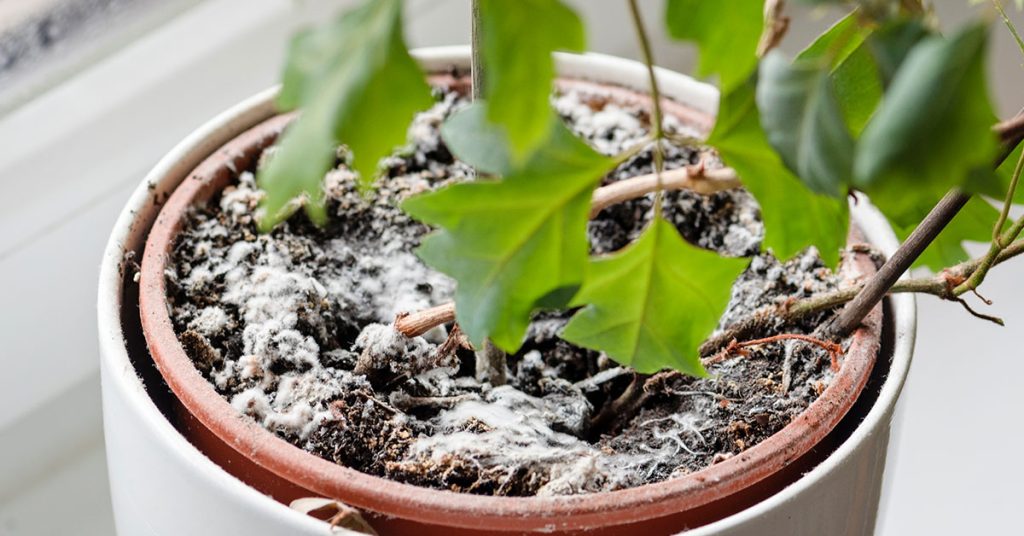
In humid climates, chard can succumb to downy mildew. Good air flow—achieved by thinning and proper spacing—along with watering at the base early in the day keeps foliage dry. At the first sign of fuzzy gray growth, remove affected leaves and rotate your chard to a fresh bed next season.
Choose Quality Seeds and Optimal Sowing Times

Your giant chard journey starts with seeds from reputable sources. Varieties bred for size—such as ‘Bright Lights’ or ‘Fordhook Giant’—deliver the thick, glossy leaves you want. Sow directly in early spring as soon as soil warms to 50°F, or in late summer for a fall harvest; both windows mimic chard’s native Mediterranean cycle.
In colder zones, start seeds indoors 4–6 weeks before the last frost, then harden off seedlings gradually. Conversely, in mild-winter regions, a late-autumn sowing establishes roots over winter, giving you an early spring jump on leaf production. Timing is everything!
Encourage Beneficial Insects and Pollinators

While chard is harvested mainly for its leaves, its tiny greenish-white flowers can be a boon for pollinators and predators. Leaving a few plants to bloom invites sweat bees, small carpenter bees, and hoverflies that prey on aphids and other pests. I set up a simple bee hotel nearby, and it’s delightful to watch native bees buzzing around!
Additionally, planting companion flowers—like alyssum or borage—around your chard patch gives pollinators more reasons to stick around. Their presence helps maintain a balanced ecosystem, resulting in healthier, more vigorous chard plants.
Provide Balanced Fertilization for Vigorous Growth

Chard is a moderate feeder that rewards regular nutrients with rapid upward growth. At planting, I mix in a slow-release balanced fertilizer (10-10-10) to support both foliage and root development. As true leaves emerge, I side-dress with well-rotted compost or an organic granular feed.
Midseason, I switch to a nitrogen-rich amendment—such as fish emulsion or high-nitrogen compost tea—every four to six weeks to keep those leaves ballooning in size! Always water in your fertilizer to prevent root burn, and steer clear of overfertilizing, which can weaken stems and invite lodging.
Prepare Soil with Rich Organic Matter

One of my first steps is to enrich the planting bed with at least two inches of compost or aged manure, blended into the top 8–12 inches of soil. This creates a crumbly, moisture-retentive medium that chard roots adore. Aim for a pH of 6.0–7.0; if your soil is too acidic or alkaline, add lime or sulfur accordingly.
If you garden in heavy clay or pure sand, mix in equal parts topsoil, compost, and coarse sand or perlite. This balanced texture ensures excess water drains away while still holding enough moisture for continuous leaf growth—perfect for those giant, glossy fronds!
Succession Sowing and Harvesting
I guarantee you’ll be overwhelmed by chard if you sow all your seeds at once—and then left wanting later in the season. Instead, I plant batches every three weeks through spring and early summer. This staggered approach delivers a steady stream of large leaves without drowning your kitchen in one big wave.
Harvest by cutting outer leaves at the base—never remove more than a third of a plant at a time—to allow rapid regeneration. With regular cutting and fresh sowings, you’ll enjoy jumbo leaves from April all the way through frost!
Mulch to Conserve Moisture and Suppress Weeds

Chard’s roots thrive in evenly moist soil, so after seedlings establish, I apply a 2–3-inch layer of shredded leaves or straw mulch. This insulating blanket keeps soil temperatures stable, slows evaporation during heat waves, and chokes out pesky weeds competing for nutrients.
As the mulch breaks down, it further enriches the soil—feeding your chard’s roots and promoting even larger leaves. Just keep mulch a couple of inches away from the crown to prevent collar rot, and top it up midseason if needed.
Water Consistently—Deep, Not Frequent

Chard doesn’t like drought stress, yet it’s equally unhappy with soggy feet. I aim for about one inch of water per week, delivered as a deep soak rather than daily light misting. This encourages roots to grow downward, making plants more resilient to dry spells.
During hot spells, I check moisture an inch below the surface—if it feels dry, I water thoroughly in the morning so leaves dry out before night. If leaves wilt despite moist soil, ease back on watering; proper drainage and balanced moisture are key to healthy, giant chard!
Overwinter and Extend Your Season
In USDA Zones 7 and warmer, chard can survive mild winters and even produce through light frosts. I cover fall plantings with a cold frame or thick mulch to protect roots, then harvest tender leaves all winter long! There’s nothing like fresh greens when most gardens rest.
For colder zones, allow a few plants to bolt and set seed in autumn—those pods will self-sow for next spring’s crop. Meanwhile, use row covers over late summer sowings to push harvests into early winter. With these season-extension tricks, your chard patch will flourish far beyond standard growing windows!