

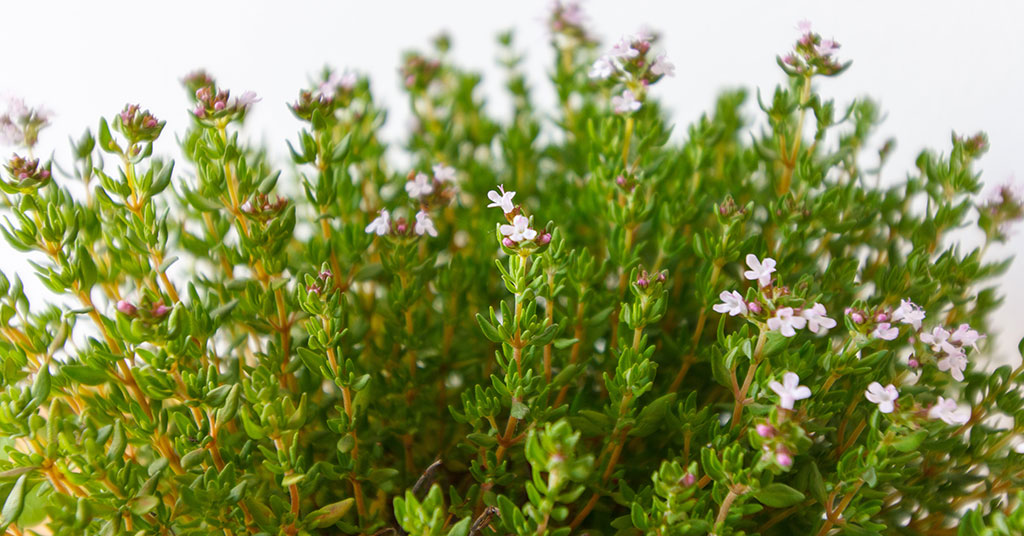
Thyme is one of those delightful herbs that brings both culinary flair and ecological benefits to any garden. Native to the Mediterranean and generally non-invasive in temperate climates, thyme thrives in loosened, well-draining soil under full sun. Its low, spreading habit makes it a wonderful groundcover or filler between stepping stones, and its aromatic foliage attracts pollinators like honeybees and native solitary bees that nest in nearby bare soil! In this guide, we’ll explore ten essential tips to help you cultivate an exceptionally dense, healthy thyme patch.
I know how frustrating it can be to end up with sparse, leggy thyme that refuses to fill out—especially when you’ve been watering and weeding diligently! Whether you’re battling compacted clay or shady corners, these strategies—ranging from propagation tricks to pruning schedules—will empower you to coax every last bit of bushiness from your thyme plants. Plus, you’ll learn how to create microhabitats that welcome beneficial insects like predatory wasps nesting in hollow stems and springtails patrolling the mulch below!
Choose the Right Thyme Variety

Not all thymes are created equal! English thyme (Thymus vulgaris), native to the western Mediterranean, is a classic for bushy growth and culinary use. Lemon thyme (Thymus × citriodorus) offers a citrusy note and similar spreading habit, while creeping thyme (Thymus serpyllum) forms a dense mat perfect for filling gaps. Selecting a variety that naturally spreads will give you a head start on a lush thyme carpet!
Each of these varieties remains well-behaved when grown in dedicated beds or containers, so you don’t have to worry about invasiveness. Plus, their compact growth encourages ground-nesting bees to burrow in the spaces between plants, providing essential pollination for nearby flowers and veggies.
Plant in Loose, Well-Draining Soil

Thyme despises “wet feet,” so prepare your bed by loosening the top 8–10 inches of soil and incorporating coarse sand or fine gravel for drainage. Add a couple of inches of compost to supply essential nutrients without waterlogging the roots. I once saw my thyme perk up dramatically after ditching heavy clay for a sandy-loam mix—it was like night and day!
Good drainage not only prevents root rot but also creates ideal conditions for springtails and predatory mites to flourish in the mulch layer, where they break down organic debris and keep fungus gnats at bay. A thriving soil micro-ecosystem sets the stage for your thyme to spread vigorously!
Give Thyme Full Sun Exposure

Aim for at least six hours of direct sunlight daily. Thyme’s Mediterranean heritage means it loves bright, sunny spots, where it produces the most aromatic oils and strongest stems. In too much shade, stems stretch and thin, making the plant more susceptible to snapping and fungal issues—such a disappointment when you’re hoping for thick, hardy mats!
Sunny conditions also draw beneficial wasps and hoverflies to the thyme flowers, where they nest in hollow plant debris and prey on aphids that might otherwise sap your thyme’s vigor. A sunlit patch truly becomes a buzzing hub of garden activity!
Space Plants Appropriately

Although you want a bushy effect, give young thyme plants about 6–8 inches of room to establish. Overcrowding before roots spread can stunt growth and invite disease. Once your plants begin to fill in, you can gently pinch back edges to encourage lateral branching and a fuller appearance!
Correct spacing also creates small corridors where ground beetles and rove beetles nest under stones or bark, hunting slugs and caterpillars that would otherwise nibble on tender shoots. Your thyme bed remains both dense and defended!
Propagate by Cuttings for Uniform Growth

Starting thyme from cuttings ensures genetic consistency and quicker establishment than seed. Snip 3–4-inch tips from healthy plants, remove lower leaves, and insert into a moist, sandy rooting medium. Within weeks, you’ll have robust new plants ready to join your thyme thicket!
This method yields strong, uniform stems that knit together rapidly, creating a seamless groundcover. Plus, any leftover stems make perfect nesting material for small solitary bees—nature’s own garden helpers!
Pinch Back to Promote Bushiness
Regularly pinch off the top 1–2 inches of new growth once plants reach 4–6 inches tall. This simple step diverts energy into side shoots, multiplying the number of stems and leaves. I find that a quick pinch every two weeks throughout the growing season transforms sparse patches into verdant cushions!
By encouraging denser foliage, you also reduce bare spots where weed seeds might germinate. Meanwhile, the lush cover shelters springtails and beneficial nematodes in the soil, maintaining healthy decomposition and nutrient cycling.
Use Light Mulch Sparingly

A thin layer of coarse mulch—such as coconut coir or small gravel—helps conserve moisture and suppress weeds without retaining too much water around thyme’s roots. Avoid thick organic mulches that can stay soggy and invite rot. A delicate mulch layer also provides frayed edges where small predatory mites can nest and patrol for pests!
These mites feed on tiny soil pests, contributing to a thriving subterranean ecosystem that supports vigorous thyme growth. Mulch thus serves both moisture management and ecological harmony.
Fertilize Moderately, If At All

Thyme thrives in nutrient-poor soils; excessive fertilizer can lead to lush foliage with diminished flavor and weak stems. If your plants show pale leaves or poor vigor, apply a balanced, slow-release organic fertilizer at half-strength in early spring. Over-fertilizing encourages susceptibility to powdery mildew—one of the last things you want!
A modest feeding regime maintains strong essential oil production for both culinary quality and pest resistance. Healthy, aromatic thyme plants are less appealing to herbivorous insects, reducing your need for sprays.
Rotate Your Thyme Patch Annually
While thyme is generally non-invasive, rotating its bed every few years in a larger herb garden prevents soil-borne diseases from building up. Follow thyme with legumes or brassicas, then return thyme to a freshly enriched plot. This simple practice keeps your thyme and the surrounding soil robust!
Rotations also prompt earthworm migrations through different soil areas, enhancing aeration and nutrient distribution across your garden—a boon for all your plants, not just thyme.
Harvest Regularly to Encourage New Growth

Frequent harvesting keeps thyme in its prime. Snip sprigs just above a pair of leaves, harvesting up to one-third of each stem at a time. Regular cuts stimulate fresh growth, maintaining a lush profile and preventing woody, unproductive centers. I relish the ritual of snipping thyme for cooking and seeing the bushes fill back out within days!
Harvesting also opens small spaces where beneficial bees can access flowers, boosting pollination for other garden plants. A busy thyme patch feeds both your kitchen and the pollinator community in tandem!